background image

A tight plug connection can rip the CEE plug out of the switch housing.

▪ This can be remedied using standard plugs and a silicone spray.

 Any such damage to the switch is not covered by the guarantee.

Driven by tractor via cardan shaft (type Z)

▪ Assemble the machine on the three-point linkage of the tractor.
▪ Attach the universal joint shaft and secure with the safety chain.

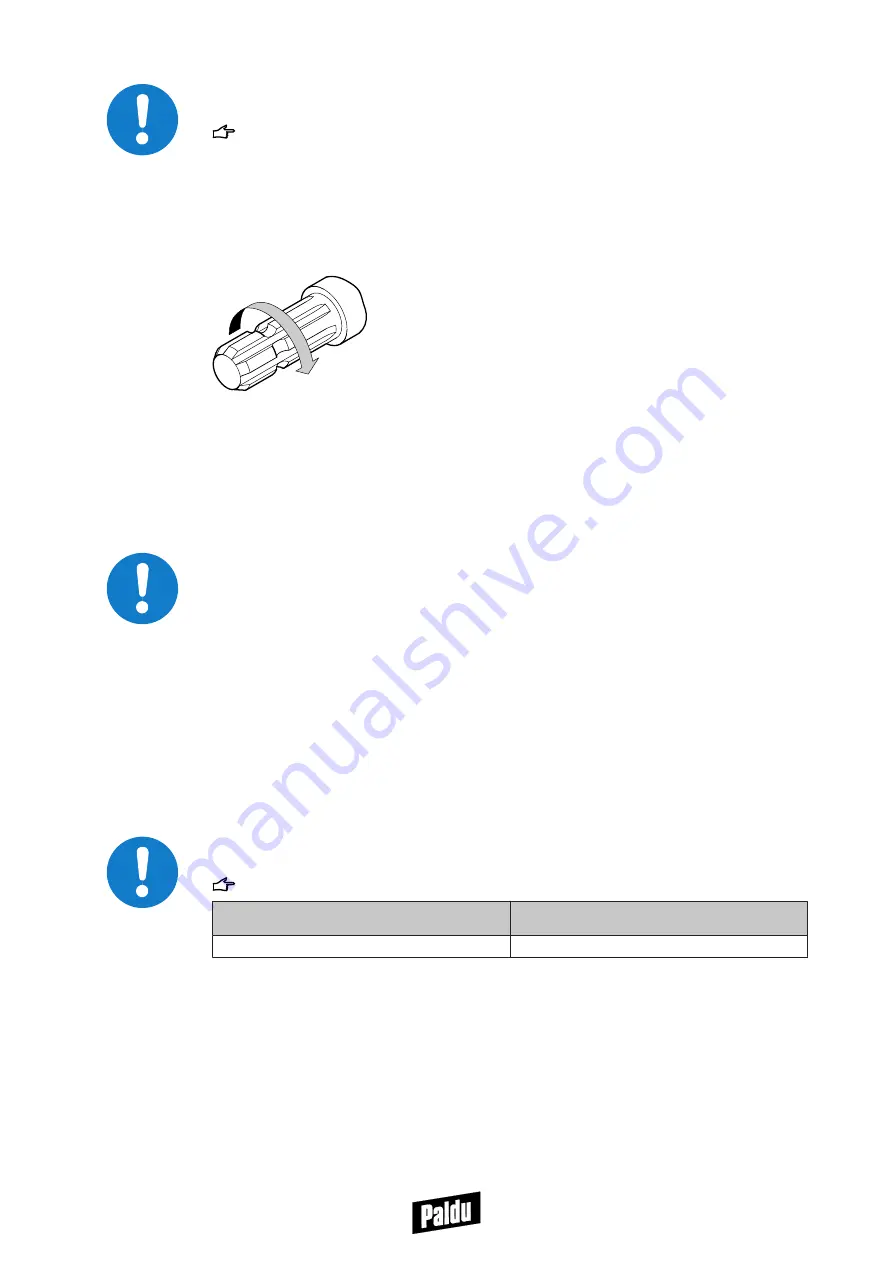
▪ Clockwise rotation of the tractor PTO shaft.
▪ Turn the tractor's manual throttle to minimum.
▪ Slowly engage the tractor PTO shaft and allow the machine to start moving.
▪ Set the required PTO shaft speed using the manual throttle.

Maximum PTO shaft speed:

▪ 380 rpm

The maximum PTO shaft speed must on no account be exceeded, otherwise the oil will

become too hot. This leads to premature wear and leaks in the pump, cylinder and hydraulic

pipes.
Before disengaging the universal joint shaft, set the manual throttle of the tractor to

minimum.
The universal joint shaft must be stored in the universal joint shaft linkage when it is

disconnected.

Driven by the tractor's hydraulic system (type PS)

▪ Assemble the machine on the three-point linkage of the tractor.
▪ Connect the hydraulic hoses to the tractor's hydraulic system.
▪ Turn the control valve on the tractor to the "On" position.

Ensure that the viscosity of the tractor hydraulic oil is compatible with that of the machine.

▪ Hydraulic oil HLP M46

 Observe the flow and return.

Maximum efficiency of tractor's hydraulic

system

Maximum working pressure of tractor's

hydraulic system

16 l/min

230 bar


4.2

4.3

Start-up


15

Summary of Contents for 1100-12

Page 1: ...Operating Instructions Log splitter 1100 12 D1010396 V001 D1010396 V001 English Copyright by Posch Gesellschaft m b H Made in Austria ...

Page 2: ...this in before starting Then you can be sure that this document relates to your machine so if you have any queries you will be given the correct information Machine number Serial number POSCH Austria 8430 Leibnitz Paul Anton Keller Strasse 40 telephone 43 0 3452 82954 fax 43 0 3452 82954 53 e mail leibnitz posch com POSCH Germany 84149 Velden Vils Preysingallee 19 telephone 49 0 8742 2081 fax 49 0...

Page 3: ...0 3 2 Description 10 3 3 Important parts of the machine 11 3 4 Stickers and their meaning 12 3 5 Set up 13 4 Start up 14 4 1 Driven by electric motor type E 14 4 2 Driven by tractor via cardan shaft type Z 15 4 3 Driven by the tractor s hydraulic system type PS 15 5 Operation 16 5 1 Two hand controller 16 5 2 Extending the cylinder 16 5 3 Splitting process 17 6 Put out of operation 19 6 1 Switchin...

Page 4: ...23 8 8 Log retaining tip 23 9 Maintenance 24 9 1 Tool guide 24 9 2 Oil changing 24 9 3 Cleaning 26 10 Additional equipment 27 10 1 Splitting cross 27 10 2 Splitting table 28 10 3 Lifting unit 28 11 Troubleshooting 30 11 1 Disposal 31 12 Technical data 32 13 Service 33 EC Declaration of Conformity 34 Contents 4 ...

Page 5: ...ects Read these operating instructions through carefully before putting the machine into operation We accept no liability for damage or disruptions caused by failure to observe the operating instructions Claims for liability must be reported as soon as the defect is identified Claims are null and void for example in the following cases improper use faulty attachments and drives not supplied with t...

Page 6: ...d troubleshooting Electrician An electrician is a person who by virtue of his specialist training has knowledge of electrical systems standards and regulations and is able to identify and prevent possible hazards Machine The term machine replaces the commercial designation of the object to which these operating instructions relate see cover sheet Operating instructions This manual is a translation...

Page 7: ...ing of dangerous electrical voltage Contact with live parts can result in immediate death Protective covers and enclosures marked with this sign may only be opened by qualified electricians after the electricity supply has been turned off DANGER Crushing hazard Risk of injury through upper limbs getting trapped DANGER Danger of tipping over Risk of serious injury if the machine tips over NOTICE In...

Page 8: ...ated as poor lighting can significantly increase the risk of injury Never work without the protective guards in place Only carry out repair set up maintenance and cleaning work when the drive is switched off and the tool is stationary If the machine has a PTO drive the universal joint shaft must be removed from the tractor The electric motor must be switched off and the power cable disconnected Ne...

Page 9: ...noise e g the number of machines and other work operations being carried out in the vicinity Equally permissible values for a work area may vary between different countries However this information should enable the user to estimate the dangers and risks more accurately Remaining risks Even if all safety precautions are observed and the machine is used in accordance with the instructions some risk...

Page 10: ...ely for splitting logs with a maximum length of 15 110 cm The splitter is driven hydraulically the hydraulic system is driven by the tractor s hydraulic system or by an electric motor or by a PTO shaft The machine is operated via a two hand safety controller As soon as the control levers of the safety circuit have been pressed down simultaneously the splitting knife is advanced As soon as you rele...

Page 11: ...ide rod 12 Identification plate 3 Two hand controller 13 Oil sight glass 4 Splitting blade 14 Switch plug 5 Guard bracket 15 Grease nipple 6 Retaining tip 16 Electric motor 7 Tool guide 17 Ventilation screw 8 Floor plate 18 Control valve 9 Oil drain screw 19 Oil filter 10 Three point linkage 3 3 General 11 ...

Page 12: ...Caution moving tools 7 Always read the user manual before operating the machine Z2001170 Note the direction of rotation of the motor The pump will be damaged if rotation is in the wrong direction Caution moving tools Z2001220 Rotational direction of motor Z2001220 Rotational direction of PTO Z2001260 Grease tool guide Z2001360 Oil level 350 380 min 1 Z2040075 PTO speed Z205 0010 Phase inverter Z20...

Page 13: ...ble before starting it Set up the machine on a level firm and clear work surface The machine must be placed directly on the ground Do not place wooden boards flat pieces of metal etc underneath it The machine must not be set up under an overhead electrical power line 3 5 General 13 ...

Page 14: ... Portable Residual Current Device PRCD Work on electrical equipment must only be carried out by qualified electricians Type E5 5 Connect the machine to the mains Mains voltage 400 V 50 Hz Circuit breaker 16 A tripping characteristic C For the feed a cable cross section of at least 2 5 mm must be used This cable cross section is only a minimum specification In the event of a lengthy supply cable it...

Page 15: ...on no account be exceeded otherwise the oil will become too hot This leads to premature wear and leaks in the pump cylinder and hydraulic pipes Before disengaging the universal joint shaft set the manual throttle of the tractor to minimum The universal joint shaft must be stored in the universal joint shaft linkage when it is disconnected Driven by the tractor s hydraulic system type PS Assemble t...

Page 16: ... Place both control levers simultaneously in position I As long as the control levers remain in this position the splitting blade continues to extend With V2 2 splitting speeds the splitting blade travels at low speed with maximum splitting force Position II In position II the splitting blade travels at maximum speed with reduced splitting force Position III Lever position with latch In position I...

Page 17: ...260 cm Splitting process Only one person may operate the machine at a time Ensure that no other people are in the vicinity of the machine Do not reach under the splitting tool always grasp the log from the side 2 1 1 Control lever 2 Guard bracket Place the log upright under the splitting knife and press it against the timber holder tip so that even relatively thin logs stand without needing to be ...

Page 18: ...rd bracket is not damaged Before starting a new splitting process the guard bracket must be pressed back up again into the working position Notes on splitting Never split angle cut wood Logs must always be split lengthways Splitting extremely crooked wood split the billets from the edge Remove jammed wood from the splitting blade with a striking tool 5 3 1 Operation 18 ...

Page 19: ... Driven by electric motor Type E Type E5 5 Move the switch to the 0 position Driven by tractor via universal joint shaft type PZG Disengage the universal joint shaft on the tractor Before disengaging turn the manual throttle to minimum Driven by the tractor s hydraulic system type PS Turn the control valve on the tractor to the Off position 6 6 1 Put out of operation 19 ...

Page 20: ...e cylinder make sure the hydraulic hoses are not trapped Attach and lock the splitting cross additional equipment on the splitting blade then retract the splitting blade fully Switch off the drive unit and swing the side guard brackets upwards Height in transport position 205 cm Transporting by three point linkage on the tractor No one is permitted to stand in the area between the tractor and the ...

Page 21: ...actor c m Distance between centre of the rear axle and centre of the lower link balls d m Distance between centre of the lower link balls and the machine s centre of gravity see tractor operating instructions see Technical Data It is vital to ensure that the weight of any additional equipment on the machine is taken into account take measurement Observe the road traffic regulations when driving on...

Page 22: ... replaced immediately A regular test of the electrical equipment should be carried out by an electrical specialist in line with the statutory requirements but at least every three years with the test results being recorded As a minimum the test should cover the following points Visual inspection of correct condition Protective measures to prevent direct contact basic protection Protective measures...

Page 23: ...aulic oil level When the oil sight glass is filled the oil level is at its maximum When the oil level is in the centre of the oil sight glass the oil level is at its minimum If this is the case the hydraulic oil must be topped up immediately See Changing the hydraulic oil 24 The oil filter only needs to be checked when the oil is changed Two hand controller Check the joints of the two hand control...

Page 24: ... Paldu spare parts Tool guide 1 2 1 Grease nipple 2 Grease brush Lubricate the grease nipple on the tool guide with lubricating grease every 10 hours Apply grease with a brush The tool guide must always be well greased Recommended lubricating greases Manufacturer Type Genol Multi purpose grease Fuchs Multi purpose grease 5028 Oil changing Old oil must be disposed of in an environment friendly mann...

Page 25: ... be slightly less as some of the hydraulic components are not empty Our hydraulic system is filled with OMV HLP M46 hydraulic oil This high quality oil comes highly recommended when changing the oil A mixture of products of the same quality poses no problem Recommended hydraulic oils Manufacturer Oil specification OMV ATF II SHELL Donax TA ELF Hydrelf DS 46 ESSO Univis N46 CASTROL Hyspin AWH M 46 ...

Page 26: ... pull out the plug of the device Disengage the universal joint shaft on the tractor Before disengaging turn the manual throttle to minimum Remove the universal joint shaft from the tractor Clean the machine regularly to ensure proper operation Only wash new machines during the first 3 months with a sponge The paint is not yet completely set so cleaning with a high pressure cleaner may damage the f...

Page 27: ...g is split into four billets For uniform billets with maximum log diameter of 30 35 cm Not suitable for knotty or deformed wood danger of jamming Fitting 1 Extend the splitting blade approx 30 cm and switch off the machine 2 Push the splitting cross over the splitting blade 3 Close the locking clip 10 10 1 Additional equipment 27 ...

Page 28: ...itting the splitting table be careful not to put your head under the splitting blade or injure your head on the splitting blade Raise both the fixing levers push the splitting table fully on to the frame then lower the levers Lifting unit 2 1 3 4 5 1 Mounting plate frame 4 Mounting plate splitting blade 2 Lifting arm 5 Lifting chain 3 Floor plate 10 2 10 3 Additional equipment 28 ...

Page 29: ...ting plate frame onto the guard bracket bearing Screw the pre assembled lifting device onto the floor plate Assemble the mounting plate splitting blade for the lifting chain on the splitting blade Set lifting chain Lifting arm should move up and down with the splitting blade Hook the last chain link of the lifting chain onto the mounting plate Lifting arm should stay up Mount the required chain li...

Page 30: ...ncorrectly rated fuse for power supply cable Use correctly rated fuses Contactor or motor circuit breaker faulty Have switch checked or send it in Splitting blade does not extend Switch elements jammed Check switch elements Not enough hydraulic oil in hydraulic system Check hydraulic oil level See 24 Splitting blade does not extend PTO shaft rotates in wrong direction Change PTO shaft rotation dir...

Page 31: ... Turn the latch seat Latch seat is worn Replace latch seat Disposal Disposal must be carried out in accordance with the relevant national applicable regulations and or guidelines Dispose of recyclable materials separately ensuring they are clean for recycling 11 1 Troubleshooting 31 ...

Page 32: ...re bar 230 230 230 Max log length cm 110 110 110 Max log diameter cm 50 50 50 Advance speed cm s 16 16 10 11 Retraction speed cm s 15 15 9 10 Dimensions Width cm 125 125 125 Depth cm 125 125 125 Height cm 260 260 260 Weight kg 250 275 220 The stated dimensions and weights are for guidance purposes and apply to the basic equipment Power rating S6 continuous operation periodic duty with related load...

Page 33: ...ts for your machine please contact your local dealer directly If you require a replacement parts list for your machine you can download this at any time by entering the serial number at the following link www posch com download 13 Service 33 ...

Page 34: ...concepts general principles for design EN ISO 4254 1 Agricultural machinery Safety General requirements EN ISO 13857 Safety distances to prevent hazard zones being reached by upper and lower limbs EN 349 Minimum gaps to avoid crushing of parts of the human body EN 60204 1 Electrical equipment of machines EN 609 1 Safety of log splitters EN 574 Two hand control devices EN ISO 4413 Safety requiremen...

Page 35: ......

Page 36: ...Your Paldu Dealer ...

Reviews: