2
Getting started with BakPak
Next, the AP needs to be registered to BakPak.
To start managing your multi-AP wireless network with BakPak, you need
to register your APs directly to BakPak. When you register the AP directly
to BakPak with BakPak Lite Management Agent, you can configure most
wireless settings directly through BakPak.
Get started by first enrolling your access point to your existing BakPak
account. If this is your first time creating a BakPak account, refer to the
BakPak User Guide
for instructions on getting started with BakPak.
Tip:
You can also learn this process from the Smart Skill
Registering a
WA-2200 to BakPak
(
pkdge.co/wa2200-register
).
To enroll the first AP to BakPak:
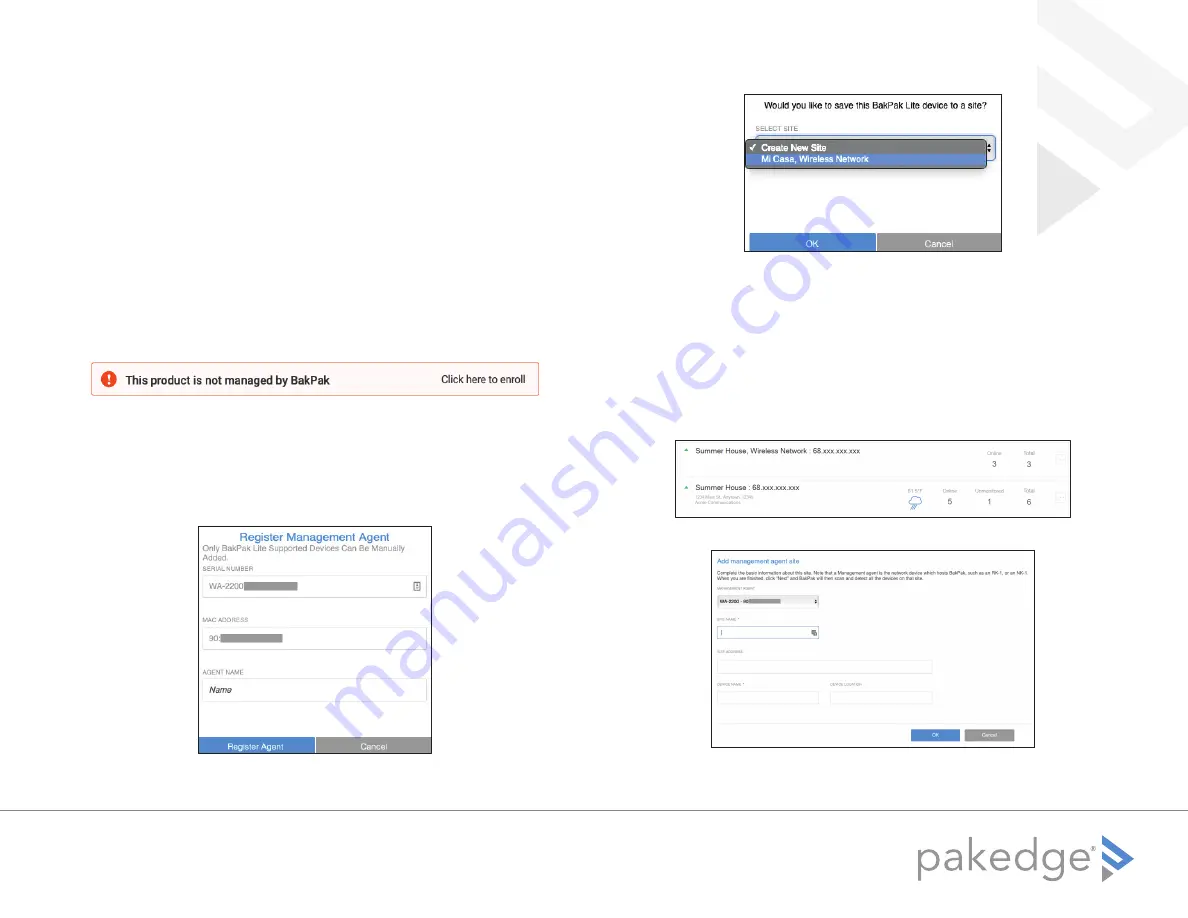
After signing in to the AP, the following message appears at the top of
the page:
1
Click
Click here to enroll
. The
BakPak Registration
page opens. Make sure
your web browser allows pop-up notifications from
mybakpak.com
.
2
Follow the on-screen instructions to complete your device registration.
Make sure to assign the AP a unique Agent name that can be easily
identified (for example, “[site name] - [AP location]”).
3
When registration is done, click
Register Agent
.
4
Assign the AP to a site. You can either create a new site or add to an
existing site.
Important:
To gain access to all WA Series wireless configuration settings,
you
must
assign the AP to either:
• a new, dedicated WA-2200-only (or WA-4200-only) site, which will
automatically register the site as a BakPak Lite site, or
• an existing BakPak Lite site for the same location, if they already
have a PE-09N, WR-1, or other APs registered.
Note:
If the home already has an RK-1 Gigabit Router registered with
BakPak, a separate site for the wireless network is still required for access
to most configuration settings.
5
Add the AP to the site.


