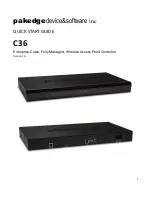
Pakedge C36 Quick Start Manual Download Page 3


Quick Controller Overview 


The front panel of the C36 has a pair of blue LEDs.  See the 

Table 1

 below for more information. 


Label 

Function 

Description 

HDD 

Hard Drive Activity 

When lit, the hard drive is in use 

PWR 

Power indicator light 

When lit, indicates that the unit has power 

Table 1: LED Explanation 

The rear panel is where the physical cabling (power, ethernet, console) is located.  

Table 2

 describes each port 

and its function. 


Name  

Description 

AC Connector 

AC110

260V 

Power Switch 

Switch to power the C36 on or off 

USB 1  /  2 

Maintenance 

LAN 

MDI/MDIX RJ45 Interface for connection to the LAN 

HDMI 

HDMI Display out for Maintenance 

Console 

Local management, Speed 115200bps, RJ45 interface 

Table 2: C36 Rear Panel Port Description


Preparing to Install the Controller  

Installing the C36 is similar to installing a network switch.  If you have installed a managed switch before, the 

process will be very similar. 


Tools required: 

o


Philips Screwdriver (if using rack-mount brackets). 

o


PC or Laptop with ehternet interface and a web browser (an integrated DB-9 port or USB-To-

Serial adapter may be necessary if you would like to use the console interface). 

o


Ethernet Cable. 


Summary of Contents for C36

Page 1: ...1 pakedgedevice software inc QUICK START GUIDE C36 Enterprise Class Fully Managed Wireless Access Point Controller Version 1 0...

Page 2: ...Contents Quick Controller Overview 3 Preparing to Install the Controller 3 Configuring the Controller 4 Changing the IP Address of the Controller 5 The Wizard 6 Guest Network 8 Access Point Overview...

Page 3: ...tch Switch to power the C36 on or off USB 1 2 Maintenance LAN MDI MDIX RJ45 Interface for connection to the LAN HDMI HDMI Display out for Maintenance Console Local management Speed 115200bps RJ45 inte...

Page 4: ...ct the controller to power and push the power switch on the rear panel The PWR LED will light up and the fans will start 2 Connect a PC or laptop to the LAN port on the C36 rear panel 3 Configure the...

Page 5: ...to consistent with your network scheme 3 Netmask Enter the subnet mask that matches your network scheme 4 Gateway Enter the IP address of the router 5 Hostname You cannot edit the hostname 6 When you...

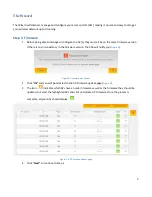
Page 6: ...here is any inconsistency in the firmware version the C36 will notify you Figure 4 Figure 4 Firmware out of date 2 Click Ok and you will be directed to the AP Firmware update page Figure 5 3 The icon...

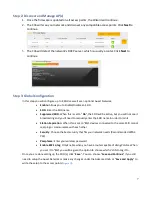
Page 7: ...t you will not see it broadcasting and you ll need to manually enter the SSID name in order to join it Station Separation When this is set to On devices connected to the same SSID cannot see ping or c...

Page 8: ...You will also need to provide the DHCP range The Default Gateway and the Primary DNS must be the IP address of your router Click Save when done and Save and Apply to apply the configuration to the AP...

Page 9: ...9 Figure 8 Access Point Overview Page NOTE For more detailed instructions and explanation of the options under the C36 GUI refer to the C36 Users Manual...

Page 10: ...10 pakedgedevice software inc 1163 Triton Drive Foster City CA 94404 Visit us at www pakedge com Pakedge Device Software Inc 2013 All Rights Reserved...

Reviews: