


13
Recorded Video Playback
1
In the
Site
List, make sure that the device has been
added to the device group.
2
In the panel tabs, click on the
Play
tab. In the
Site
list,
select a site you wish to connect to. Then, drag & drop
the selected site on the playback screen using your
mouse. The recorded video of the selected site will be
displayed on the screen.
PDR-mobile
This service requires heavy data traffic, and using a
Wi-Fi connection is recommended. Using wireless
internet (3G, LTE) may result in excessive data charges.
Android OS device
1
Open the
Play Store
(Google Play) on your Android
device.
2
In
Play Store
(Google Play), enter
aPDR-mobile
in
the search field.
3
Install
aPDR-mobile
program and open it.
4
The start-up menu appears when pressing the Menu
button on your mobile device.
5
Register the device by pressing
New Site
and
entering the device (network camera) information.
–
Description
: Enter a name of the device to be
used in
aPDR-mobile
app.
–
Use DVRNS
: Select the check box. Deselect the
checkbox if FEN is not enabled on the device. If
the device is using an additional FEN server, press
Settings
in the start-up menu and enter the FEN
server information. (Default site: dvrnames.net,
Default port number: 10088). For more details,
contact your FEN server administrator.
–
Address
,
Watch Port
,
Search Port
: Enter the
device name used to register the device to FEN. If
FEN feature is not enabled on the device, deselect
DVRNS
checkbox and enter the device's IP
address. For port number, using the default value
is recommended.
–
User ID
,
Password
: Enter the User ID and
Password used to login to the device. (Default
value of User ID:
admin
, No default value of
password)
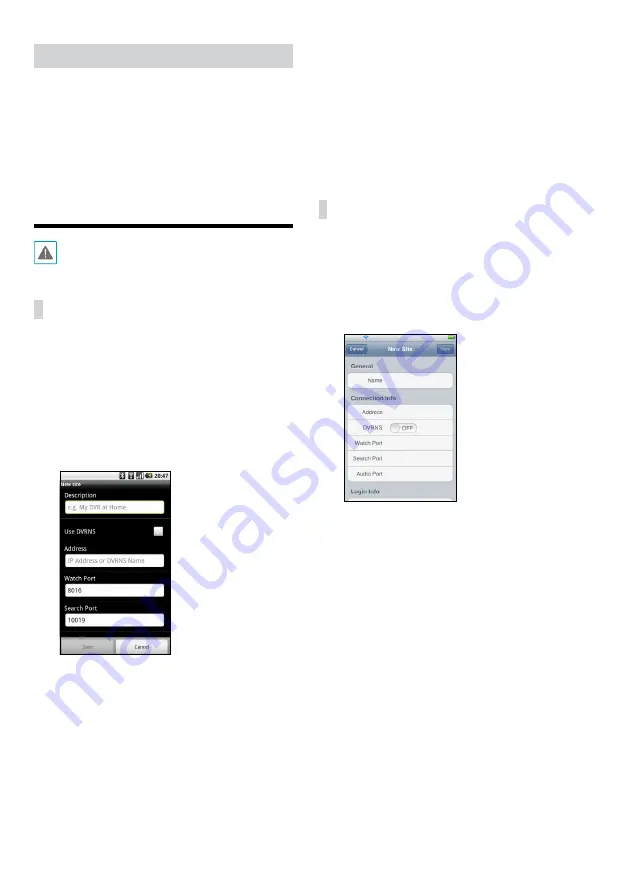
iOS device
1
Open the
App Store
on your device.
2
Enter
iPDR-mobile
in the search filed of the
App
Store
.
3
Install
iPDR-mobile
program and open it.
4
Register the device by pr button and entering
the device (NVR) information.
–
General
: Enter a name of the device to be used in
iPDR-mobile
app.
–
Connection Info
: Turn
DVRNS
ON
and enter
the device name used to register the device to
the FEN. If FEN feature is not enabled on the
device, turn
DVRNS
OFF
and enter the device's IP
address. For port number, using the default value
is recommended.
–
Login Info
: Enter the User ID and Password used
to login to the device. (Default value of User ID:
admin
, No default value of password).


