


User’s Manual
44
Highlighting the boxes under the
Column
heading and pressing the button allows you to edit the information in
those boxes.
Highlighting the boxes under the
Day
box and pressing the button allows you to select the days that the alarm
schedule will be active. The choices are: Sun, Mon, Tue, Wed, Thu, Fri, Sat, M~F, Hol and All.
Highlighting the boxes under the
Range
box and pressing the button allows you to set the time that the alarm
schedule will be active in 15-minute increments from 00:00 to 24:00.
Highlighting the boxes under the
Mode
box and pressing the button allows you to set how the alarm reacts during
the scheduled time. When set to
On
, the Alarm-Out is active during the scheduled time. When set to
Event
, the
Alarm-Out is only active when there is an Event during the scheduled time.
Highlighting the boxes under the
Channels
box and pressing the button allows you to set which alarm outputs
will be active. You can also select the NVR’s internal buzzer.
The box allows you to delete an alarm output schedule. You will be asked to confirm whether or not you really
wish to delete the schedule.
Highlighting the box beside
Alarm-Out Dwell Time
and pressing the button allows you to set the dwell time of
the alarm output. Dwell times range from 5 seconds to 15 minutes.
Display
Setup
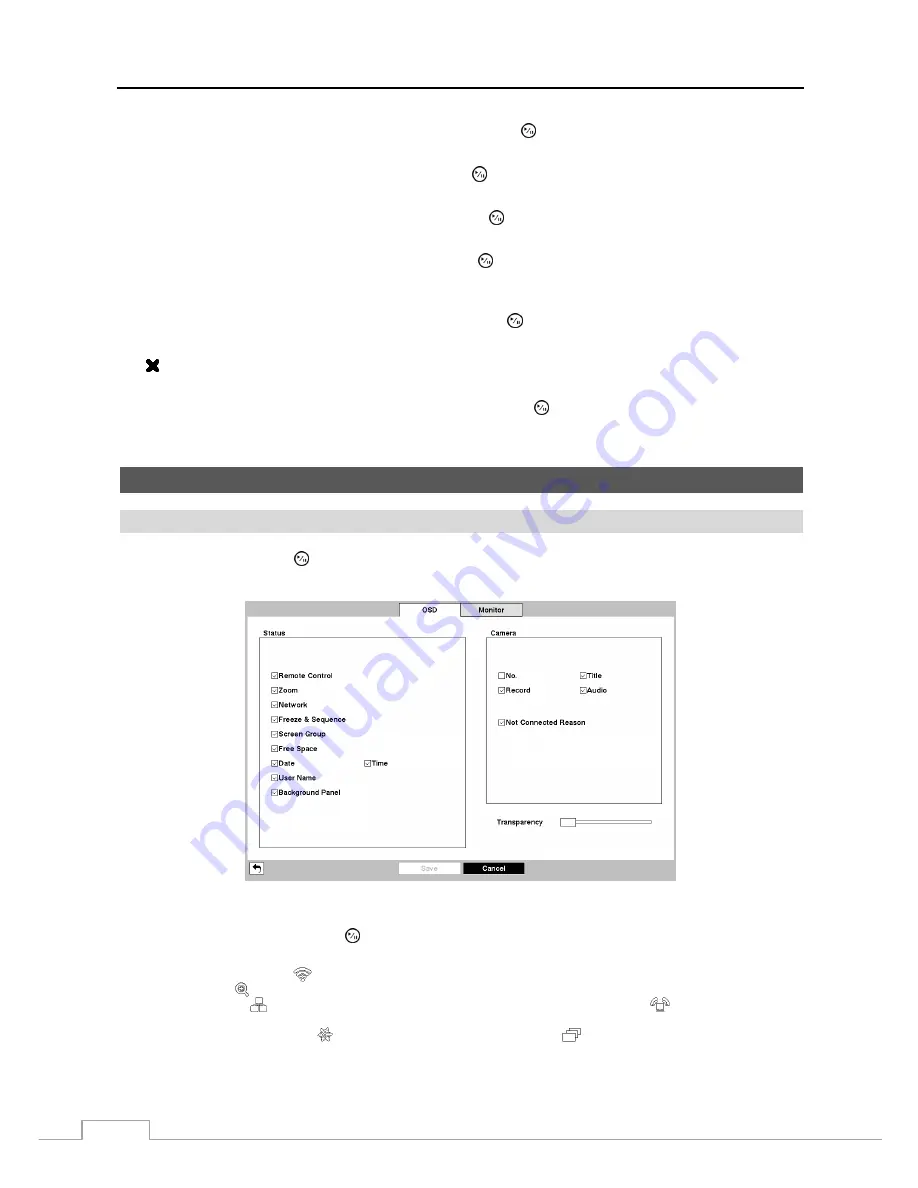
OSD
Highlight
OSD
and press the button. The OSD
screen allows you to select what information will be displayed on
the monitor.
Figure 28 : Display – OSD setup screen.
Highlighting an item and pressing the button toggles that item On and Off. When an item is On, there is a
checkmark in the box beside it. The following items can be turned On or Off:
Remote
Control
–
The icon
displays when the NVR can be controlled by the infrared remote control.
Zoom
–
The icon displays on the enlarged video.
Network
–
The icon
displays when the unit is connected to a network via Ethernet. The icon
displays on each camera
when audio communication is available between the NVR and a PC running RAS via Ethernet.
Freeze & Sequence –
The icon
displays while in the Freeze mode, and the
displays while in the Sequence mode.
Screen Group –
The number of screen group displays when the NVR is not in the 3x3 display mode of the 8-channel NVR, and
2x2 mode of the 4-channel NVR.
Summary of Contents for DmartIP-8E
Page 1: ......
Page 2: ......
Page 10: ...User s Manual 2 ...
Page 14: ...User s Manual 6 ...
Page 62: ...User s Manual 54 ...
Page 88: ......


