background image


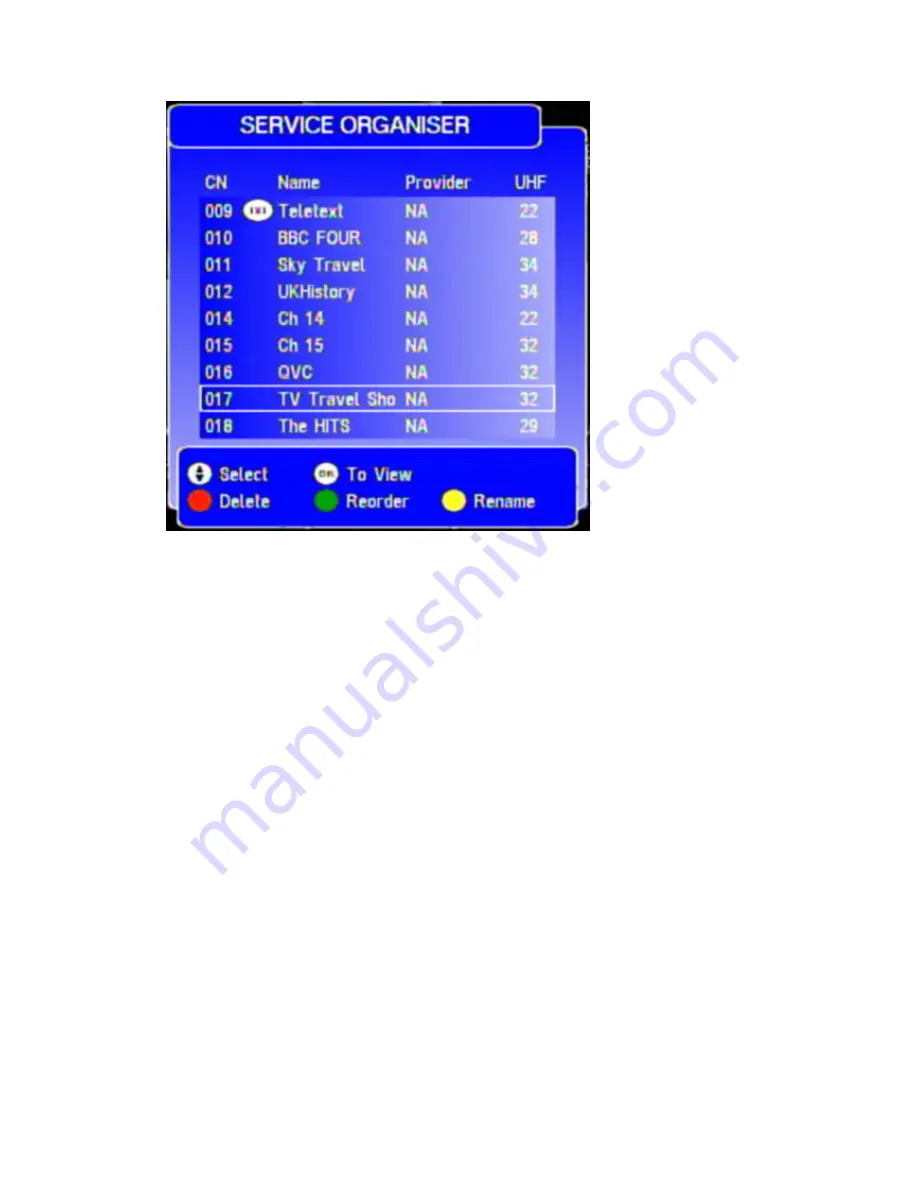
To resort the list select a channel with the up/down keys and press the green key. With the up/down keys 

move the channel to its new position. Press the OK key to save the new position or the green key to cancel 
the changes. To rename a channel select the desired channel with the up/down keys and press the yellow 
key
. An edit window displaying all letters, numbers and a few special characters will open. Please refer to 
section 11.3 Name Editor, page 17 in order to learn how to work with the edit window. The edit window will 
close and the new name will appear in the opened channel list when the new name has been entered and 
saved. To cancel the name change press the yellow key. To delete a channel select a channel with the 
up/down keys and then press the red key. A new window will open and you will have to enter the four digit 
PIN. Please use the number keys to do so. This is to prevent the deletion of a service without parental 
permission. To delete the channel definitively press the red key again. 
Please note: It is only possible to cancel the name change as long as the new name has not been saved. If 
you have already saved the new name you will have to repeat the rename process to get the old channel 
name. 

Please note:  


An icon will be displayed if a service has been added or removed by the broadcaster or if it is 

temporarily unavailable.  


The default PIN code is "0000".  

Favourites 

You may create several favourite lists, e.g. for every person in the family or different kinds of services like 
"news", "sports" or "movies". In otherbwords, it will group together your favorite channels in one list. Once 
this list is selected with the favourite key of the remote control, the CH+ and CH- keys will only display 
channels which are in this list. The favourites menu can be found in the Main menu. To create a new 
favourites list press the green key. A new list will be created and added to the list of favourites. The default 
name of the new list will be Favourite List #X. You can edit the list and change its name. 
 
Editing favourites 
To edit a new or already existing favourite list, select the list from the available favourites within the 
favourite window by using the up/down keys. After that press the yellow key to open the edit favourites 
window. Here you will see two lists: The general service list on the left (this is the active list) and the 
favourite list to be edited on the right. With the up/down keys you can select the channels to be added to the 

favourite list. If you have selected a channel press the OK key and the respective channel will be added to 
the favourite list. Do so for every channel you want to add. To rename the favourite list press the right arrow 
key and the favourite list will be active. Press the yellow key and the edit window will open. To resort the 
programs of the favourite list, select the channel to be moved, with the up/down keys and press the green 
key
. Then move to the new position for the respective channel and press the OK key to save the new 
position of the channel. Do so for every channel you want to move. 

Summary of Contents for TCX 170

Page 1: ...y SystemTek with information from Packard Bell web site and from our own technical department This is not the original manual that came with the product but all the information you will need to setup and configure your Packard Bell TCX 170 will be found in here ...

Page 2: ...s best suitable for your area B Connecting the TV set Using the included scart cable connect the TV socket of the receiver with the AV input on your TV set C Connecting the stereo You may listen to the audio of your digital TV and radio programs via your stereo Connect with a cinch stereo cable the Audio L R sockets of the receiver with the inputs of your stereo D Connecting the VCR It is possible...

Page 3: ... contains all options to set your preferences and technical settings of the TCX 170 Digital TV Receiver To open the setup menu open the main menu and select the setup menu option with the up down keys and press the OK key Or you can simply press the Setup key and the setup menu will open Languages In the languages menu you can set the default languages for subtitles data services audio and the gen...

Page 4: ... add new services option with the up down keys and press the OK key The scan will start immediately All new channels will be added at the end of the service list A message at the bottom of the window will indicate how many services have been added to the list Please note Do NOT turn off the receiver while scanning for new channels Otherwise there might be malfunctions Full Scan Replace Existing Se...

Page 5: ...setup menu select technical information with the up down keys and press the OK key The technical information window will open and you can get the hard and software version number Advanced features of the TCX 170 Digital TV Receiver Almost all advanced functions of the TCX 170 Digital TV Receiver can be accessed from the main menu In this menu you can for example change the order of the channels cr...

Page 6: ...te lists e g for every person in the family or different kinds of services like news sports or movies In otherbwords it will group together your favorite channels in one list Once this list is selected with the favourite key of the remote control the CH and CH keys will only display channels which are in this list The favourites menu can be found in the Main menu To create a new favourites list pr...

Page 7: ...d or numbers To write a new name move to the first letter number or sign of the new name with the up down keys and press the OK key Do so for every further letter number or sign of the new name When the new name has been completed press the green key in order save the new name Timer When the timer has been programmed your receiver will turn on and off at a certain time e g to record a program with...

Page 8: ...e age level for viewing restrictions If you select a channel that is locked you will be prompted to enter the PIN To do so use the number keys If you have entered the correct PIN the channel will be unlocked Upon changing the channel and selecting a locked channel again you will have to enter the PIN again The channels will remain unlocked until the device is turned off To access the parental cont...

Page 9: ...st for normal analogue TV Most functions however will be familiar Changing Channels and Obtaining Programme Information Like a normal TV set using the Channel Up Down buttons on your remote control will allow you to navigate through the channels However a banner with program information will be shown on your screen This banner will time out after four seconds It is also possible to select the desi...

Page 10: ... event is encrypted So with these icons you can easily see if there are additional services available There are three additional icons which will notify you of a new service added by the broadcaster or if the service is temporarily unavailable If the service has been removed you have the choice of deleting the service from your system This icon will show next to the icon for subtitling and will di...

Page 11: ...e mute key on the remote control the sound will be muted A symbol will be displayed on the screen It will automatically be removed after two seconds Subtitles and Language Some programs are transmitted in several languages To select the desired language press the Sound key The upcoming menu displays all the audio streams available on the current service To select a language use the Up Down keys To...

Page 12: ...e been transferred to the receiver it will program itself Warning Do not turn off the receiver while it is reprogramming itself Otherwise your device will be severely damaged A message will be displayed on your screen to let you know when it will be safe to switch the receiver off again After the download has been completed the receiver will automatically restart After the restart a message window...

Reviews: