


Orbital Sander
8
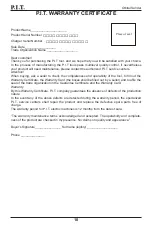
TERMS OF WARRANTY SERVICE
1. This Warranty Certifi cate is the only docu-
ment that confi rms your right to free warranty
service. Without presenting this certifi cate, no
claims are accepted. In case of loss or dam-
age, the warranty certifi cate is not restored.
2. The warranty period for the electric ma-
chine is 12 months from the date of sale,
during the warranty period the service depart-
ment eliminates manufacturing defects and
replaces parts that have failed due to the fault
of the manufacturer free of charge. In the war-
ranty repair, an equivalent operable product
is not provided. Replaceable parts become
property of service providers.
P.I.T is not liable for any damage that may be
caused by operation of the electric machine.
3. Only clean tool accompanied with the
following duly executed documents: this War-
ranty Certifi cate, Warranty Card, with all fi elds
fi lled out, bearing the stamp of the trade orga-
nization and the signature of the buyer, shall
be accepted for warranty repair.
4. Warranty repair is not performed in the fol-
lowing cases:
- in the absence of a Warranty Certifi cate and
a Warranty Card or their incorrect execution;
- with failure of both a rotor and a stator of the
electric engine, charring or melting of primary
winding of the welding machine transformer,
charging or starting-charging device, with in-
ternal parts melting, burn down of electronic
circuit boards;
- if a Warranty Certifi cate or a Warranty Card
does not correspond to this electric machine
or to the form established by the supplier;
- upon expiration of the warranty period;
- at attempts of opening or repair of the elec-
tric machine outside the warranty workshop;
making constructive changes and lubrication
of the tool during the warranty period, as ev-
idenced, for example, by the creases on the
spline parts of the fasteners of non-rotational
parts.
- when using electric tools for production or
other purposes connected with making a prof-
it, as well as in case of malfunctions related
to instability of the power network parameters
exceeding the norms established by GOST;
- in the events of improper operation (use the
electric machine for other than intended pur-
poses, attachments to the electric machine of
attachments, accessories, etc. not provided
by the manufacturer);
polish with either linear or circular movements
and with moderate pressure.
Do not allow the polish to dry out on the sur-
face; this may damage the surface. Do not
expose the surface which you intend to polish
to direct sunlight.
Clean the polishing tool regularly to ensure
good polishing results. Wash the polishing
tools with mild detergent and warm water; do
not use thinning agents.
Maintenance and Service
Maintenance and Cleaning
►
Pull the plug out of the socket before
carrying out any work on the power
tool.
►
To ensure safe and effi cient operation,
always keep the power tool and the
ventilation slots clean.
In order to avoid safety hazards, if the power
supply cord needs to be replaced, this must
be done by P.I.T. or by an after-sales service
centre that is authorised to repair P.I.T. power
tools.
Transportation of the power tools
► Categorically not to drop any mechanical
impact on the packaging during transport.
► When unloading / loading is not allowed to
use any kind of technology that works on
the principle of clamping packaging.
Dispose of waste
Damaged power tools, batteries, acces-
sories and waste packaging materials must
be recycled and reused in an environmentally
friendly manner.
Do not throw power tools and accumulators /
batteries into general household waste!
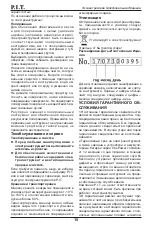
Product serial number interpretation
serial number
The fi rst and second digits of the product seri-
al number from left to right
Year of production, the third and fourth digits
indicate the month of production, the
The fi fth and sixth digits indicate the produc-
tion day.
Summary of Contents for PDS150-C
Page 2: ...Orbital Sander 1...
Page 3: ...Orbital Sander 2...
Page 4: ...Orbital Sander 3...
Page 11: ...10...
Page 12: ...11 18...
Page 13: ...12 PDS150 C 220 50 500 6000 12000...
Page 14: ...13 PDS150 C 150 mm 6 1 9 1 1 1 1 P I T 1 2 3 4 5 6 7 8 9 10 A B 150 125 P I T 2...
Page 15: ...14 C1 C2 D 230 220 3 P I T P I T...
Page 16: ...15 2 2 2 1 2 OnePower 12 I 3 P I T P I T 10 50 80...
Page 17: ...16 4 3 2 2 5...
Page 18: ...17...


