


Your new Ozpig:
What’s in the box.
4 x Zinc Coated Legs
4 x Extension Legs
1 x Vinyl Carry Bag
3 x Chimney Sections
1 x Mesh Floor Fire Grate
1 x Ozpig Steel Cooker Body
1 x Multipurpose Tool
( Wood poker & plate lift handle)
Please visit
ozpig.com.au
to see
the full range of additional Ozpig
accessories available for purchase.
1 x BBQ Plate
3
• 1 X Spark Arrestor
(this fits to the top of the
chimney when assembled)
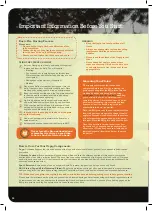
Setting up
your Ozpig
3
4
5
6
1
2
1 x Large Warming Tray
When you first take your Ozpig
from its box, please ensure you
have removed all items before
discarding the packaging properly.
(Make sure you don’t throw away
your black vinyl bag). Place the
BBQ plate and the warming plate
to one side, then remove each item
from the barrel of the Ozpig.
Simply start assembling your Ozpig
from the bottom up, by screwing
in two legs firmly. Lean your Ozpig
on those legs and screw in the
remaining two.
Next, place the 3 chimney pieces
on top of the chimney stub at the
back of the Ozpig. Remember to
place the spark arrestor on top of
the top chimney piece to contain
embers.
Ozpig have added a new chimney
stub that assists with the draw of
fire when door is open as well
as improves the effectiveness
of the vented door when fitted.
See opposite page for fitting
instructions
Place the Fire Grate into the belly
of the Ozpig - this sits right in the
bottom of the cavity.
Next place your round BBQ plate
on the top ring of your Ozpig.
Ensure the pin on the bottom of
the plate is inserted in the socket
on the side of the top ring.
Lastly place your Large Warming
tray in to the two side sockets on
the other side of the barrel.