background image

10

TOOL OPERATION (cont.)

MAINTENANCE

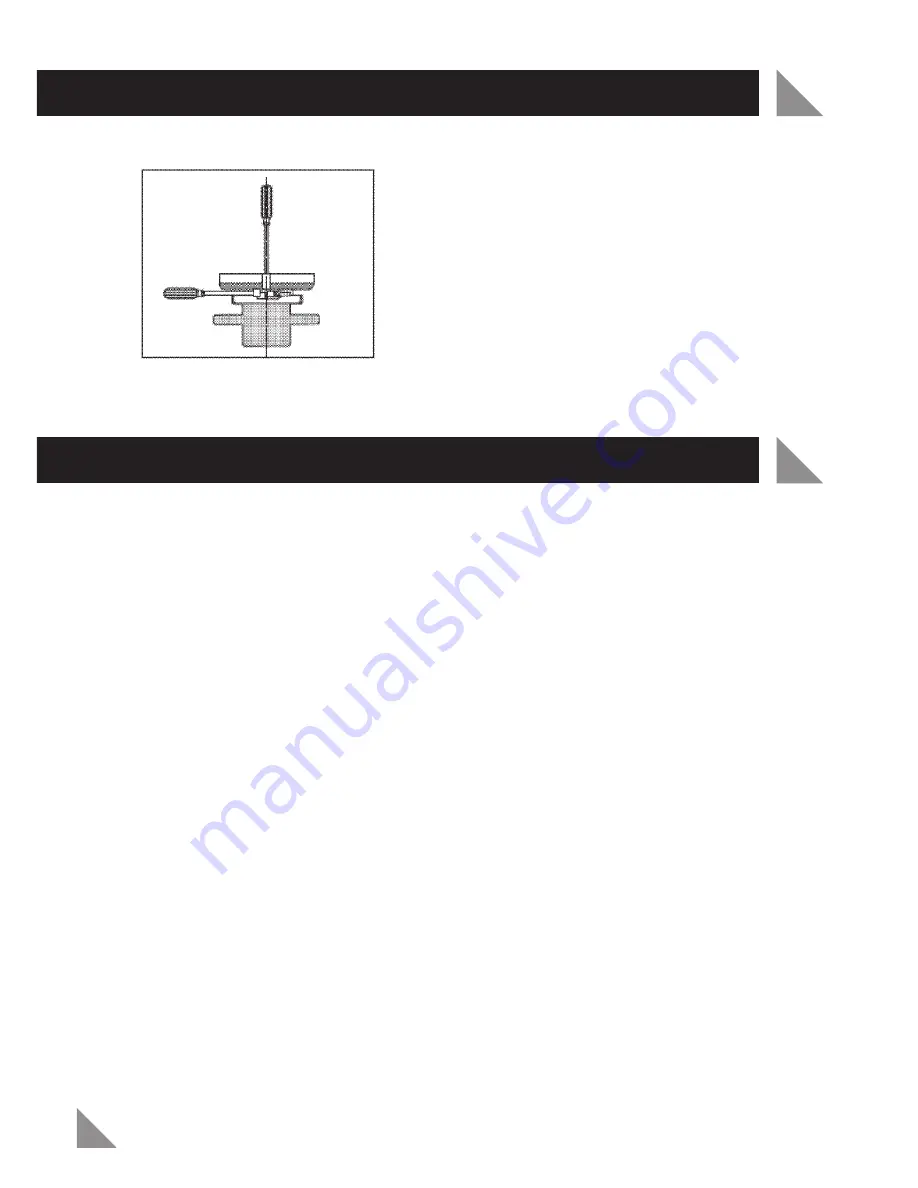
To remove foam pad

1.

Insert any long-bladed screwdriver between
the foam pad (3) and the motor housing (7)
as shown in Fig. 7 and hold in position.

2.

Using a flat-bladed screwdriver, remove the
screw holding the foam pad (3) by turning 
it clockwise.

3.

To reinstall the foam pad (3), turn the screw
anticlockwise.

1. The bonnets are machine washable in cold water. However, hand washing will

extend the life of the bonnet.

2. Always store the polisher with the foam pad face up to extend pad life and shape.

3. When not in use, remove bonnet from the foam pad. This will ensure that the

foam pad will dry out and retain its shape.

4. After each use, blow air through the tool housing to ensure it is free from all

dust particles that may build up. Build up of dust particles may cause the tool
to overheat and fail.

5. If the housing of the tool requires cleaning do not use solvents but a moist soft

cloth only. Never let any liquid get inside the tool; never immerse any part of
the tool into a liquid.

Note: 

Ozito Industries will not be responsible for any damage or injuries caused

by the repair of the tool by an unauthorised person or by mishandling of the tool.  

Fig. 7


Summary of Contents for OZBP110WA

Page 1: ...Buffer Polisher 110 Watt Operation Manual 3 Year Replacement Warranty OZBP110WA To view the full range visit www ozito com au 0409 ...

Page 2: ...tures Random orbit operation Individually adjustable handles Compact design Comfortable ergonomic handles Reusable buffing polishing bonnets This Polisher has been designed to comply with the following Australian New Zealand Standards and any other applicable standards referenced therein AS NZS60745 2 4 2003 Hand held motor operated electric tools Safety general requirements Part 2 4 Particular re...

Page 3: ...3 TABLE OF CONTENTS SPECIFICATIONS TABLE OF CONTENTS INTRODUCTION SAFETY INSTRUCTIONS OPERATION MAINTENANCE CONTENTS WARRANTY Page 2 Page 3 Page 4 Page 4 Page 9 Page 10 Page 11 Page 12 ...

Page 4: ...30V and 240V on Ozito tools are interchangeable for Australia and New Zealand If the supply cord is damaged it must be replaced by an electrician or a power tool repairer in order to avoid a hazard This tool is double insulated in accordance with AS NZS60745 therefore no earth wire is required Note Double insulation does not take the place of normal safety precautions when operating this tool The ...

Page 5: ... grounded c Do not expose power tools to rain or wet conditions Water entering a power tool will increase the risk of electric shock d Do not abuse the cord Never use the cord for carrying pulling or unplugging the power tool Keep cord away from heat oil sharp edges or moving parts Damaged or entangled cords increase the risk of electric shock e When operating a power tool outdoors use an extensio...

Page 6: ...source before making any adjustments changing accessories or storing power tools Such preventive safety measures reduce the risk of starting the power tool accidentally d Store idle power tools unplugged out of the reach of children and do not allow persons unfamiliar with the power tool or these instructions to operate the power tool Power tools are dangerous in the hands of untrained users e Mai...

Page 7: ...spect the accessory such as abrasive wheels for chips and cracks backing pad for cracks tear or excess wear wire brush for loose or cracked wires If power tool or accessory is dropped inspect for damage or install an undamaged accessory After inspecting and installing an accessory position yourself and bystanders away from the plane of the rotating accessory and run the power tool at maximum no lo...

Page 8: ...point can dig into the surface of the material causing the wheel to climb out or kick out The wheel may either jump toward or away from the operator depending on direction of the wheel s movement at the point of pinching Abrasive wheels may also break under these conditions Kickback is the result of power tool misuse and or incorrect operating procedures or conditions and can be avoided by taking ...

Page 9: ...y 7 Follow application process by polishing the surface Polishing 1 Install a clean polishing bonnet 9 on the foam pad 3 as shown in Fig 2 2 Switch the polisher on and wait till the motor reaches maximum speed 3 Move the polisher onto the surface to be polished and use long sweeping strokes in a criss cross pattern 4 Do not use excessive force when pressing down the polisher onto the surface Allow...

Page 10: ...ace up to extend pad life and shape 3 When not in use remove bonnet from the foam pad This will ensure that the foam pad will dry out and retain its shape 4 After each use blow air through the tool housing to ensure it is free from all dust particles that may build up Build up of dust particles may cause the tool to overheat and fail 5 If the housing of the tool requires cleaning do not use solven...

Page 11: ...council authority for recycling advice Recycling packaging reduces the need for landfill and raw materials Reuse of recycled material decreases pollution in the environment Please recycle packaging where facilities exist Check with your local council authority for recycling advice 1 x Buffer Polisher OZBP110WA 1 x Applicator Bonnet 1 x Polishing Bonnet 1 x Instruction Manual CONTENTS OZITO INDUSTR...

Page 12: ...e If the tool has been operated on a supply voltage other than that specified on the tool If the tool shows signs of damage or defects caused by or resulting from abuse accidents or alterations If the tool is disassembled or tampered with in any way Note Warranty excludes consumable parts such as brushes batteries sanding pads blades discs drill bits collets drive belts and other accessories YOUR ...

Reviews: