OC-SR10 Manual - Rev 1.1
WIRING CONNECTIONS
To protect the Battery and the Solar Panel, we strongly recommend that you place a 15A inline fuse on the positive
wire on both the “Solar” and “Battery” Circuits. (As close to the Battery / Panel as possible)
The leads which exit the Solar Controller are clearly marked ‘Solar’ and ‘Battery’.
Each of these leads is twin core black cable, one power (12V) and one earth (GND) wire for each circuit.
Refer to the marking on the leads for the Power +VE (12V) wires.
1.
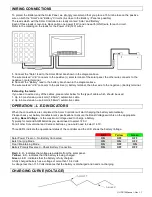
Connect the “Solar” lead to the Solar Panel like shown in the diagram above.
The wire marked “+VE” connects to the positive (+) solar terminal of the solar panel, the other wire connects to the
negative (-) solar terminal.
2.
Connect the “Battery” lead to the battery like shown in the diagram above.
The wire marked “+VE” connects to the positive (+) battery terminal, the other wire to the negative (-) battery terminal.
Extending the leads:
If you need to extend any of the cables, please refer below for the type of cable which should be used.
1. Up to 3m extension, use 4mm (1.85mm
²
) automotive cable.
2. Up to 6m extension, use 6mm (4.58mm
²
) automotive cable.
OPERATION – L.E.D INDICATORS
When the connections are completed, the Solar Controller will start charging the battery automatically.
Please check your battery manufacturer’s specifications to ensure the Boost Voltage switch is on the appropriate
setting.
Boost Voltage
– Is the maximum Voltage used to charge a battery.
Typically for Gel and AGM batteries you would need to select 14.5V.
For all other Conventional and Calcium batteries, you would need to select 14.7V.
Three LED’s indicate the operational status of the controller and the LCD shows the battery Voltage.
Red
Yellow
Green
Solar Power Present – No Battery Connected
ON
OFF
OFF
Bulk Charging Mode
ON
ON
OFF
Float / Maintaining Mode
ON
OFF
ON
Battery Polarity Reversed – Check Battery Connection
ON
OFF
OFF
Red
L.E.D - indicates that voltage is available from the solar panel.
Yellow
L.E.D - indicates that the battery is being charged.
Green
L.E.D - indicates that the battery is fully charged.
A fully charged battery has a voltage of more than 13.4 Volts.
A voltage less than 11.5 Volts indicates that the battery is discharged and needs re-charging.
CHARGING CURVE (VOLTAGE)


