background image

RT1003 Manual

Revision: 1

90628

101

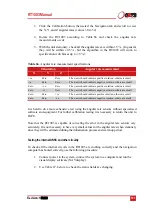
3. Click the Calibration button, then select the Navigation tab and scroll to view

the X, Y, and Z angular rates (values 30 to 32).

4. Rotate  the  RT1003  according  to  Table 66  and  check  the  angular  rate

measurements occur.

5. With the unit stationary, check all the angular rates are within ±5 °/s. (In general

they  will  be  within  ±0.5 °/s,  but  the  algorithm  in  the  RT1003  will  work  to
specification with biases up to ±5 °/s).

It is hard to do a more exhaustive test using the angular rate sensors without specialised
software and equipment. For further calibration testing it is necessary to return the unit to
OxTS.

Note that the RT1003 is capable of correcting the error in the angular rate sensors very
accurately. It is not necessary to have very small values for the angular rates when stationary
since they will be estimated during the initialisation process and warm-up period.

Testing the internal GNSS and other circuitry

To check all the internal circuits in the RT1003 are working correctly and the navigation
computer has booted correctly, use the following procedure:

1. Connect power to the system, connect the system to a computer and run the

visual display software (NAVdisplay).

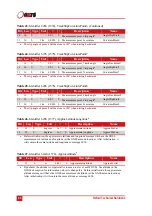
2. Use Table 67, below, to check the status fields are changing.

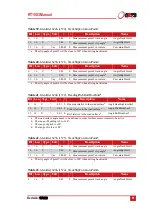
Table 66. 

Angular rate measurement specifications

Orientation

Angular rate measurement

X

Y

Z

+ve

Zero

Zero

The x-axis should indicate positive rotation, others are small

-ve

Zero

Zero

The x-axis should indicate negative rotation, others are small.

Zero

+ve

Zero

The y-axis should indicate positive rotation, others are small

Zero

-ve

Zero

The y-axis should indicate negative rotation, others are small

Zero

Zero

+ve

The z-axis should indicate positive rotation, others are small

Zero

Zero

-ve

The z-axis should indicate negative rotation, others are small

Summary of Contents for RT1003

Page 1: ...Confidently Accurately User Manual RT1003 GNSS aided inertial navigation system ...

Page 2: ... Xiph org Foundation TI at software dl ti com Copyright 2002 2015 Texas Instruments Incorporated All rights reserved None of the names of the Xiph org Foundation or Texas Instruments Incorporated nor the names of their contributors may be used to endorse or promote this product or products using this software without specific prior written permission Any redistribution of the software must reprodu...

Page 3: ...ess written approval of Oxford Technical Solutions Limited The software is provided by the copyright holders and contributors as is and any express or implied warranties including but not limited to the implied warranties of merchantability and fitness for a particular purpose are disclaimed In no event shall the copyright holders or contributors be liable for any direct indirect incidental specia...

Page 4: ...ir at an authorised location only Determination of replacement or repair will be made by Oxford Technical Solutions Limited personnel or by personnel expressly authorised by Oxford Technical Solutions Limited for this purpose In no event will Oxford Technical Solutions Limited be liable for any indirect incidental special or consequential damages whether through tort contract or otherwise This war...

Page 5: ...16 Co ordinate frame conventions 17 IMU frame 17 OxTS NED navigation frame 18 ISO 8855 ENU earth fixed system 19 OxTS horizontal frame 20 ISO 8855 intermediate system 21 OxTS vehicle frame 22 ISO 8855 vehicle system 23 Local co ordinates 24 NAVsuite software 26 How to install 26 System requirements 26 Admin rights 26 To uninstall NAVsuite 27 NAVsuite applications 27 Documentation 28 Communicating ...

Page 6: ...n and finishing 73 Setting up the base station 75 Initialisation 76 Dynamic initialisation 76 Static initialisation 77 Real time output during initialisation 78 Warm up 79 Post processing data 83 CAN messages and signals 84 CAN DB file 84 CAN bus messages 84 Table heading definitions 86 Signals 86 Specifications 98 Appendix A Troubleshooting 100 Accelerometer test procedure 100 Gyro test procedure...

Page 7: ...ght coupling and advanced gx ix processing technology the RT1003 delivers up to 2 cm position and 0 1 heading accuracy 2 m antenna separation with up to 250 Hz output for all measurements This manual covers the installation configuration and basic operation of the RT1003 Separate manuals are provided for the post processing and graphing software installed with NAVsuite We suggest reading the entir...

Page 8: ...ct These are listed in Table 2 For more information on specific accessories please see our website or speak to your OxTS representative Table 1 Summary of standard components supplied with an RT1000 Qty Description 1 Mounting kit with screws 2 G5Ant 2AMNS1 GNSS antenna with 5 m cable 1 RT1003 system unit 1 RT1003 user manual 1 USB memory stick software 1 User cable Table 2 Compatible accessories P...

Page 9: ...ns DGNSS The position accuracy of differential and RTK capable receivers is improved when using the RT Base S RT Strut Designed to quickly and securely provide a mounting location inside a land based vehicle RT UPS An uninterruptible power supply capable of powering the INS for up to one minute after power is lost Input 9 48 volts RT XLAN The RT XLAN is a high performance WLAN radio unit capable o...

Page 10: ...o extract the best possible accuracy DGNSS corrections can also be applied Local path C Program Files x86 OxTS Manuals rtppman pdf Online Downloads Support Manuals rtppman pdf NAVgraph NAVgraph is used to plot analyse and export measurement data once processed Local path C Program Files x86 OxTS Manuals NAVgraphman pdf Online Downloads Support Manuals NAVgraphman pdf NCOM NCOM is a propriety forma...

Page 11: ...ent off and on the user is encouraged to try to correct the interference by one or more of the following measures Re orient or relocate the receiving antenna Increase the separation between the equipment and the receiver The RT1003 incorporates a GNSS receiver No GNSS receiver can track satellites in the presence of strong RF radiations within 70 MHz of the GNSS frequencies The RT1003 conforms to ...

Page 12: ...sive impact extreme temperature and water The product housing is designed to dissipate heat and after periods of extended operation it may be hot The product should be allowed to cool before handling and care should be taken If the product is used in high temperature environments forced convection may be required Connector panel layout The layout of the RT1003 s connector panel is shown below and ...

Page 13: ...d and the program is running The GNSS receiver has not yet output a valid time position or velocity Red The GNSS receiver has locked on to satellites and has adjusted its clock to valid time the 1PPS output will now be valid The strapdown navigator is ready to initialise If the vehicle is travelling faster than the value set for Initialisation speed during configuration then the strapdown navigato...

Page 14: ...t is a low voltage CMOS output with 0 8 V or less representing a low and 2 4 V or more representing a high No more than 10 mA should be drawn from this output Table 7 User cable digital I O connector J5 Pin Name function Description J5 1 Digital 1 1PPS output Pulsed output from primary GNSS receiver synchronised with the transition of GPS seconds J5 2 Digital 2 Trigger 1 User selectable I O input ...

Page 15: ...products The detection rate for both products increases to 50 Hz by when Output on falling edge of trigger or Output on rising edge of trigger is selected in the Ethernet Output window in NAVconfig Trigger information is contained within status message 24 and 43 output over NCOM and CAN for the low rate triggers 1 Hz The fast trigger information 50 Hz can only be output over NCOM In output mode th...

Page 16: ...r on a single wheel An encoder from a gearbox should not be used and simulated TTL pulses e g converted from the CAN bus should not be used either The timing of the wheel speed input pulses is critical and nothing should cause any delay to them The RT1003 also accepts signals from quadrature wheel speed sensors When using quadrature sensors connect one channel from the quadrature sensor to wheel s...

Page 17: ...ibed in the technical drawings at the end of the user manual All of our inertial navigation systems share a common IMU reference frame The orientation of that frame is popular among navigation systems The positive direction of each axis and the direction of positive rotation about those axes is shown in Figure 3 When looking at the connector panel of your product the positive X axis points forward...

Page 18: ...s shown in Figure 4 The down axis is always aligned to the gravity vector while the north axis always points north As long as the displaced output function in NAVconfig is not enabled the OxTS navigation frame is centred on the IMU frame origin Table 8 OxTS navigation frame definition Axis Description North The north axis N is perpendicular to the gravity vector and in the direction of the north p...

Page 19: ...t is shown in Figure 5 The east and north axes are always perpendicular to the gravity vector As long as the displaced output function in NAVconfig is not enabled the ISO 8855 earth fixed system is centred to the IMU frame origin Table 9 ISO 8855 earth fixed system definition Axis Description East The east axis E is perpendicular to gravity perpendicular to the north axis and is in the east direct...

Page 20: ...hicle but does not rotate with the roll and pitch of the vehicle Instead it only rotates with the heading of the vehicle The definition of the OxTS horizontal frame is listed in Table 10 and shown in Figure 6 Table 10 OxTS horizontal frame definition Axis Description Longitudinal This is the longitudinal forward in NCOM direction of the vehicle projected in to the horizontal plane Lateral This is ...

Page 21: ...tudinal and lateral axes both remain parallel to the ground plane The longitudinal axis is also aligned with the vertical projection of the vehicle heading The definition of the ISO 8855 intermediate system is listed in Table 11 and shown in Figure 7 Table 11 ISO 8855 intermediate system definition Axis Description Longitudinal This is the forward direction of the vehicle projected in to the horiz...

Page 22: ...he gravity vector and points down The OxTS vehicle frame is attached to the body of the vehicle It is related to the INS through the rotations in the Orientation page of NAVconfig It can be changed while the INS is running using the Quick Config tool in NAVdisplay The definitions of the vehicle frame are listed in Table 12 and shown in Figure 8 Table 12 OxTS vehicle frame definition Axis Descripti...

Page 23: ...points up The ISO 8855 vehicle system is attached to the body of the vehicle At rest the longitudinal axis points forwards horizontally and is parallel to the vehicle s longitudinal axis The lateral axis is perpendicular to the longitudinal axis and points left The vertical axis is orthogonal to the longitudinal and lateral axes Definitions are listed in Table 13 and shown in Figure 9 Table 13 ISO...

Page 24: ...ive or negative which is applied to the WGS 84 altitude at the assigned lat lon co ordinates The offset is applied parallel to the gravity vector at the defined origin Finally the X axis angle must be defined relative to north A value of 0 causes the X axis to point north while the Y axis points east A value of 90 causes the X axis to point west while the Y axis points north The Z axis always poin...

Page 25: ...e Y axis is perpendicular the X and Z axis Z The Z axis is parallel to the gravity vector and centred on the latitude and longitude entered in the local co ordinate settings panel Table 14 Local co ordinate frame Continued Axis Description ...

Page 26: ...to unzip the saved file first Note please restart the PC after the NAVsuite installer successfully completes System requirements NAVsuite installs and runs on PCs running Microsoft Windows 7 8 or 10 either 32 and 64 bit versions Please ensure the latest operating system service packs are installed The following components are also required to run NAVsuite and will be automatically installed if not...

Page 27: ...ch can be used to achieve RTK integer level position accuracy NAVconfig Used to create send and receive configurations from OxTS inertial navigation systems NAVdisplay Used to view real time data from OxTS products via Ethernet or a serial port It can also be used to transmit special commands and replay logged data NAVgraph Used to graph NCOM XCOM and RCOM files created in post process It can disp...

Page 28: ...ddition to the main applications the NAVsuite installer also copies a number PDF manuals and help documents to the computer s disk The documents are located in C Program Files x86 OxTS Manuals and can be accessed via the OxTS folder in the Start menu ...

Page 29: ...terpret the NCOM packet See Related documents on page 10 To ensure high speed transmission each RT1003 is fitted with a 10 100 Base T Ethernet adaptor and is configured with a static IP address The IP address of your product can be found on your delivery note If the delivery note is unavailable the default IP address assigned by OxTS takes the form 195 0 0 sn where sn are the last two digits of th...

Page 30: ...e the IP address of a computer running Windows 10 1 Right click on the Windows Start icon in the Taskbar then select Network Connections 2 In the window that opens right click on the network adapter you want to configure and select Properties 3 In the window that opens navigate the list to find Internet Protocol Version 4 TCP IPv4 Select it and then click Properties 4 In the TCP IPv4 Properties wi...

Page 31: ...duct using Windows File Explorer or another FTP application The user name and password required to manually connect to the RT1003 are Username user Password user Firewall warning The first time some OxTS applications are run a firewall warning message similar to that shown in Figure 12 may be triggered This is because the program is attempting to listen for and communicate with OxTS products on th...

Page 32: ...er in a straight through configuration Following the in line coupler a normal straight UDP Cat 5e cable can be used to connect the coupler to the hub To connect directly to an Ethernet card in a computer a crossed in line coupler must be used The connections in the crossed coupler are given in Table 16 Note that this is not the normal configuration sold and it may be necessary to modify an existin...

Page 33: ...e logged inside the INS along with the navigation measurements Please note that a termination resistor is not built into the RT1003 It is therefore essential to include a 120 ohm resistor at each end of your CAN bus wiring otherwise the CAN bus will not work Signals sent from the RT1003 are encoded in little endian format Intel style In its default configuration the CAN bus uses the following iden...

Page 34: ...rrupted view of the sky and on a suitable ground plane such as the roof of a vehicle if made of a ferrous material It is possible to mount one antenna on the roof and one on the bonnet hood although in reality the multipath reflections from the windscreen will degrade the performance of the system For good multipath rejection the antennas should be mounted on a metal surface using the magnetic mou...

Page 35: ... are not level then the separation must be measured to 5 mm For both single and dual antenna systems it is essential that the supplied GNSS antenna cables are used and not extended shortened or replaced This is even more critical for dual antenna systems and the two antenna cables must be of the same specification Do not for example use a 5 m antenna cable for one antenna and a 15 m antenna cable ...

Page 36: ...which options to use while processing the data such as DGNSS corrections Configuration files are stored in the product s memory and loaded each time the product is powered up There is no need to upload a new configuration unless the RT1003 is installed in another vehicle or something about the existing installation changes an antenna is moved for example Overview In order to give the best possible...

Page 37: ...onal settings of the computer to choose whether numbers are represented in the English or European format dot or comma for the decimal separator The selected language does not change the format used for numbers Measurements are always displayed in metric units in NAVconfig However when entering measurements alternate units can be used as long as they are specified e g 10 or 10 in NAVconfig will th...

Page 38: ... configuration pages are not available with some of the products These will be displayed as grey in the sidebar In instances where the same product type will be used each time the Product Selection page can be skipped in the future by selecting Always use this product If a different product needs configuring the selection page can be returned to by clicking Product Selection in the sidebar Read co...

Page 39: ...s using to the internally stored RD file This option extracts the configuration used and loads it into the configuration wizard Specify an RD file by clicking the Browse button Read initial settings from device If the RT1003 is connected to the computer via Ethernet it is possible to read the initial settings directly from the RT1003 The settings loaded are the settings that were last committed to...

Page 40: ...ate frame Unless the RT1003 happens to be installed in the default orientation it will need to be told which way the IMU s Y and Z axis point Figure 17 illustrates this by showing an INS with its IMU frame shown mounted on our RT Strut system If the RT Strut was installed in the vehicle as shown the settings on NAVconfig s Orientation page would need to be set to Y axis points left Z axis points f...

Page 41: ...le s X axis forward direction is incorrect the system will not initialise correctly when the vehicle moves forwards Get improved settings The Get improved settings button provides the ability to read the configuration settings from a warmed up system While the RT1003 is running it tries to improve some of its configured parameters This option is useful if a calibration run has been done and the Ka...

Page 42: ...f using Get improved settings To read the improved values from the RT1003 click Get improved settings on the Orientation page This opens the Get settings from device window shown in Figure 19 Figure 19 Source selection page for Get improved settings In the Read configuration from box select the source for the improved settings The options are ...

Page 43: ... list will not function correctly if NAVdisplay or other software is using the UDP port unless the OxTS UDP Server is running Once a source has been selected click Next and the software will check which settings can be obtained from the source Settings that cannot be obtained will be shown in grey this may be because the product is not calculating these values at present Figure 20 shows the Settin...

Page 44: ... primary antenna in NAVconfig helps achieve better results sooner It is recommended to measure the GNSS antenna position to an accuracy of 10 cm Measure the distances from the RT1003 to the GNSS antenna along each of the axes in the vehicle s co ordinate frame On the Primary Antenna page shown in Figure 21 select the directions Ahead Behind Right Left and Above Below and enter each of the measurem...

Page 45: ... during the warm up period Care should be taken if specifying a greater accuracy Do not overstate the accuracy as doing so may cause the RT1003 to look in the wrong place increasing the time taken to find the correct solution Secondary antenna Figure 22 NAVconfig Secondary Antenna page The Secondary Antenna page shown in Figure 22 is used to define the position of the GNSS antenna connected to the...

Page 46: ...asurement accuracy can also be specified with the to within drop down box The illustrations will change according to the settings you choose to help visualise the configuration of the antennas It is important to measure between the same point on each antenna e g centre to centre or from cable to cable If the antennas are mounted at significantly different heights or if the mounting angle is not di...

Page 47: ...so not suitable for land vehicles that have no non steered wheels The vertical settings should not be used if the vehicle can perform wheelies motorcycles The advanced slip feature applies heading correction when the vehicle is not slipping when the vehicle is slipping the lateral acceleration is usually large enough that the normal heading corrections provide excellent results When combined with ...

Page 48: ...etter than 10 cm does not improve results Using an accuracy figure worse than 20 cm will increase the drift of the RT1003 Use the accuracy fields to select or specify the accuracy of the measurements The Advanced Slip feature also requires some knowledge of the road surface Select one of the predefined options from the drop down list Normal or Low friction ice For the Vertical settings the system ...

Page 49: ...te The standard output rate of the RT1003 is 100 Hz however this can be increased to 250 Hz with the application of a special IMU high rate feature code On devices where the feature code has been applied the IMU output rate option allows the output rate to be set to 100 200 or 250 Hz On devices where the IMU high rate feature code has not been applied this option is ignored regardless of its setti...

Page 50: ...hernet using a device such as the RT XLAN or via the serial port when connected to a radio modem If another device on the network is transmitting differential corrections the Differential option should be set to Network correction receiver When receiving corrections via the serial port the Differential option should be set to Disabled Once the serial port has been correctly configured to receive c...

Page 51: ...ist or their properties may change In this case it is necessary to select Use advanced settings to set the satellite s Frequency and Baud rate CAN RT1003 systems can be configured to send and receive data via a CAN bus This allows measurements to be sent to external logging devices and signals from a test vehicle s CAN bus to be logged alongside navigation data inside an RT1003 By default CAN comm...

Page 52: ...so works but the baud rate must be common to all devices on the bus When using an RTANA the default baud rate is 1 MBaud The Save DBC file button generates a CAN DBC library listing all navigation and status messages that are enabled not greyed out The DBC file does not include channels defined under the acquisition tab The status message binary format is the same as the NCOM status message binary...

Page 53: ... apply an offset to all CAN IDs These tools are useful when IDs conflict with other equipment and changes need to be made to many channels Positive and negative integer values can be entered into the Identifier offset box in both decimal and hexadecimal formats Data entered in hexadecimal format should end with a h To remove the offset type 0 in the identifier offset box and click Apply Each messa...

Page 54: ...be necessary to reduce the number of messages that are output on an RT1003 system The Status tab Figure 28 lists all status messages which are sent one after another in a repeating loop Although 80 messages are shown in the list 100 are actually used internally If the data rate is set to 100 Hz a status message will be sent every 10 ms Some messages are transmitted more frequently than others beca...

Page 55: ...t adjustable Extra CAN messages those on the grey background do not need deleting from the list but will not be logged To move a message up into the top 12 area for logging right click on messages above and delete them from the list To remove individual signals from a message right click on the signal in the right hand window to bring up the delete option Figure 29 NAVconfig CAN messages configura...

Page 56: ...ering wheel while stationary is often enough to change the heading on most road vehicles Select an option from the drop down list Table 17 gives a description on each of the heading lock options Table 17 NAVconfig heading lock options Heading Lock Description Disabled Disables heading lock Should be used if the vehicle can turn on the spot Normal Best for most applications Assumes that the heading...

Page 57: ...oduct makes some assumptions during initialisation First it assumes the vehicle is travelling forwards and second it assumes its travelling in a straight line For this reason the initialisation speed should be set sufficiently high that initialisation is not accidentally triggered while reversing out of a parking space for example A higher speed also means there is more time for the steering to se...

Page 58: ...the data if output displacement is used Trigger 1 and Trigger 2 The RT1003 has two triggers each of which can be configured as an input trigger output trigger or an IMU sync pulse To define a trigger click in the Settings column then select the button to open the properties window shown in Figure 31 Select the trigger type from the drop down list Figure 31 NAVconfig trigger properties window The N...

Page 59: ...gger can be configured as a low or high as illustrated in Figure 31 IMU sync Generates an output pulse at the same frequency as the data rate of the system synchronised to the IMU sample time The output has a duty cycle of approximately 50 and the falling edge is synchronised to the sample file of the data from the IMU Figure 32 Output trigger settings Analogue output The Analogue output option is...

Page 60: ...s on the CAN bus On the NCOM output the non filtered values are output together with the filter characteristics and the NCOM decoders provided by OxTS will implement the chosen filter The linear acceleration and the angular acceleration can be configured separately Due to vibration the accelerations both linear and angular are noisy In particular angular acceleration is normally filtered when it i...

Page 61: ...imum delay over the 0 to 5 Hz interval and the Noise Reduction Factor over the full bandwidth The Noise Reduction Factor is the ratio of the filtered noise compared to the unfiltered noise assuming the vibration is white i e same amplitude across the frequency spectrum Agraph showing the delay with respect to frequency can also be plotted The delay is the additional delay of the filter and not the...

Page 62: ... vehicle s longitudinal axis As odometer pulses from driven wheels are less accurate the best results are achieved when the odometer input is fitted to the rear wheel of a front wheel drive vehicle To work correctly the system needs to know where the measurement point the centre of the wheel being measured is in relation to the IMU origin The directions can be selected from the drop down lists If ...

Page 63: ... entered along with an angular offset for the X axis Local co ordinates are fully explained on page 24 Serial 1 output Figure 36 NAVconfig serial output properties The NMEA tab is enabled when Packet is set to NMEA The serial port can be configured to output different types of message see Table 18 To enabled serial output click in the Setting column then click the button to open the properties win...

Page 64: ...an filter runs quicker NCOM Normal output of the RT1003 NCOM data is transmitted at up to 125 Hz over serial The format is described in the NCOM Description Manual Software drivers exist for decoding the NCOM data IPAQ NCOM output at a reduced rate The baud rate of the serial port is set to 19200 and the update rate is 25 Hz It is used because the IPAQ cannot manage to receive the data reliably ab...

Page 65: ... initialisation forces output of the raw GNSS measurements before the RT1003 is initialised Currently just the position is output and this is the position of the antenna not the inertial measurement unit Note that there will be a jump from the antenna to the inertial measurement unit when initialisation occurs Ethernet output Figure 37 NAVconfig Ethernet output properties window Ethernet is the de...

Page 66: ...se packets are interpolated to the time when the event occurred and may be output up to 30 ms late and out of order compared to the normal messages It is essential to enable these options in order to see trigger information in NCOM or if the events have a rate higher than 1 Hz otherwise the output cannot communicate all of the events and some will be lost Steering robot IP The default address 195 ...

Page 67: ... designed to improve the data in real time When post processing the data using the forwards backwards combined option output smoothing should not be used as it may give unexpected results Slip points Figure 39 NAVconfig Slip points properties window The RT1003 can output slip angle measurements slip angle track angle and curvature at up to eight additional points in the NCOM stream The data is als...

Page 68: ...ing GNSS measurements if they have been rejected or ignored for a period of time The Use GNSS receiver s calculations option turns off gx ix mode and uses the receiver s default algorithms for calculating a GNSS solution Use OxTS gx ix raw data processing algorithm enables gx ix mode The gx ix processing uses the raw data from the GNSS and custom algorithms to compute position and velocity tailore...

Page 69: ... it may be desirable to reject more GNSS measurements Select the Start believing measurements after option and enter the number of GNSS measurements to reject before the system starts believing it again The RT1003 GNSS receivers update both position and velocity at a rate of 5 Hz Therefore to ignore updates for 60 seconds for example the number to enter to start believing measurements again would ...

Page 70: ...The roll angle shows a similar effect Using the surface tilt option the roll and pitch compared to the inclined surface can be output as well The NAVdisplay software contains a tool for working out the surface angles NAVconfig can be used to configure the surface s angle if it has been measured already Figure 41 shows the Surface tilt properties window Enter the heading compared to true north of t...

Page 71: ...ion is selected The Altitude reference can be compared to either ellipsoidal or geoidal height If Ellipsoid is selected the altitude will be output with respect to the reference ellipsoid selected in the coordinate datum section If Geoid receiver default is selected the altitude will be relative to the geoid used in the GNSS receivers ACustom geoid file can be used for local variations To download...

Page 72: ...de with the rising or falling edge of the signal Advanced Clicking the button opens the Advanced settings window This can be used to set special commands for the RT1003 This should only be done with special instructions from OxTS Committing the configuration Figure 43 NAVconfig Commit page NAVconfig is an off line configuration tool so configurations must be explicitly uploaded to the RT1003 via E...

Page 73: ...ill automatically reset the RT1003 so the changes take effect Note It will be necessary to initialise and warm up the system again after the changes have been applied Saving the configuration and finishing Figure 44 NAVconfig Save Finish page Before finishing it is possible to save a copy of the configuration in a folder on your computer This can then be easily loaded back into the system if using...

Page 74: ... folder check the Save settings in the following folder box and use Browse to select a folder The configuration has a number of files associated with it so it is recommended to create a new folder Click Finish to save the configuration to the selected folder and close NAVconfig ...

Page 75: ...l errors are sent from the base station GNSS to the RT1003 via a radio modem available separately The position of the base station GNSS antenna can either be determined by the base station GNSS receiver or can be surveyed in by a chartered surveyor If the base station GNSS receiver determines its own position through position averaging then any error in the base station receiver will also result i...

Page 76: ...over by filtering out other accelerations over a period of time to separate out a gravity vector Heading is the most difficult variable to initialise There are two different methods of calculating an initial heading value dynamic initialisation and static initialisation Dynamic initialisation Dynamic initialisation is the default and preferred method of initialisation It is suitable for nearly all...

Page 77: ...quired to statically initialise depends entirely on the GNSS environment however in good GNSS environments it typically takes less than 30 seconds Once static initialisation is successful the LEDs on the connector panel will change to reflect the current state of the strapdown navigator Static initialisation is 99 reliable in open sky but the reliability decreases in environments with high multipa...

Page 78: ...cle travels in straight line during dynamic initialisation airborne and waterborne applications Real time output during initialisation During the initialisation process the INS does not output measurements in real time Instead the system runs one second behind allowing GNSS information to be compared to information from the inertial sensors However once initialisation occurs the system reduces thi...

Page 79: ...he INS was configured well the GNSS antenna position Advanced slip options and dual antenna separation were measured accurately in advance 2 The INS was turned on as soon as possible In this case it took us 15 minutes to get all the other equipment sorted out The INS was stationary for most of this period which is not a problem 3 Although in this example the INS was receiving corrections from a ba...

Page 80: ...acy of the velocity roll and pitch steadily improves as the Kalman filter places more and more weight on the inertial sensors At this point the heading accuracy is worse than the scale of the graph d in Figure 47 the heading is not accurate and the dual antenna system cannot measure the angle of the GNSS antennas compared to the inertial sensors so the dual antenna cannot provide accurate informat...

Page 81: ...RT1003 Manual Revision 190628 81 Figure 47 Example warm up accuracy estimates a Forward velocity b Position accuracies c Velocity accuracies d Orientation accuracies ...

Page 82: ... for six minutes These are fairly large figures of eight driven at relatively low speeds Notice the brake stops in the velocity graph a in Figure 47 where the speed falls to zero These are important parts of the warm up so as many states in the Kalman filter as possible can be updated Notice how close to the specification the INS is even without the figure of eight manoeuvres A proper warm up is r...

Page 83: ...n created in NAVconfig was incorrect when running in real time the configuration can be changed and the data can be reprocessed post mission using a new configuration The software suite provided with the RT1003 includes the RT Post process software which can be used to process the data The RT Post process Wizard also gives the user the ability to change the NCOM binary output format to text A full...

Page 84: ...frame IMU acceleration Table 27 1543 607h HeadingPitchRoll OxTS orientation Table 28 1544 608h RateVehicle OxTS output frame IMU angular rate Table 29 1545 609h RateLevel OxTS horizontal frame IMU angular rate Table 30 1546 60Ah TrackSlipCurvature Track slip and curvature Table 31 1547 60Bh Distance Distance Table 32 1548 60Ch PosLocal Position in local co ordinates Table 33 1549 60Dh VelYawLocal ...

Page 85: ... edge Table 49 1582 62Eh RisingTrigger Trigger 1 rising edge Table 50 1583 62Fh PosLocalNE Northing and easting in local co ordinates Table 51 1584 630h MilliTime Absolute GPS time Table 52 1585 631h Reserved 1586 632h Reserved 1587 633h IsoOrientation ISO 8855 orientation Table 53 1588 634h IsoVsVelocity ISO 8855 vehicle system velocity Table 54 1589 635h IsoVsAcceleration ISO 8855 vehicle system...

Page 86: ...r all the RT1003 signals and can usually be discarded Name This is a short name by which the signal is identified in the CAN DBC and in NAVconfig Signals The following tables describe the signals in each of the messages Table 21 Identifier 600h 1536 DateTimea a Time is always reported as GPS time currently 16 seconds different from UTC Bit Len Type Unit Description Name 0 8 U Year 1 0 Year within ...

Page 87: ...frame vertical down velocity VelDown 48 16 U m s 0 01 0 Horizontal speeda a Horizontal speed is the vector addition of north and east velocities For forward speed which can go negative see message 604h Speed2D Table 25 Identifier 604h 1540 VelocityLevel Bit Len Type Unit Description Name 0 16 S m s 0 01 0 OxTS horizontal frame longitudinal forward velocity VelForwarda a The forward velocity can go...

Page 88: ... S 0 01 0 Pitch angleb b The range of the pitch angle is 90 AnglePitch 32 16 S 0 01 0 Roll anglec c The range of the roll angle is 180 AngleRoll Table 29 Identifier 608h 1544 RateVehicle Bit Len Type Unit Description Name 0 16 S s 0 01 0 OxTS output frame longitudinal forward IMU angular rate AngRateX 16 16 S s 0 01 0 OxTS output frame lateral right IMU angular rate AngRateY 32 16 S s 0 01 0 OxTS ...

Page 89: ...increase when the RT1003 measures a speed less than 0 2 m s whereas the Distance field will drift by the noise of the RT when stationary The distances start from zero when the RT CAN unit is powered up 32 32 U m 0 001 0 Horizontal distance without hold Distance Table 33 Identifier 60Ch 1548 PosLocala a The origin is set using the local co ordinates option in NAVconfig The convention used for the l...

Page 90: ...on AngAccelLateral 32 16 S s2 0 1 0 OxTS horizontal frame vertical down IMU angular acceleration AngAccelDown Table 37 Identifier 620h 1568 TrackSlipCurvaturePoint1 Bit Len Type Unit Description Name 0 16 U 0 01 0 Measurement point 1 track angle AngleTrackPoint1 16 16 S 0 01 0 Measurement point 1 slip anglea a The slip angle of point 1 will be close to 180 when driving backwards AngleSlipPoint1 32...

Page 91: ...4h 1572 HeadingPitchRollFromSurfa a The road surface angle needs to be defined in order for these measurements to be active Bit Len Type Unit Description Name 0 16 U 0 01 0 Heading relative to the road surfaceb b The range of heading is 0 to 360 AngleHeadingFromSurf 16 16 S 0 01 0 Pitch relative to the road surfacec c The range of pitch is 90 AnglePitchFromSurf 32 16 S 0 01 0 Roll relative to the ...

Page 92: ... 1 m 0 0001 0 Measurement point 8 curvature CurvaturePoint8 Table 46 Identifier 629h 1577 ApproxLatitudeLongitudea a Before initialisation the approximate latitude and longitude message will have the GNSS measurement of latitude and longitude at the GNSS antenna location After initialisation it will contain the same latitude and longitude as message 601h Bit Len Type Unit Description Name 0 32 S d...

Page 93: ...gger Bit Len Type Unit Description Name 0 8 U 1 0 TTL signal level 0 low 1 high 255 unknown SignalLevelFalling 8 8 U 1 0 Trigger count increments with each new trigger TriggerCountFalling 16 16 U s 0 0002 0 Time since last trigger TriggerTimeFalling 32 32 U m 0 001 0 Distance with hold since last trigger TriggerDistanceFalling Table 50 Identifier 62Eh 1582 RisingTrigger Bit Len Type Unit Descripti...

Page 94: ... Seconds since the start of GPS time MilliTimeSeconds 48 8 S s 1 0 GPS UTC offset UtcOffset Table 53 Identifier 633h 1587 IsoOrientation Bit Len Type Unit Description Name 0 16 S 0 01 0 ISO 8855 yaw angle IsoYawAngle 16 16 S 0 01 0 ISO 8855 pitch angle IsoPitchAngle 32 16 S 0 01 0 ISO 8855 roll angle IsoRollAngle Table 54 Identifier 634h 1588 IsoVsVelocity Bit Len Type Unit Description Name 0 16 S...

Page 95: ...ystem pitch lateral angular acceleration IsoVsPitchAcceleration 32 16 S s 0 1 0 ISO 8855 vehicle system yaw vertical angular acceleration IsoVsYawAcceleration Table 58 Identifier 638h 1592 IsoIsVelocity Bit Len Type Unit Description Name 0 16 S m s 0 01 0 ISO 8855 intermediate system longitudinal forward velocity IsoIsLongitudinalVelocity 16 16 S m s 0 01 0 ISO 8855 intermediate system lateral lef...

Page 96: ...udinal angular acceleration IsoIsRollAcceleration 16 16 S s 0 1 0 ISO 8855 intermediate system pitch lateral angular acceleration IsoIsPitchAcceleration 32 16 S s 0 1 0 ISO 8855 intermediate system yaw vertical angular acceleration IsoIsYawAcceleration Table 62 Identifier 63Ch 1596 IsoEfsVelocity Bit Len Type Unit Description Name 0 16 S m s 0 01 0 ISO 8855 earth fixed system east velocity IsoEfsE...

Page 97: ...855 earth fixed system north acceleration IsoEfsNorthAcceleration 32 16 S m s 0 01 0 ISO 8855 earth fixed system vertical up acceleration IsoEfsVerticalAcceleration Table 63 Identifier 63Dh 1597 IsoEfsAcceleration Continued Bit Len Type Unit Description Name ...

Page 98: ... s GNSS outageb 0 95 Velocity accuracy km h RMS 0 1 Roll pitch 1 0 05 Heading 1 2 m antenna baseline 0 1 Accelerometers Bias stability mg Linearity 1 g range Scale factor Range g 0 02 0 05 0 01 30 Gyros Bias stability hr Linearity 200 s range Scale factor Range s 3 0 05 0 05 300 Slip angle 1 at 50 km h 0 25 Update rate Hz 100 200 250 optional Output latency Jitter μs 215 250 Input voltage V dc 10 ...

Page 99: ...S Shock survival g 60 Environmental protection IP65 Internal storage GB 32 Input output RS232 serial CAN up to 1 Mb s 10 100 Base T Ethernet 2 IO ports wheel speed input quadrature DGNSS types RTCM RTCMV3 Recommended recalibration period Years 2 a Valid for open sky conditions b Quoted from post process Table 64 RT1003 specificationa Continued Parameter unit RT1003 ...

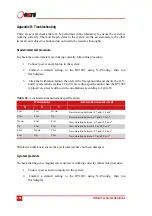
Page 100: ... to 21 are within specification when the RT1003 is placed on a level surface in the orientations according to Table 65 This test is sufficient to ensure the accelerometers have not been damaged Gyro test procedure To check that the gyros angular rate sensors are working correctly follow this procedure 1 Connect power and a computer to the system 2 Commit a default setting to the RT1003 using NAVco...

Page 101: ...stationary since they will be estimated during the initialisation process and warm up period Testing the internal GNSS and other circuitry To check all the internal circuits in the RT1003 are working correctly and the navigation computer has booted correctly use the following procedure 1 Connect power to the system connect the system to a computer and run the visual display software NAVdisplay 2 U...

Page 102: ...packets 100 per second or 250 per second depending on IMU speed IMU chars skipped Not changing but not necessarily zero GPS packets Between 2 and 20 per second depending on system GPS chars skipped Not changing but not necessarily zero GPS2 packetsa a The GPS2 related fields will only increase for dual antenna systems Between 2 and 20 per second depending on system GPS2 char skippeda Not changing ...

Page 103: ...vaturePoint5 91 TrackSlipCurvaturePoint6 91 TrackSlipCurvaturePoint7 92 TrackSlipCurvaturePoint8 92 Velocity 87 VelocityLevel 87 VelYawLocal 89 CAN signal AccelDown 88 AccelForward 88 AccelLateral 88 AccelSlip 88 AccelX 87 AccelY 87 AccelZ 87 Altitude 87 AngAccelDown 90 AngAccelForward 90 AngAccelLateral 90 AngAccelX 90 AngAccelY 90 AngAccelZ 90 AngleHeading 88 AngleHeadingFromSurf 91 AngleLocalTr...

Page 104: ...locity 95 IsoVsRollAcceleration 95 IsoVsRollVelocity 95 IsoVsVerticalAcceleration 94 IsoVsVerticalVelocity 94 IsoVsYawAcceleration 95 IsoVsYawVelocity 95 IsoYawAngle 94 MilliTime 94 MilliTimeSeconds 94 PosLat 87 PosLocalEast 93 PosLocalNorth 93 PosLocalX 89 PosLocalY 89 PosLon 87 SignalLevelFalling 93 SignalLevelRising 93 Speed2D 87 TimeCentury 86 TimeDay 86 TimeHour 86 TimeHSecond 86 TimeMinute 8...

Page 105: ... NED navigation frame 18 network 31 NMEA 10 north 18 numbers 37 O origin 17 output mode 15 P password 31 Power PWR LED 13 R reference frames 17 regional settings 37 RS232 33 RT Post process 10 27 RT ANA 8 RT Backpack 9 RT Base S 9 RT Strut 9 RT UPS 9 RT XLAN 9 S SBAS 50 serial number 29 Specifications 98 static IP 29 static IP address 29 status information 85 Status LED 13 T TCP IPv4 30 Trigger 1 ...

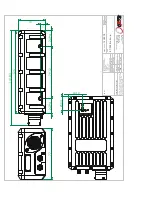
Page 106: ...NEAR 0 02 ANGULAR 0 1 DRAWN BY A3 Confidential Information The information in this document is confidential and must not be disclosed to other parties or used to build the described components without the written permission of Oxford Technical Solutions MATERIAL DRAWING NO DATE 21 06 2017 sbedford NOTES REV SHEET 1 OF 1 14A0078 RT1003 Enclosure A THIRD ANGLE PROJECTION 435 g Various 77 79 12 7 41 ...

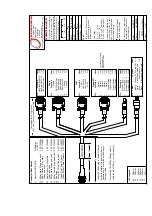
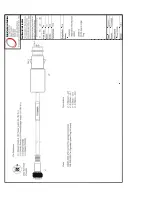
Page 107: ...wisted pair J1 14 J1 21 Twisted pair Cables outers braided and connected to J1 22 J1 shell and J7 shell through cable assembly braiding Please populate all unused pins with empty crimps Ensure that the cable legend text precisely matches that given in diagram RT1000 User Cable Tail Lengths L2 L3 L4 L5 L6 L7 300mm 300mm 300mm 300mm 300mm 300mm Pin Function Conn 1 2 3 6 Ethernet ETX Ethernet ETX Eth...

Page 108: ...Confidential Information Oxford Technical Solutions ...

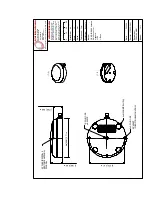
Page 109: ... the described components without the prior written consent of Oxford Te chnical Solutions Sheet 1 of 1 Document Part Date 0 10 20 30 Print Size Scale Units Tolerances Projection A4 1 1 mm 1 mm 3rd Angle Notes 21 04 16 110 00012 601 G5Ant 2AMNS1 1 2 1 2 NAME PLATE dia 68 81 2 71 in 21 96 0 86 in 10 32 UNF 2B x 0 250 DP 3x6 32 UNC 2B 90 APART FOROPTIONAL MOUNTING 62 74 2 47 in 17 30 0 68 in X YPHAS...

Page 110: ......

Reviews: