background image

OWC Mercury Pro

Device Setup

4

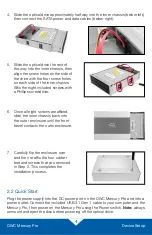
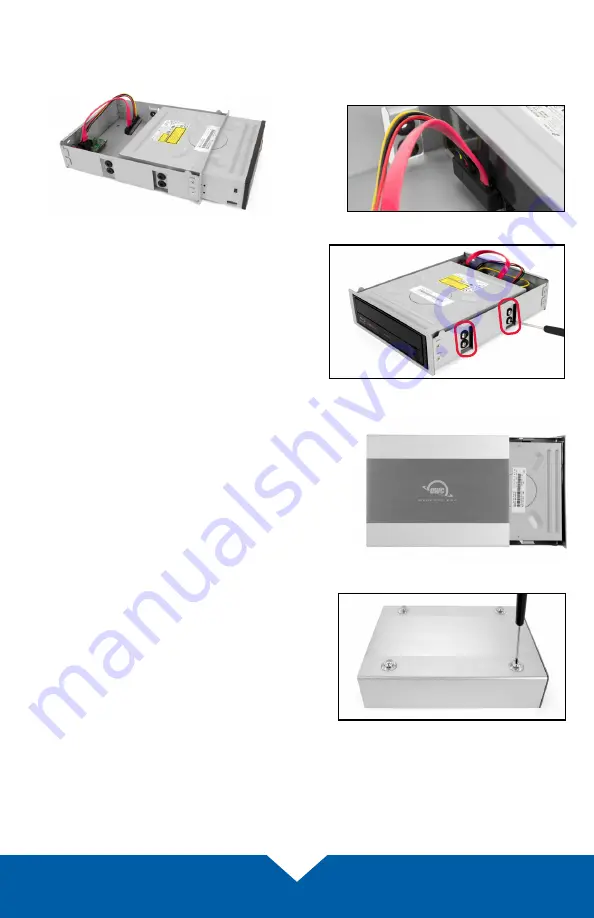
4.  Slide the optical drive approximately half way into the inner chassis (below-left), 

then connect the SATA power and data cables (below-right).

5.  Slide the optical drive the rest of 

the way into the inner chassis, then 

align the screw holes on the side of 

the drive with the four screw holes 

on each side of the inner chassis. 

Affix the eight included screws with 

a Phillips screwdriver.

6.  Once all eight screws are affixed, 

slide the inner chassis back into 

the outer enclosure until the front 

bezel contacts the outer enclosure. 

7.  Carefully flip the enclosure over 

and then re-affix the four rubber 

feet and screws that you removed 

in Step 2. This completes the 

installation process.

2.2 Quick Start

Plug the power supply into the DC power port on the OWC Mercury Pro and into a 

power outlet. Connect the included USB 3.1 Gen 1 cable to your computer and the 

Mercury Pro, then power on the Mercury Pro using the Power switch. 

Note:

 always 

unmount and eject the disc before powering off the optical drive.

Summary of Contents for Mercury Pro

Page 1: ...M E R C U R Y P R O Assembly Manual User Guide...

Page 2: ...2 PC Requirements 1 1 3 Supported Optical Drives 1 2 Package Contents 1 3 About This Manual 1 4 Front View 1 5 Rear View Device Setup 3 2 1 Installation Steps 2 2 Quick Start Support Resources 5 3 1...

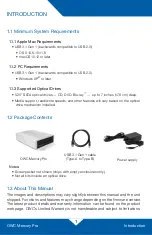
Page 3: ...r features will vary based on the optical drive mechanism installed 1 2 Package Contents Notes Screw packet not shown ships with empty enclosures only Not all kits include an optical drive 1 3 About T...

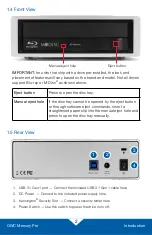
Page 4: ...hole If the disc tray cannot be opened by the eject button or through software eject commands insert a straightened paper clip into the manual eject hole and press to open the disc tray manually 1 5...

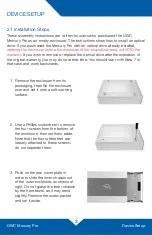
Page 5: ...he original warranty you may do so at that time You should start with Step 7 in that case and work backwards 1 Remove the enclosure from its packaging then flip the enclosure over and set it onto a so...

Page 6: ...6 Once all eight screws are affixed slide the inner chassis back into the outer enclosure until the front bezel contacts the outer enclosure 7 Carefully flip the enclosure over and then re affix the...

Page 7: ...ect the Mercury Pro to a different computer to eliminate the possibility that the problem is with the computer and not the drive or the cable If problems persist please copntact Technical Support Sect...

Page 8: ...e carefully and follow the correct procedures when setting up the device Use proper anti static precautions while performing the installation of your drives into this drive enclosure Failure to do so...

Reviews: