


07
2.1 ASSEMBLY
This section describes the process of installing drives and a PCIe card into the OWC Flex 1U4.
If you purchased the OWC Flex 1U4 with drives pre-installed, please proceed to section 2.2 Mac
Formatting. The installation video can be watched by visiting
scanning the Install Video QR Code:
Required Tools: Philips PH02 Driver
INSTALLATION
INSTALLING DRIVES
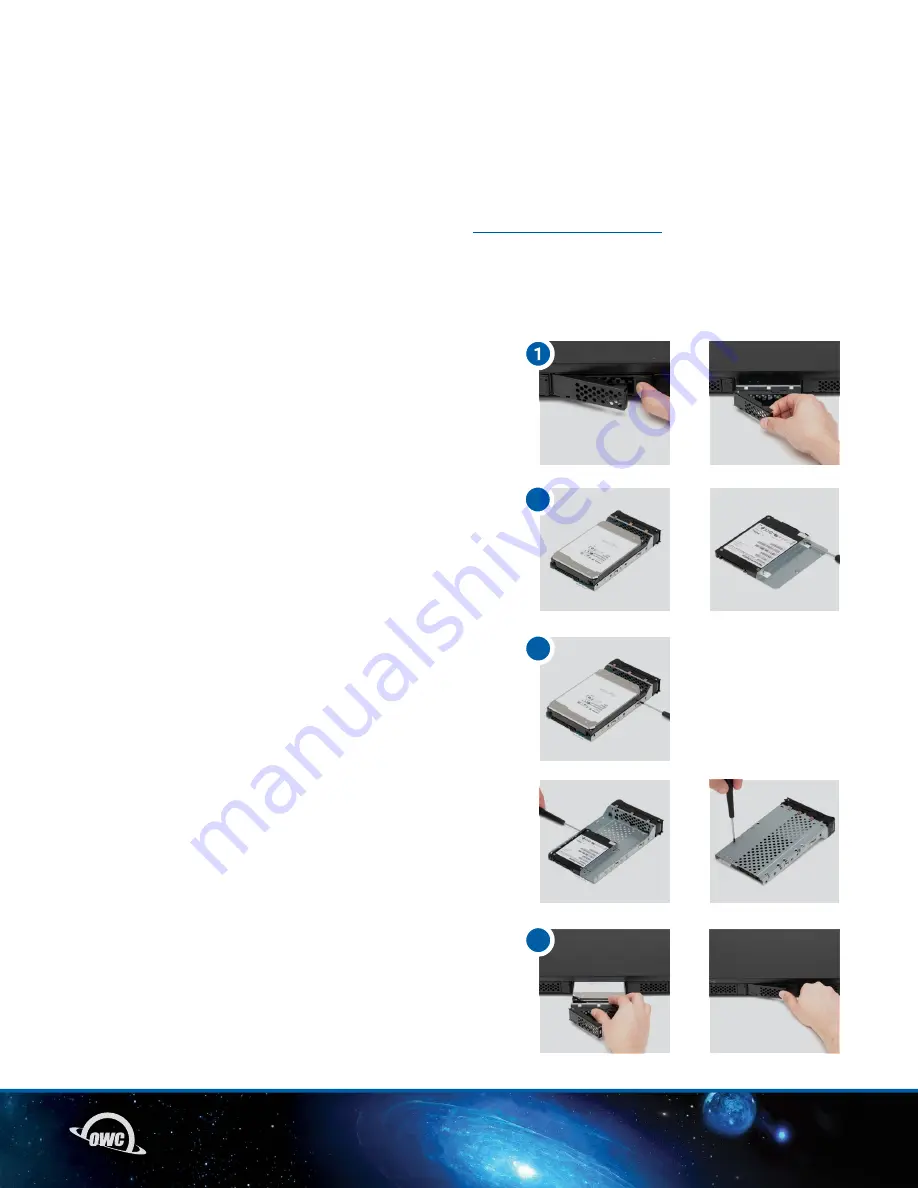
1. Disengage the drive tray by pushing the tray tab to the right.
Remove the drive tray and place on a flat surface. NOTE: The
drive trays have locking mechanisms. Ensure the locks are
not engaged before pushing the tray tabs to the right. The
lock is disengaged when the tab is in the up position.
2. Place a 3.5-inch drive into the drive tray with the label facing
upwards, connector facing the open end of the tray, and flush
with edge of the open end. NOTE: 2.5-inch drives need to be
installed with a drive spacer (included with install hardware).
3. Align the drive and tray holes, then secure with drive screws.
4. Install the drive with tray back into the chassis. Repeat
to install up to three additional drives.
-Resistance will be felt once the drive and back drive board
connections make contact. Additional force will be needed
to fully seat or connect the drive and back drive board.
This will allow the drive tray latch to engage properly.
INSTALLATION
2
3
4
3.5-inch drives
3.5-inch drives
2.5-inch drives
2.5-inch drives


