Part Number 10400120-102 06/2007
©2007 Overland Storage, Inc.
W
Page
4
of
4
Once the unit is secured in the rack and the disk drives
installed, you are ready to attach the cables that connect
the REO expansion unit to your system and power source.
Connecting to REO 4500 Appliance
1.
Using the
InfiniBand-to-MiniSAS cable
, insert the
MiniSAS plug into the In port of the expansion unit.
2.
Plug the other end of the cable into the InfiniBand port
on the
SAS card
of the REO 4500 appliance.
3.
Attach the power cords to the
AC Power
sockets on
REO 4500x back panel, but do not connect the power
cord to an AC power source.
Continue with “Configuring Your REO 4500/4500x
System” below.
Connecting to REO 4500x Expansion Unit
1.
Using the
MiniSAS-to-MiniSAS cable
, insert one of
the MiniSAS plugs into the In port of this expansion
unit.
2.
Plug the other end of the cable into the Out port on the
other REO 4500x expansion unit.
3.
Attach the power cords to the
AC Power
sockets on
REO 4500x back panel, but do not connect the power
cord to an AC power source.
Configuring Your REO 4500/4500x System
1.
Verify that the REO 4500 head unit is powered
Off
.
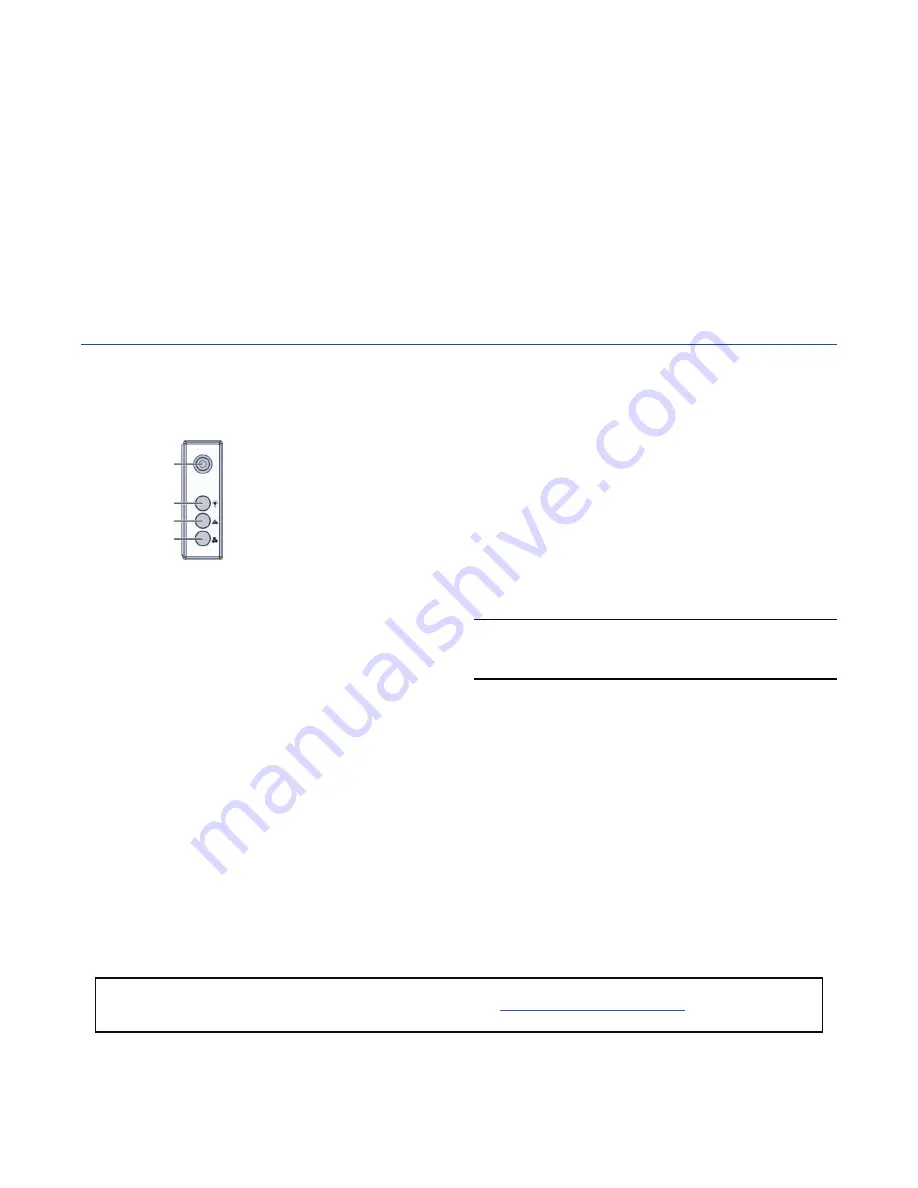
If not, use the Power button located on the front of the
unit (
) to power it off.
Figure 10. Front Panel Controls and Indicators
2.
Plug the 4500x
power cords
into an AC power source.
3.
To turn the expansion unit
ON
, press and hold the
Power button for no more than one (1) second.
After you turn the power ON, the System performs a
self-test process, which takes a couple of minutes. Wait
until all the drive LEDs are lit.
4.
Power on the
REO 4500
the same way.
5.
When both systems are powered up, log into the REO
head unit and select the
Disk Management
page from
the GUI.
The Disk Management page will display both a new
button, Add New Storage, and the new expansion
appliance information.
6.
Click the
Add New Storage
button and configure your
REO system as needed.
NOTE: See the Disk Management section in the REO 4500
Setup Guide for more details on configuring a REO system
with expansion units.
IMPORTANT:
You must leave the appliances ON while
completing the configuration process for your application
and backup servers.
All information contained in or disclosed by this document is considered proprietary by Overland Storage. By accepting this material, the recipient agrees that this material and the information contained therein are held in confidence and in trust and will not be
used, reproduced in whole or in part, nor its contents revealed to others, except to meet the purpose for which it was delivered. It is understood that no right is conveyed to reproduce or have reproduced any item herein disclosed without express permission from
Overland Storage. Overland Storage provides this document as is, without warranty of any kind, either expressed or implied, including, but not limited to, the implied warranties of merchantability and fitness for a particular purpose. Overland Storage may make
improvements or changes in the product(s) or program(s) described in this document at any time. These changes will be incorporated in new editions of this publication.
Overland Storage assumes no responsibility for the accuracy, completeness, sufficiency, or usefulness of this document, nor for any problem that might arise from the use of the information in this document.
1 - Power Button
2 - Power LED
3 - System Health LED
4 - Fan Fail LED
1
2
3
4
Additional Help
You can get additional technical support on the Internet at
http://support.overlandstorage.com
, or call
1-877-654-3429 (toll-free U.S. & Canada), +44 (0) 118-9898050 (Europe), or +1 (858) 571-5555 Option 5 (International).


