PART NO: 104331-104
1 of 2
Powering Up a REO Appliance and
Shutting It Down
(for REO 1000 and REO 4000)
Warning:
Pressing and holding the power button or switch for 4 seconds, or more, causes an immediate
hardware-shutdown that might result in the loss of data on the REO appliance if there are any active read-
, write-, or management-operations. Whenever possible, turn off the appliance using the REO GUI or the
graceful shutdown method described later in this document. If you must use the immediate hardware-
shutdown method, make sure that you first stop all host- and management-server-related activity.
Turning On a New Appliance
1
Before attaching the power cord (REO 1000) or cords (REO 4000), make sure that the disk carriers, which
contain the disk drives, are inserted in the correct slots in the chassis, and that the REO SoftKey is
inserted in a USB port.
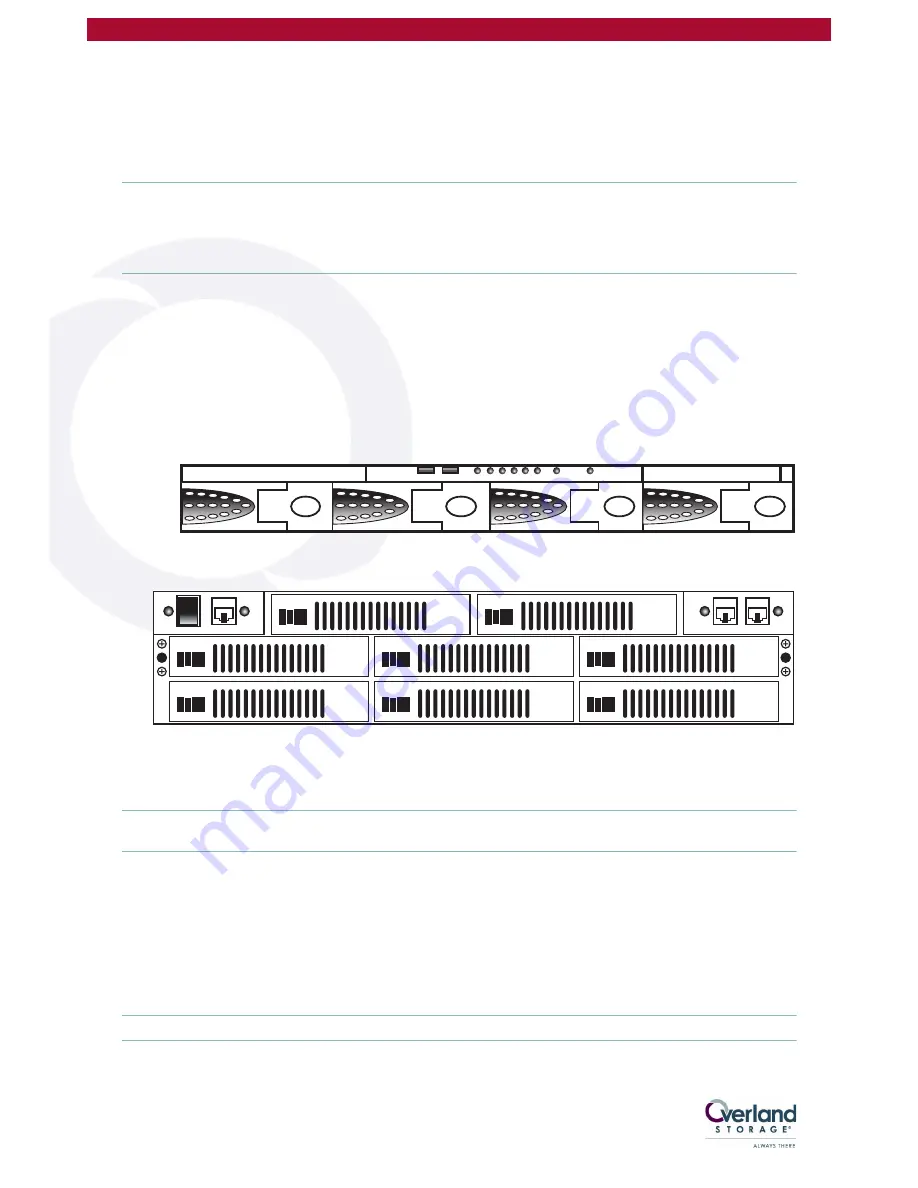
Because your appliance is preconfigured to use RAID 5 with logical volumes, it is important that the disks
remain in the correct slot (REO 4000) or that you insert them in the correct slot (REO 1000). The following
diagrams show how disk numbering is assigned.
2
After you ensure that the disks are seated correctly and the REO SoftKey is inserted in a USB port, attach
the power cord (REO 1000) or cords (REO 4000) to the REO Appliance, and plug the cord or cords in to an
AC power source, but do
not
turn the power on.
Important:
If you do not complete these steps in this order, or if power is automatically enabled on your
appliance, the appliance might start in an error state.
3
If you did not follow the preceding steps or if power was automatically enabled, shut down the appliance
before continuing with the setup process.
For details on shutting down an appliance, see the next section,
4
Using the guidelines provided in the Setup Guide, connect the Management and Data Ports.
5
For a REO 4000, connect the Fibre Channel and external SCSI ports, if applicable.
6
To turn the REO Appliance on, press and hold the power button (REO 1000) or switch (REO 4000) on the
front of the appliance for 1 second.
Important:
If you purchased multiple units, enable power to one unit only;
you must set up one unit at a time
.
REO 1000
0
1
2
3
REO 4000
0
1
2
3
4
5
6
7


