


Installation
t
2-7
S
ETTING
U
P
THE
R
ACK
M
OUNT
M
ODEL
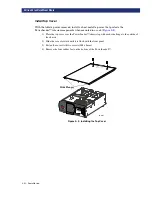
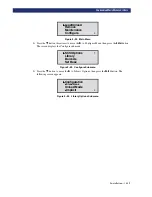
Install The Rack Slides
After you've attached the top cover, attach rack slides to both sides of the module using the
procedure outlined below. Attach each inner slide of the rack slide assembly to the module
enclosure first. Fasten each outer slide to the rack mount cabinet later.
The left and right slides are alike, so there is no risk of confusing the parts on reassembly.
1)
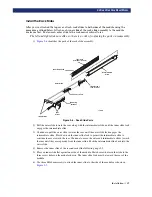
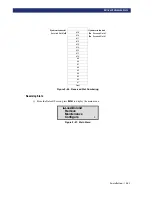
identifies the parts of the rack slide assembly.
Figure 2–6. Rack Slide Parts
2) Pull the outer slide toward the rear, along with the intermediate slide, until the inner slide lock
engages the intermediate slide.
3) Continue to pull the outer slide towards the rear until the outer slide lock engages the
intermediate slide. Press down on the inner slide lock to permit the intermediate slide to
continue to move toward the rear. Continue to move the outer and intermediate slides toward
the rear until they are separated from the inner slide. Push the intermediate slide back into the
outer slide.
4) Remove the inner slide of the second rack slide following steps 2-3.
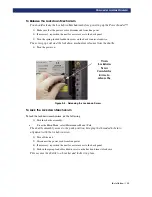
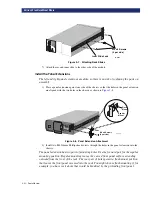
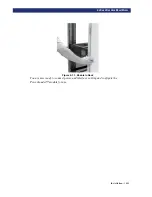
5) Place an inner slide flat against one side of the module. Match screw holes in the slide to the
three screw holes on the module chassis. The inner slide lock must be toward the rear of the
module.
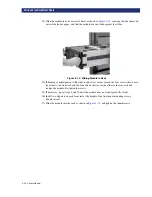
6) Use three M4x8mm screws to attach the inner slide to the side of the module as shown in
Inner Slide
(attached to module)
Inner Slide Lock
Outer Slide
Lock Tab
10-32 Screws
(Low Profile)
Intermmediate
Slide
Mounting
Bracket
Nut
Plates
10-32 Screws
LP-0013
Summary of Contents for PowerLoaders AIT-2
Page 1: ......
Page 4: ...ii u...
Page 13: ...xi LIST OF FIGURES CONT D...
Page 14: ...xii LIST OF FIGURES CONT D...
Page 16: ...xiv LIST OF TABLES CONT D...
Page 26: ...2 2 u Installation RELEASING THE LOCKDOWN MECHANISM Lockdown Screw...
Page 52: ...2 28 u Installation CONFIGURATION OPTIONS DESCRIPTION...
Page 96: ...5 18 u Troubleshooting ERROR RECOVERY...
Page 102: ...A 6 u Specifications SPECIFICATIONS...
Page 104: ...B 2 u...


