Grid-Lok
TM
Installation Manual
Panasonic CM602/402 placement machines
www.Ovation-Products.com
Page 1: ...Grid Lok TM Installation Manual Panasonic CM602 402 placement machines www Ovation Products com...
Page 2: ......
Page 3: ...necting up Connections overview 11 Locating and fitting power and air connections 12 Table up to pressure sensor on control box 13 Manifold to modules 15 Pin up and pin lock air connections to table 1...
Page 4: ...chine issues or failures subsequent to a Grid LokTM installation using this guide In all cases Ovation Products recommend the use of a properly trained engineer to complete the works The Installation...
Page 5: ...are supplied with a number of typical components required to facilitate fitting Please make sure you have identified all parts required either included with your kit or fitted to the target machine C...
Page 6: ...Tooling modules number dependant on exact kit CHAPTER 2 Kit description 4 Grid Lok Installation Manual Issue 1 Regulator kit and mounting bracket Power supply cable...
Page 7: ...PTER 2 Kit description Machine connection 8mm tube Y fitting one per machine Control box to table 4 per machine Machine connection 10mm tube T fitting to 8mm reducer one per machine Table up air press...
Page 8: ...SUPPLIES CONNECTED Before installing the equipment the target machine must be powered down and in a safe state All machine safety procedures must be followed Please ensure you are familiar with these...
Page 9: ...ntroller location Fit the Grid LokTM 411_CTL controller as follows 1 The Grid LokTM 411_CTL controller fits in the front middle compartment of the CM602 machine It is recommended to remove the front f...
Page 10: ...Grid Lok Installation Manual Issue 1 Air solenoid location Locate the air solenoid compartment on the LH side of the machine Remove door dial manifold and Digi one unit to gain easier access to CMs ai...
Page 11: ...l 9 CHAPTER 4 Locating the kit Air solenoid location Locate the air solenoid compartment on the RH side at the rear of the machine Remove door dial manifold and Digi one unit to gain easier access to...
Page 12: ...CHAPTER 4 Locating the kit 10 Grid Lok Installation Manual Issue 1 Aux power supply location Locate the Aux Power Supply on the RH side of the machine...
Page 13: ...actual Grid Lok modules are not shown for clarity see the diagram on page 12 for more details Grid Lok TM 411_CTL Multi Table Control Unit Operator Interface Plug In Power Supply Pneumatic Trigger Inp...
Page 14: ...Locate the Pneumatics chamber using the 8mm tube and Y connection supplied remove the tube from the Machine regulator and replace with tube provided connecting the Machine regulator to the Grid Lok r...
Page 15: ...the assembled Y connection Connect the line removed from valve 8 to the 6mm open connection connect provided 4mm airline to 4mm adapter Connect the other end of 4mm line to the Control Box located in...
Page 16: ...Connecting up Locating and fitting pneumatic connectors Table up to pressure sensor on control box Connect the 4mm tubes from the table up air valves to the control box as shown below Pressure sensor...
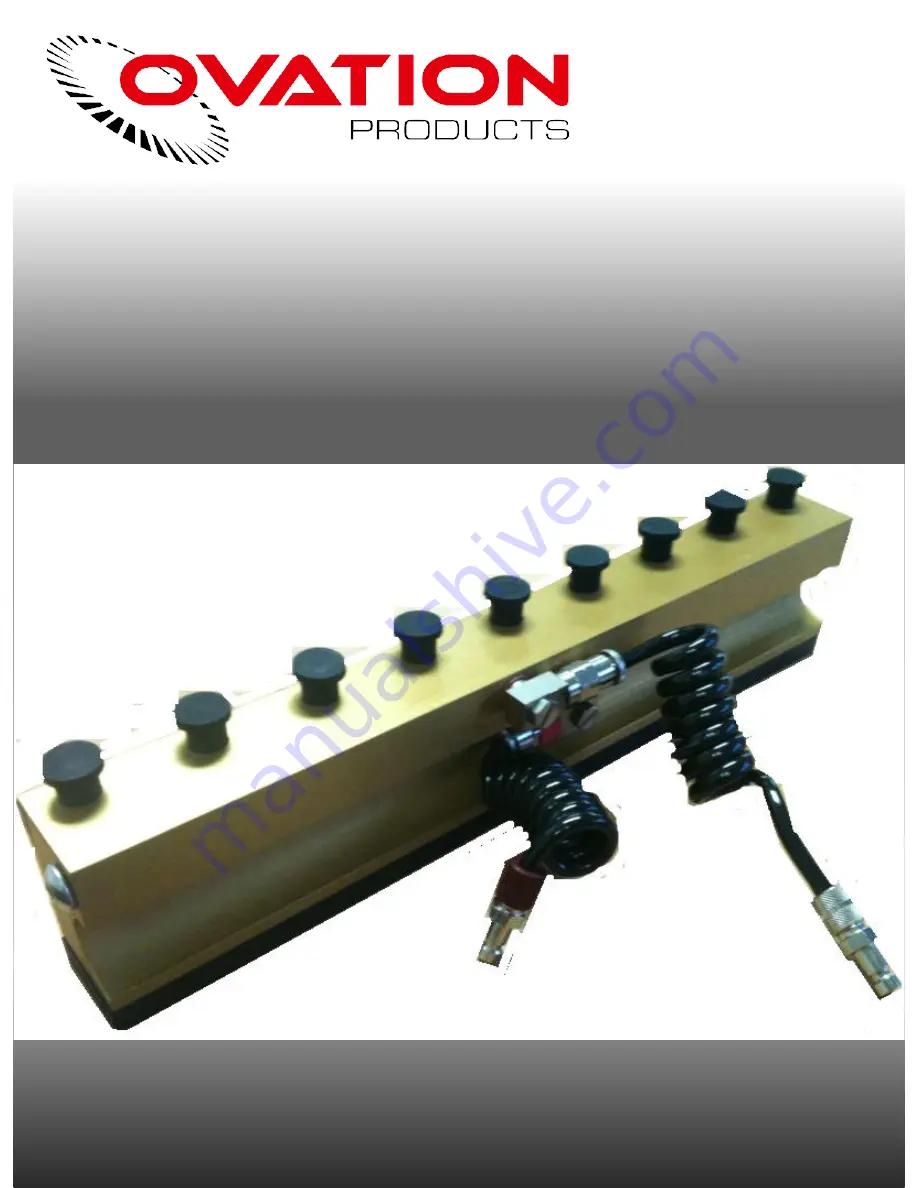
Page 17: ...Grid LokTM kit 2 Ensure that the Distribution bar Air connections are at the back when sliding the table into the machine 3 Once the tables are in the machine connect the tooling modules using 4mm pne...
Page 18: ...From the control Box feed the 4mm twin tube to each designated table Connect the tube with the grey strip to the Red distribution bar and the plain black tube to the silver distribution bar Table LH s...
Page 19: ...interface comprises four toggle switches Set Reset To raise and lower the tooling pins in semi automatic mode Auto Manual Automatic or Semi Automatic mode NOTE The Set Reset switches are disabled if...
Page 20: ...ir control regulator one turn anti clockwise 5 Press the Set button on the operator interface 6 If all the pins on the tooling modules do not raise fully press the Reset button on the operator interfa...
Page 21: ...p timing air control regulator use the following procedure 1 Remove the cover from the 411_CTL control Box 2 Locate the 4 Control Boards 3 Adjust the potentiometer labeled D1 D2 D3 and D4 in the pictu...
Page 22: ...CHAPTER 8 Technical reference 20 Grid Lok Installation Manual Issue 1 NOTE Preventive Maintenance Tasks are the only authorized maintenance tasks that may be carried out on the Grid Lok tooling system...
Page 23: ...CHAPTER 8 Technical reference Issue 1 Grid Lok Installation Manual 21...
Page 24: ...CHAPTER 9 Contacts Grid Lok Installation Manual Issue 1 22...
Page 25: ......
Page 26: ...Grid Lok TM Installation Manual www Ovation Products com...