04
03
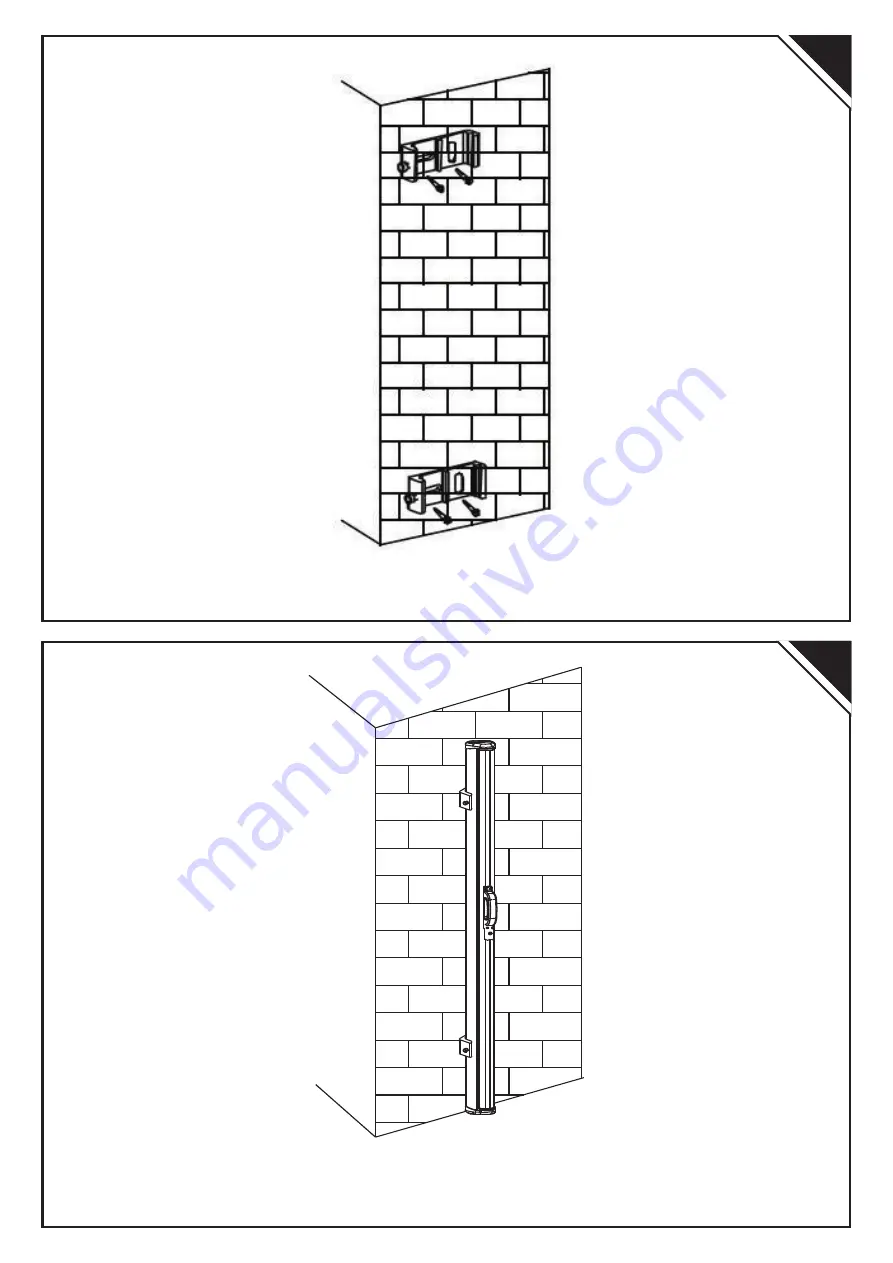
3.Fix the bracket with M6x60 hexagon tapping bolt
4.Insert the cassette part into the bracket, tighten the flat fillister head screw M6x16mm with Hexagonal spanner CR-V5mm
Page 1: ...ASSEMBLY INSTRUCTION MANUAL READ AND SAVE THIS INSTRUCTIONS FOR FUTURE USE INboc021_US_UK 840 232 Assembly video please scan the QR code Tools Recommended...
Page 2: ...I S T M8 75 M6 M8 M6 40 H 4 G 4 F 4 E 4 D 8 C 2 B 1 A 1 Warning When mounting the awning keep the cassette part and stand column on the horizon or the fabric will deformation and dif cult to open and...
Page 3: ...02 01 1 Drill 6cm deep holes in the size as the following picture shows 2 Insert one 10x50mm plastic expansion tube in each of holes...
Page 4: ...04 03 3 Fix the bracket with M6x60 hexagon tapping bolt 4 Insert the cassette part into the bracket tighten the at llister head screw M6x16mm with Hexagonal spanner CR V5mm...
Page 5: ...06 05 5 Drill four 10mm diameter holes on the oor in the size as the following picture shows 6 sert one 10x50 mm plastic expansion tube 4pcs in each of holes...
Page 6: ...tapping bolt 1 Keep the front bar upright hold the handle and pull it over the column Hold the handle tightly rotate it 90 degrees align the side of the front rod with the groove of the column and pu...
Page 7: ...09 2 Before closing pull it out rst then rotate it 90 degrees to make the side of side bar align with the groove and then close it slowly D o n e...
Page 8: ......