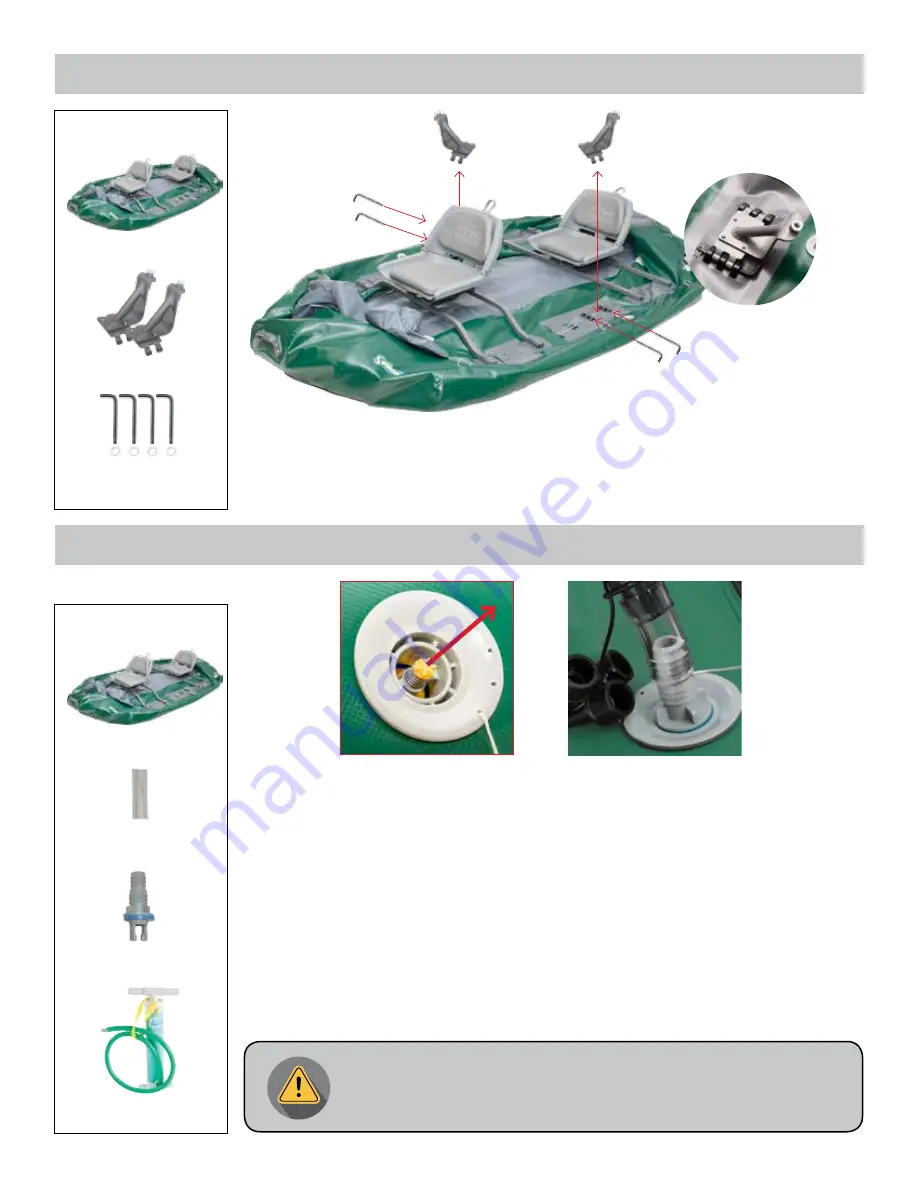
Items needed:
Items needed:
4 - L-pins
with split-rings
1. Insert the oar stands in between the knuckles.
2. Lock into place with the L-pins.
3. Secure the L-pins with the split-rings.
4. (NOTE: the knuckles can be moved forward to fine tune the position of the oars for the best fit.)
1. Remove the dust caps from the valves
2. Push and turn the valve stem 1/4 turn. This positions the valve stem in the up or
closed
position. Having the valve stem in the
closed
position allows air to be pumped into the rafts
and will prevent air from escaping out.
3. Connect the vinyl tube adapter to the pump hose.
4. Connect the Summit 2 valve adapter to the vinyl tube.
5. Insert the Summit 2 valve adapter into the valve and turn it to lock it into place.
6. Inflate the raft collar, floor, and lean bar to soft pressure.
7. Inflate the raft collar, floor, and lean bar to full pressure, about 2.5 psi. A good rule for
estimating the proper pressure is to push with your thumb at the center of the tube, when you
can depress about 1/2” from the top surface of the tube, it will be close to 2.5 psi.
8. Place dust caps on the valves.
Changes in air temperature and elevation could cause the air inside the raft to expand
which could cause damage to the AIREcells.
Never leave your fully inflated raft sitting in direct sun light out of the water.
Always release some air when these conditions occur.
Step 7: Install the Oar Stands
Step 8: Inflate the Striker
Striker with frames
Striker with frames
Vinyl tube valve adapter
Summit 2 valve adapter
Hand, foot or electric pump
designed for inflatable boats
2 - Oar Stands


