6.9 Adjusting the anti-tipper
WARNING
Incorrect installation of the anti-tipper/missing anti-tipper
Tipping over, falling of the user due to failure to observe the installation instructions and because of incorrect
adjustment
►
Depending upon the settings of the chassis, the centre of gravity, the back angle and the experience of the
user, the use of an anti-tipper may be necessary.
►
For a small wheelbase and a backrest that is tilted far back, an anti-tipper may need to be installed on both
sides, depending upon the user's experience.
►
Verify that the anti-tipper has been installed and adjusted properly. Find the appropriate position with the
assistance of a helper.
INFORMATION
In order to adjust the anti-tipper correctly, it may be necessary to combine the steps to adjust the length and
angle.
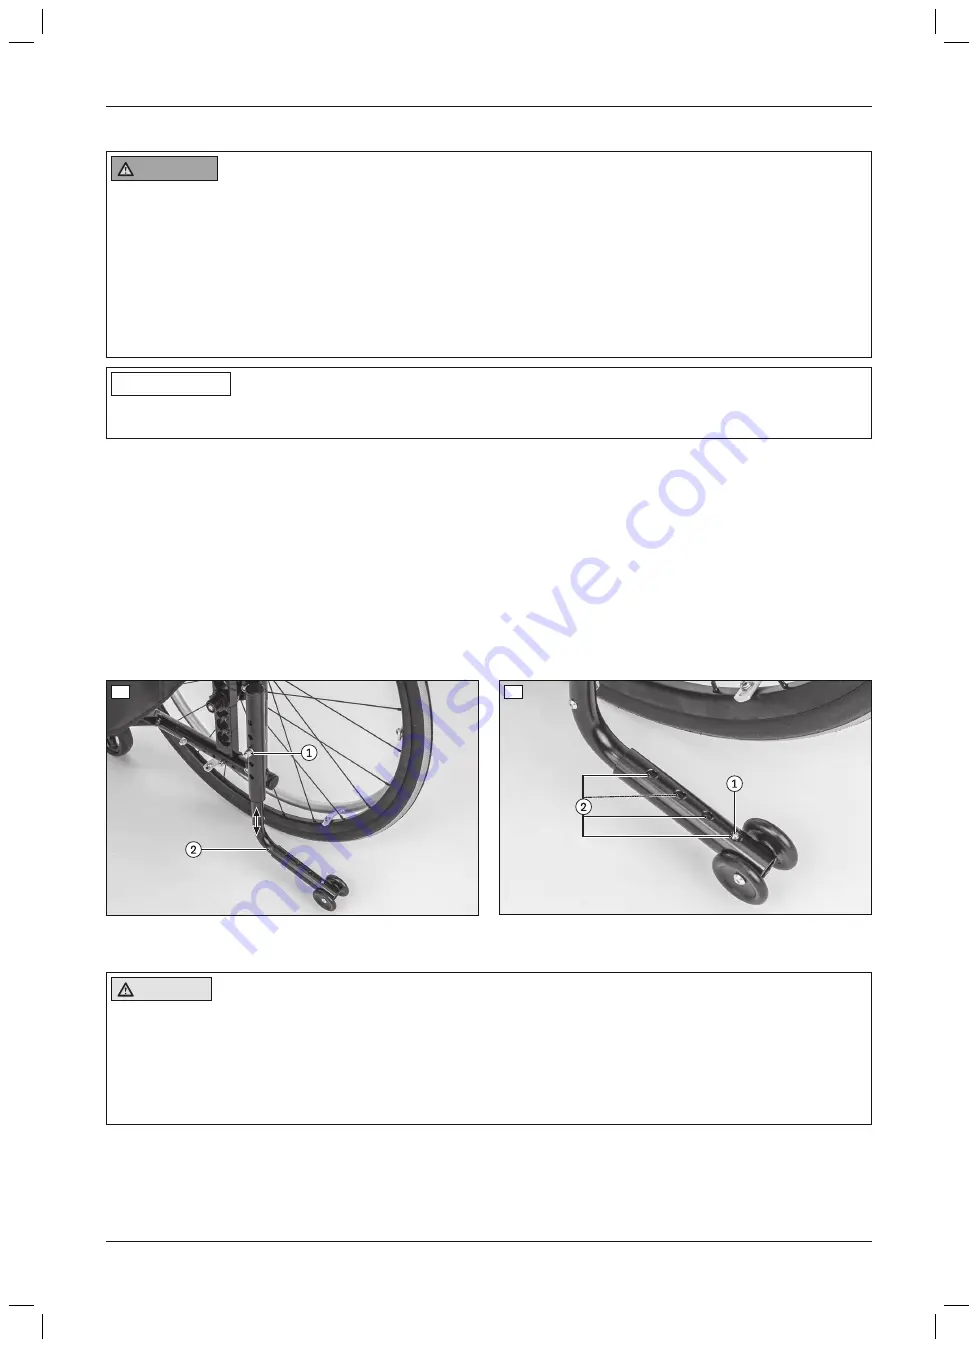
Adjusting the height of the anti-tipper
1) Remove the Allen screw between the anti-tipper tube and the adapter tube (see fig. 69, item 1).
2) Adjust the height of the anti-tipper by sliding it in the adapter tube (see fig. 69, item 2).
→
The distance between the anti-tipper rollers and the ground must be
50 mm
max.
3) Tighten the Allen screw to
7 Nm
.
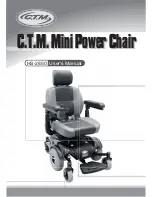
Adjusting the length of the anti-tipper
1) Press the push-button on the lower tube section of the anti-tipper (see fig. 70, item 1).
2) Adjust the length of the anti-tipper (see fig. 70, item 2):
→
As a minimum, the anti-tipper rollers must project fully beyond the largest diameter of the drive wheel.
3) Allow the push-button to engage.
69
70
6.10 Adjusting the lap belt
CAUTION
Incorrect approach to the adjustment process
Injuries, malpositions, user discomfort due to adjustment errors
►
The qualified personnel is responsible for the individual positioning and fitting of the belt system.
►
Adjusting the belt system too tightly may lead to unnecessary pain or user discomfort.
►
Adjusting the belt system too loosely can cause the user to slide into a dangerous position. In addition, the
fastening snaps could open unintentionally if they slide against hard parts of clothing (e.g. buttons).
29
Motus CV, Motus CS
Settings


