23
PRO Controller Keypad
Soft Keys are used to navigate between the PRO Controller Setting and Operating Screens. Pressing the leftmost and
rightmost keys (Fig. 37, Pos. B, page 21) moves between the various Setting Screens. Pressing the central two keys
moves to the Operating Screen. A Special Key Sequence is required to get out of the Operating Screen and back to the
Setting Screens.
Direction Keys (Fig. 37, Pos. C, page 21) allow the user to move a Cursor (Fig. 38, page 22), up, down, left and right
to various sections of the screen. The Cursor places a box or otherwise highlights the functions over which it is placed.
The Direction Keys are also used to input a Key Sequence to take the PRO Controller out of Operating Mode and into
Settings Mode.
The Select Key (Fig. 37, Pos. D, page 21) selects or deselects a setting function (Fig. 38, page 22) and opens up a
setting window or slider bar so that changes can be made (Fig. 39, page 22).
The Start/Stop Button starts and stops the CPM Device when in Setting or Operating Mode (Fig. 37, Pos. E, page 21).
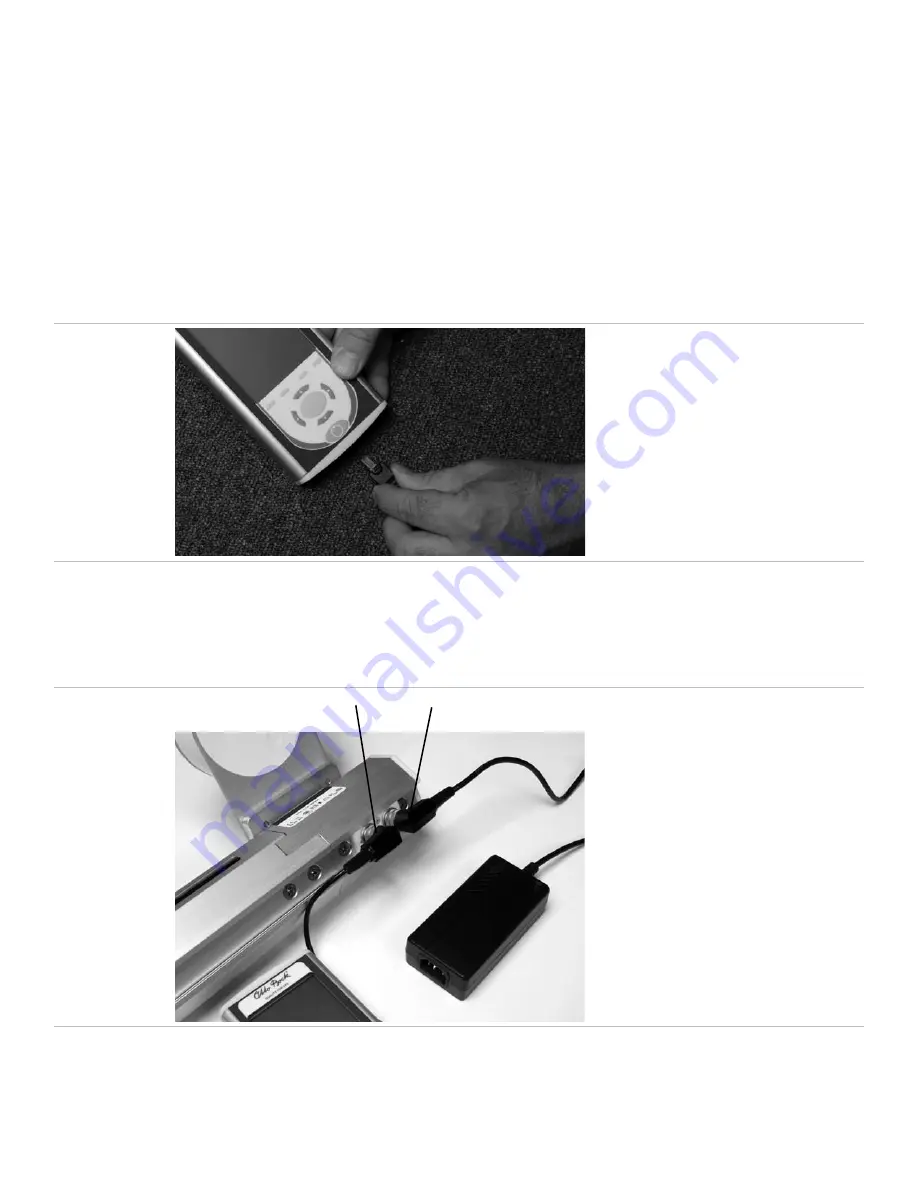
Fig. 40
Connecting the
Pendant Cable to
the pendant.
6.2.2 Connecting the PRO Controller to the CPM Device
Note:
Make sure the CPM system is unplugged and turned off when connecting the Pendant Cable.
If it is not already connected, plug the small connector side of the Cable into the bottom of the ProController. To disconnect
the Pendant cable from the PRO Controller, place a small flat screwdriver into the end of the PRO Controller, between the
connector lever and the Pendant chassis, and gently depress the lever to release the cable lock while pulling on the cable.
Fig. 41
å
ç
Connecting the
Pendant Cable to a
CPM device.
To connect the PRO Controller to the CPM device, simply attach the cable with three prong connector to the socket located
on the base of the CPM Device (Fig. 41, Pos. 1). The cable can only be plugged in one way. Screw the locking collar in
place . If it is not already attached, connect the power adaptor cable to the socket located in the base unit (Fig. 41, Pos. 2).
Connect the other end to the power adaptor and plug the adaptor into the wall socket. Turn on the system via the power
switch located on the base unit.
Summary of Contents for 7000P
Page 41: ...39 ...


