background image

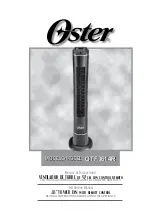
A. LCD Display Panel

B. Power button

C. Speed  Button 

D. Timer Button      

E. Sleep/Breeze Mode Button        

F. Oscillation Button

G. Speed Setting Indicator Lights

Figure 3

C

B

F

E

D

A

B

E

D

F

C

G

A

B

E

D

F

C

G

OTF3614R-LA051

OTF3614R-LA013

(SEE FIGURE 3)

1.   Plug the cord into a standard outlet. 
2.   To turn the fan on, press the power button ( ) located on the control panel or remote control.  
3.   Press the speed button ( ) to cycle through the speed settings in sequence. The corresponding 

indicator light will illuminate to confirm the selection:

4.   To turn the oscillation on and off, press the oscillation button (

) located on the control panel or 

remote control. The oscillation icon (

) will illuminate on the LCD display.

5.   To set your fan to automatically shut off, press the timer button ( ) located on the control panel or 

the remote control. When set, the fan will run and automatically shut off after the set duration of 

time (1-8 hours) has expired. 

6.   To activate the breeze mode ( ), press the sleep/breeze mode button (

  ) located on the 

control panel or remote control. When turned on, the fan will randomly cycle through the speed 

settings, recreating a natural outdoor breeze. To activate sleep mode (

), press the mode button 

again. This function slows the fan speed down, and when used in conjunction with the timer 

settings, will ultimately turn the fan off.

7.   To turn the fan off press the power button ( ) located on the control panel or remote control.

NOTE: Your fan features a LCD display panel. When a specific feature is activated on your fan, the 

LCD panel will illuminate with the corresponding icons showing which features have been activated.

OPERATING INSTRUCTIONS

7

Summary of Contents for OTF3614R

Page 1: ...NTILADOR DE TORRE de 97 cm con control remoto LEA TODAS LAS INSTRUCCIONES ANTES DE USAR ESTE ARTEFACTO Instruction Manual 38 TOWER FAN with remote control READ ALL INSTRUCTIONS BEFORE USING THIS APPLI...

Page 2: ...o cualquier otro da o Ll velo a un Centro de Servicio Autorizado para su inspecci n o reparaci n El uso de aditamentos no recomendados o vendidos por el fabricante del artefacto el ctrico puede ocasio...

Page 3: ...a base alrededor del cable de alimentaci n Para fijar las mitades de la base entre s deslice los postes de una mitad de base dentro de las ranuras de la segunda mitad de base Consulte la Figura 2 2 Al...

Page 4: ...bot n de modo Reposo Brisa ubicado en el panel de control o el control remoto Cuando est activado el ventilador alternar aleatoriamente los ajustes de velocidad a fin de recrear una brisa exterior na...

Page 5: ...ado Retire inmediatamente la bater a usada LIMPIEZA Y MANTENIMIENTO Siga estas instrucciones para cuidar correctamente con seguridad de su ventilador Oster Recuerde hacer lo siguiente Desenchufar siem...

Page 6: ...manner Take it to an Authorized Service Center for its examination and or repair The use of attachments not recommended or sold by the appliance manufacturer may cause hazards Do not use outdoors Do n...

Page 7: ...e half into the slots of the second base half Refer to Figure 2 2 Line up the screws holes of the base halves with the holes located on the bottom of the fan housing Secure with the six screws include...

Page 8: ...tomatically shut off press the timer button located on the control panel or the remote control When set the fan will run and automatically shut off after the set duration of time 1 8 hours has expired...

Page 9: ...t being used for an extended period of time Remove the used battery promptly CLEANING AND MAINTENANCE Follow these instructions to correctly and safely care for your Oster fan Please remember Always u...

Page 10: ...wing information is intended for Mexico only Caracter sticas el ctricas de los modelos de la serie Electric characteristics of series models Voltaje Voltage Frecuencia Frequency Potencia Power 120 V 6...

Reviews: