Toaster
Seven Toast
Food Select Buttons
Model
Color
Shade Settings
(Frozen, Warm, Bagel, Pastry & Waffle)
6240
White with Gray Accents
Yes
Yes
6243
White with Silver Accents;
Yes
Yes
Oster Badge
6241
White with Gray Accents
Yes
No
6244
White with Silver Accents;
Yes
No
Oster Badge
6245
Black with Silver Accents;
Yes
No
6246
Black with Silver Accents;
Yes
No
Oster Badge
–––
F
OLD
–––
English-1
IMPORTANT SAFEGUARDS
When using your toaster, basic safety precautions should always be followed, including the following:
READ ALL INSTRUCTIONS BEFORE USE
• Unplug toaster from outlet when not in use and before cleaning.
• Do not touch hot surfaces. Metal parts can become hot. Use handles or knobs.
• To protect against electrical hazards, do not immerse cord, plug or toaster in water or other liquids.
• Do not let cord hang over edge of table or counter or touch hot surfaces.
• Never leave appliance unattended when in use.
• Young children or incapacitated persons should not use this appliance. Supervise older children closely.
• Do not operate or place the toaster:
– On non-heat-resistant or flammable surfaces.
– Near a hot gas stove flame or electric element.
– In a heated oven or microwave oven.
• To reduce the risk of fire or electric shock, do not insert:
– Utensils or foil-covered or oversized foods into the toaster.
– Fingers or metallic utensils into slots when toaster is plugged in.
• Do not attempt to dislodge food when toaster is plugged in.
• Do not use foods that will drip coatings or fillings when heated. Such accumulations inside the toaster
create unsanitary conditions and the possibility of fire or toaster malfunction. Clean out accumulated
crumbs frequently to avoid risk of fire or toaster malfunction. Do not operate the toaster without the
crumb tray being replaced in its correct position.
• Do not operate any appliance with a damaged cord or plug or after the appliance has malfunctioned
or has been damaged in any manner. Return the toaster to the nearest Authorized Sunbeam Appliance
Service Center for examination, repair or electrical or mechanical adjustment.
• Do not use the toaster outdoors or for commercial purposes; this appliance is for household use only.
• Use this appliance only for its intended use as described in this manual. Do not use attachments that are
not recommended by the manufacturer; they may cause injury.
• A fire may occur if toasters are covered or touching flammable material, including curtains, draperies, walls
and the like when in operation.
• Toast lift lever must be in the normal up position before attaching or disconnecting the plug from the wall outlet.
SAVE THESE INSTRUCTIONS
Power Cord Instructions
Please follow the instructions below to ensure the safe use of the power cord.
• This toaster has a power cord area that allows you to adjust the length of the cord so that it is the
appropriate length for your situation. Try to position the toaster near the power source to reduce the
hazards associated with power cords
(such as becoming entangled or tripping over a long power cord)
.
• You may use an extension cord, if necessary, but be certain to follow these guidelines:
– The marked electrical rating of the extension cord must be at least 120/127 volt, 60 Hz.
– The extension cord must be arranged so that it will not drape over the countertop or tabletop,
will not be within the reach of children and will not be tripped over.
• For toasters purchased in the U.S. and Canada: This appliance has a polarized plug
(one blade is wider
than the other)
. To reduce the risk of electric shock, this plug will fit into a polarized plug in only one
way. If you cannot completely insert the power plug into the power outlet, reverse the direction of the
plug. If it still does not fit, contact a qualified electrician. Do not modify the plug in any way.
• Do not pull, twist or otherwise abuse the power cord.
• Do not operate any electrical appliance with a damaged cord or plug or after the appliance malfunctions
or has been dropped or damaged in any manner.
• Unplug the toaster when it is not in use and before cleaning.
• Do not wrap the power cord around the main body of the toaster during or after use.
English-5
English-4
Using the Seven Toast Shade Dial
You can adjust how light or dark the toaster toasts your food. The lightest setting is 1; the darkest
setting is 7. Your selection should vary based on the moisture content, thickness of bread and your
darkness preference.
To select the darkness setting:
Turn the Lighter/Darker knob to the setting you desire.
As you adjust the setting, the Lighter/Darker indicator light changes.
This TOAST WATCH
™
conrol offers a precise visual and audible indication
of your toasting progress.
(Models 6240 & 6243 only)
Using the Frozen Food Feature
Your toaster can defrost your frozen food and then toast it. Now you can
take a frozen bagel out of the freezer and defrost and toast it – all in your
toaster – all in one easy step.
(Models 6240 & 6243 only)
To defrost and toast your food:
1.
Press the Frozen button if the food is frozen, then select your food type.
Toast is the default setting.
The Frozen indicator will light.
2.
Press the bread carriage lever down to begin the cycle.
Using the Warm Food Feature
Will your toasted food be ready before you are ready to eat it? This feature
will allow you to warm your toasted food.
(Models 6240 & 6243 only)
To warm toasted food:
1.
Press the Warm button.
The Warm indicator will light.
2.
Press the bread carriage lever down to begin the cycle. The toaster will
warm up your food.
Using the Food Select Feature
(Bagel, Pastry, Waffle)
(Models 6240 & 6243)
Your OSTER
®
Toaster will adjust the light/dark range based upon the type of food you are toasting.
You must select which type of food you are toasting so that the toaster can adjust accordingly.
To select the food type:
Choose between the Bagel, Pastry or Waffle mode.
• If you would like to toast bread, make certain that the Bagel, Pastry or Waffle
indicators are not lit. If they are unlit, then the toaster is set to toast bread.
If either indicator is lit, press the corresponding button to deselect the food type
and then the toaster will be set to toast bread. Toast is the default setting.
• Press the Bagel button if you are going to toast a bagel. The Bagel indicator
will light. Bagel setting adjusts the temperature for bread thickness.
• Press the Pastry button if you are going to toast a pastry.
The Pastry indicator will light. Pastry setting warms inside to perfection.
• Press the Waffle button if you are going to toast a waffle.
The Waffle indicator will light. This function toasts waffles evenly.
Using the Cancel Function
To cancel the toast process:
Press the Cancel button. The toaster will stop toasting immediately and the food
will pop up automatically. The toaster will chime for Models 6240 & 6243.
English-6
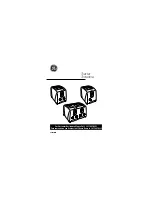
User Manual
2-Slice Toaster
Manual de Instruccione
s
Horno de 2 Rebanadas
Manuel d’Instruction
s
Grille-Pain de 2 Tranches
MODELS/MODELOS
MODÈLES
Español-1
Español-3
Español-4
PRECAUCIONES IMPORT
ANTES
Obedezca siempre las precauciones elementales de seguridad cuando vaya a hacer
uso de su tostadora, incluyendo las siguientes:
LEA TODAS LAS INSTRUCCIONES ANTES DEL USO
•
Desenchufe la tostadora del tomacorrientes cuando no se encuentre enservicio y antes
delimpiarla.
•
No toque las superficies calientes. Las piezas de metal pueden volverse calientes. Utilicelas
asideras
olas
perillas.
•
Para evitar los peligros eléctricos, no sumerja el cordón, el enchufe nila tostadora en sí en agua
ocualquier otro líquido.
•
No permita que el cordón cuelgue sobre el borde de la mesa o del mostrador, ni que entre
encontacto con las superficies calientes.
•
Jamás permita que los enseres queden desatendidos durante el uso.
•
Los niños y las personas incapacitadas no deben hacer uso de estos enseres.
Supervisecuidadosamente a
los niños de mayor edad.
•
No opere ni coloque la tostadora:
–
Sobre superficies que no sean termorresistentes ni inflamables.
–
Cerca de las llamas de una estufa de gas o elemento eléctrico.
–
Dentro de un horno calentado o microondas.
•
Para reducir el riesgo de los incendios o los choques eléctricos, noinserte:
–
Utensilios ni alimentos cubiertos en papel aluminio, ni de grandes dimensiones, en la tostadora.
–
Los dedos ni utensilios de metal en la tostadora cuando el aparato se encuentre enchufado.
•
No intente desalojar alimentos cuando la tostadora esté enchufada.
•
No utilice alimentos cuyas cubiertas o rellenos puedan gotear a consecuencia del calentamiento.
Tales acumulaciones dentro de la tostadora crean condiciones poco sanitarias así como la
posibilidad deincendios o malfuncionamientos de la tostadora. Elimine con frecuencia las migas
acumuladas para evitar el riesgo de incendios o elmalfuncionamiento del tostadora. No opere
latostadora sin haber antes devuelto la bandeja para migas a su posición correcta.
•
No opere ningún aparato que tenga un cordón o enchufe dañado, odespués de que se haya
producido un malfuncionamiento en el aparato o que haya sido dañado en cualquier forma.
Devuelva la tostadora al centro de servicio autorizado de Sunbeam para su inspección, ajuste,
reparación o cualquier ajuste electromecánico.
•
No utilice la tostadora a la intemperie o para usos comerciales: estatostadora es para el uso
doméstico exclusivamente.
•
Sólo utilice este aparato para su uso original conforme a lo descrito en este manual; no utilice
aditamentos que no hayan sido recomendados por el fabricante, ya que pueden producir
lesionamientos.
•
Puede producirse un incendio si se cubre la tostadora o si entra en contacto con material inflamable,
incluyendo cortinas, tapicería, paredesy afines mientras que se encuentre funcionando.
•
El mando elevador de tostadas debe estar en la posición elevada antesde
conectar odesconectar el
enchufe de la pared.
GUARDE ESTAS INSTRUCCIONES
Instrucciones para el Cordón de Potencia
Obedezca las siguientes instrucciones para asegurar el uso correcto del cordón depotencia.
•
Esta tostadora cuenta con una zona de cordón de potencia que le permite ajustarlo a la longitud correcta
para su situación. Trate de colocar la tostadora cerca del tomacorrientes apropiado para disminuir
losriesgos asociados con los
cordones de potencia
(tales como enredarse con un cordón de potencia
delongitud excesiva o tropezarse sobre él)
.
•
Si resulta necesario, se puede hacer uso de una extensión eléctrica, peroasegúrese
de seguir estas
direcciones:
–
La notación eléctrica de la extensión eléctrica debe ser de un mínimo de120/127 voltios, 60 Hz.
–
La extensión eléctrica debe estar colocada de tal manera que no se envuelva sobre el mostrador
ola
superficie de la mesa, ni que tampoco quede alalcance
de los niños, ni que tampoco pueda
tropezarse sobre ella.
•
Para los tostadoraes cuya compra se efectúa en EE.UU. y el Canadá: esteaparato cuenta con un enchufe
polarizado
(una hoja es mas ancha quela
otra)
. Paradisminuir el riesgo de los choques eléctricos, dicho
enchufe se adaptará au
ntomacorrientes polarizado de una manera solamente. Si
nopuede insertar
elenchufe en el tomacorrientes completamente, invierta la dirección del
enchufe. Siaún no cabe,
comuníquese conun
electricista experto. Nomodifique el enchufe.
•
No tire, tuerza ni abuse el cordón de potencia.
•
No opere ningún aparato eléctrico que tenga un cordón o enchufe dañado, nidespués de que se haya
producido el malfuncionamiento dela
unidad, nique
se
haya caído o dañado en cualquier manera.
•
Desenchufe la tostadora cuando ésta no se encuentre en uso y antes delimpiarla.
•
No envuelva el cordón de potencia alrededor del cuerpo de la tostadora nidurante ni después del uso.
Bienvenido
¡Felicitaciones por haber efectuado la compra de una tostadora OSTER
®
!Su tostador
tiene La Tecnología TOAST LOGIC
®
que le brinda un rendimiento consistente yr
epetible
altostar
. Esto significa que sus tostadas quedarán justo como legustan,
rebanadatras
rebanada y día tras día.
Español-2
Conociendo Su Tostador
1.Selector y Piloto de T
ostadora–
Gire la perilla para seleccionar elgrado al cual le
gustaría
tostar sus alimentos: el número uno esel más ligero, y el número siete es
elmás oscuro.
2.Luz indicadora de Claro/Oscuro
(Sólo Modelos 6240 y 6243)
– Elpiloto de
claro/ oscuro
se iluminara sobre la fijación seleccionada.
3.Botón y Piloto para Congelados
(Sólo Modelos 6240 y 6243)
– Presione este botón sisus
alimentos están congelados y luego seleccione su tipo de pan. La tostadora
automáticamente descongelará su alimento y lo
tostará en un solo paso fácil.
4.Botón de Calentamiento y Piloto
(Sólo Modelos 6240 y 6243)
– Presione este botón
paramantener sus alimentos tostados calientes sin la necesidad
de tostarlos adicionalmente.
Elpiloto se encenderá para confirmar su
selección.
5.Botón y Piloto para “Bagels”
(Sólo Modelos 6240 y 6243)
– Presione este botón si
desea
tostar un“bagel”. El
piloto se encenderá para confirmar la seleccion delmodo “bagel” .
Lafijación por
omisión es “tostadas”.
6.Botón y Piloto de Pastelería
(Sólo Modelos 6240 y 6243)
– Presione este botón
sidesea
tostar pastelería. Elpiloto se encenderá para confirmar la seleccion del
modo
depastelería. La
fijación por omisión es “tostadas”.
7.Botón y Piloto de W
affles
(Sólo Modelos 6240 y 6243)
– Presione este botón sidesea
tostar Waffles. El
pilotose
encenderá para confirmar la seleccion delmodo de W
affles.
Lafijación
por omisión es “tostadas”.
8.Superficie Antiadherente Sobre las Ranuras –
Facilitar laLimpieza.
9.Ranuras –
Las ranuras anchas (1.3 pulgadas) le permiten tostar “bagels”, pancasero,
bollitos y pastelería.
10.Guías para Rebanadas Dobles, Autonivelantes, Hechas de Acero Inoxidable –
Seajustan
automáticamente al grosor del pan.
11.Botón de Anulación –
Presiónelo para hacer saltar los alimentos dela
tostadora ycancelar
el proceso de tostado.
12.Mando de Resistencias del Pan –
Presiónelo para empezar atostar sus alimentos.
13.Elevador de T
ostadas –
Presione el mando de resistencias del pan para hacer saltar
losalimentos fuera de la tostadora.
14.Bandeja para Migas Plenamente Desmontable
– Para la limpieza conveniente y fácil
15.Almacenamiento para el Cordón –
Le permite almacenar un cordón adicional
debajod
el
atostadora y fuera del paso.
16.Cordón de Potencia
17.Un Exterior COOL-TOUCH™
que mantiene la superficie de la tostadora fría altacto
aúndurante el uso.
Preparándose para Usar Su Tostador por Primera V
ez
Si va a utilizar su tostadora por primera vez, asegúrese delo siguiente:
1.
Quite cualquier pegatina de la superficie de latostadora
ylimpie
lacarcasa de su tostadora con
un paño húmedo.
2.
Inserte la bandeja para migas desmontable enla
ranura
dela
bandeja para migas.
(Figura A)
3.
Asegúrese de que el mando de resistencias delp
an esté en
laposición superior antes de enchufar el cordón de potencia
dela
tostadora.
(Figura B)
4.
Elija una ubicación para la tostadora. Dichaubicación:
•
Debe ser una superficie plana, termorresistente ya
ntiinflamable.
•
Debe estar a un mínimo de 3 pulgadas delas
paredes
od
el
aparte posterior de
losmostradores.
•
Por lo menos de un pie de distancia de cualquier gabinete
oestante
quepueden estar sobre de la tostadora.
•
Debe estar alejada de los materiales inflamables
talescomo
lascortinas o
lostapizados.
•
Debe estar alejada de las estufas de gas o de elementos eléctricos.
5.
Enchufe el cordón de potencia en un tomacorrientes
de120/127
voltios, 60 Hz CA.
English-3
12. Bread Carriage Lever –
Press to begin toasting your food.
13. Toast Lift –
Press up on the bread carriage lever to lift food out of the bread slots.
Convenient and safe way of retrieving the smallest of toasted items.
14. Fully Removable, Non-Stick, Crumb Tray
- For convenient and easy clean up.
15. Cord Storage –
Allows you to store extra cord under the toaster and out of the way.
16. Power Cord
17. A Cool-Touch™ exterior
that keeps the toaster surface cool to the touch, even during use.
Preparing To Use Your Toaster for the First Time
If you are using your toaster for the first time, please be sure to:
1.
Remove any stickers from the surface of the toaster and wipe the outside of
your toaster with a damp cloth.
2.
Insert the removable crumb tray into the crumb tray slot.
(Figure A)
3.
Make certain that the bread carriage lever is in the uppermost position before
plugging in the toaster’s power cord.
(Figure B)
4.
Select a location for the toaster. The location should be:
• A flat, heat-resistant, non-flammable surface.
• At least three inches away from walls or the back of countertops.
• At least one foot away from any cabinet or shelving that may be
above the toaster.
• Away from flammable materials, such as curtains and wall fabric.
• Away from a gas stove flame or electric element.
5.
Plug the power cord into 120/127 volt, 60 Hz AC outlet.
Adjusting the power cord length
Your toaster’s cord storage area allows you to adjust the length of the
power cord so that it is the exact length you desire.
To adjust the length of the power cord:
Wrap the power cord around the cord storage posts on the base of the
toaster until the cord is the length you desire. Be certain to read “Power
Cord Instructions” on Page English-1 for safety information.
(Figure C)
6.
Without inserting any food into the bread slots, push the bread lever all
the way down until it locks.
(The carriage will not lock if the toaster
is not plugged into a power source.) (Figure D)
The first toasting process will preheat the new elements and burn off any
dust which may have accumulated during storage or manufacturing. It is
normal for this burn off to create an odor.
Your OSTER
®
Toaster is now ready for use.
F
IGURE
C
F
IGURE
D
F
IGURE
B
F
IGURE
A
Los Botones para
Model de
Siete Modos
Selecionar el Tipo de Pan
Tostadora
Color
de Tostada
(Frozen, Warm, Bagel, Pastr
y y Waffle)
6240
Blanca con el Tono de Gris
Sí
Sí
6243
Blanca con el Tono de Plateado;
Sí
Sí
Insignia de Oster
6241
Blancacon el T
ono de Gris
Sí
No
6244
Blanca con el Tono de Plateado;
Sí
No
Insignia de Oster
6245
Negracon el T
ono de Plateado;
Sí
No
6246
Negracon el T
ono de Plateado;
Sí
No
Insignia de Oster
F
IGURA
B
F
IGURA
A
6240, 6241, 6243
6244, 6245, 6246
1
Models 6241,
6244, 6245, 6246
TOASTER MODEL COMPARISON CHART
TABLA P
ARA LA COMPARACÍON DE LAS TOST
ADORAS
1.Selector y Piloto de T
ostadora
2.Botón y Piloto Indicador
TOASTW
ATCH™
3.Botón y Piloto para Congelados
4.
Botón de Calentamiento y Piloto
5.
Botón y Piloto para ”Bagels”
6.Botón y Piloto de Pastelería
7.Botón y Piloto de W
affles
8.Super
ficie Antiadherente Sobre las
Ranuras para Facilitar laLimpieza
9.Ranuras
10.
Guías para Rebanadas,
Hechasde
Acero Inoxidable
11.
Botón de Anulación
12.
Mando de Resistencias del Pan
13.
Elevador de Tostadas
14.
Bandeja para Migas Plenamente
Desmontable
15.
Almacenamiento para el Cordón
16.
Cordón de Potencia
17.
Exterior Cool-Touch™
Modelos 6240 & 6243
1
5
6
7
3
4
2
1
Modelos 6241,
6244, 6245,6246
8
9
10
11
1 2/1
3
14
15
16
17
Welcome
Congratulations on your purchase of an OSTER
®
toaster! This toaster has TOAST LOGIC
®
technology
which gives you consistent and repeatable toasting performance. This means that you
can expect your toast to be just the way you like it, slice after slice and day after day.
Learning About Your Toaster
1. Lighter/Darker Knob –
Turn the knob to select how dark you would like your food toasted;
1 is lightest, 7 is darkest.
2. Lighter/Darker Indicator Light
(Models 6240 & 6243 only)
– The Lighter/ Darker indicator will light
above the corresponding setting you select.
3. Frozen Button and Indicator
(Models 6240 & 6243 only)
– Press this button if your food is frozen and then
select your bread type. The toaster will automatically defrost your food and then toast it in one easy step.
4. Warm Button and Indicator
(Models 6240 & 6243 only)
– Press this button to warm your toasted food.
The indicator will light to confirm your selection.
5. Bagel Button and Indicator
(Models 6240 & 6243 only)
– Press this button if you want to toast
a bagel. The indicator will light to confirm that “Bagel” is selected. Toast is the default setting.
6. Pastry Button and Indicator (
Models 6240 & 6243 only)
– Press this button if you want to toast
a pastry. The indicator will light to confirm that “Pastry” is selected. Toast is the default setting.
7. Waffle Button and Indicator (
Models 6240 & 6243 only)
– Press this button if you want to toast
a waffle. The indicator will light to confirm that “Waffle” is selected. Toast is the default setting.
8. Non-Stick Surface on the Top of Bread Slots –
Makes clean up easy.
9. Extra Wide Bread Slots –
Wide slots (1.3 inches) allow you to toast bagels, thickly sliced homemade
bread, English muffins and pastries.
10. Dual, Auto-Adjusting, Stainless Steel Bread Guides –
Automatically adjust to bread thickness
for even toasting.
11. Cancel Button –
Press the cancel buton to pop the food out of the bread slots and stop the toasting process.
English-2
1. Lighter/Darker Knob
2. Lighter/Darker Indicator
(TOAST WATCH™ control)
3. Frozen Button and Indicator
4. Warm Button and Indicator
5. Bagel Button and Indicator
6. Pastry Button and Indicator
7. Waffle Button and Indicator
8. Non-Stick Surface on the
Top of Bread Slots
9. Extra-Wide Bread Slots
10. Stainless Steel Bread Guides
11. Cancel Button
12. Bread Carriage Lever
13. Toast Lift
14. Removable Crumb Tray
15. Cord Storage
16. Power Cord
17. Cool-Touch™ Exterior
Models 6240 & 6243
1
5
6
7
3
4
2
8
9
10
11
12/13
14
15
16
17
P .N. 111320
Helpful Tips
Inserting the food into the bread slots and toasting
Now you are ready to insert your food into the bread slots. Keep the following tips in mind when
inserting your food.
• Most types of breads and pastries can be toasted, such as bagels, tea cakes, thickly sliced breads,
English muffins, waffles, etc. Slices should not, however, be so thick as to jam the bread slots.
• When toasting two slices at a time, the slices should be of equal size and freshness to ensure even toasting.
• When toasting two slices of bread, place one slice in the center of each bread slot.
• When toasting one slice of bread, place the slice in the center of either bread slot.
After you insert the food into the bread slots:
1.
Press the bread carriage lever down until it locks.
The Auto-adjusting, stainless steel bread guides will automatically center the food
for even browning.
Tip: Your toaster has been designed for optimum toast balance. Some elements
on the inside of the toaster may glow more brightly than others when in use.
This is part of normal toaster operation.
After the desired level of darkness has been reached, the food will pop up automatically.
The bread carriage lever will return to its original position and the indicator lights will turn off.
On Models 6240 & 6243, the TOAST WATCH
™
control offers a precise visual and audible indication
of your toasting. The toaster will chime and the food will pop up automatically.
2.
Carefully remove the toasted food from the bread slots.
WARNING: Toasted food can be very hot, especially pastry fillings. Handle with care.
Tip: To remove food jammed in the bread slots, unplug the toaster and remove the food once the toaster
has cooled down.
WARNING: Never insert your fingers or metallic utensils into the bread slots.
Cleaning Your Toaster
After use and before cleaning, unplug the toaster power cord from the power
outlet and wait for the toaster to cool.
1.
Wipe the outside of the toaster with a damp cloth and then dry it with
another cloth or paper towel. Do not use abrasive cleaners; they will damage
the toaster’s finish.
WARNING: Do not use any pointed or sharp articles for cleaning the inside
of the toaster; this may damage the toaster.
2.
Lightly tap the sides of the toaster to dislodge any crumbs caught in the toast chamber. Remove the
crumb tray and empty it. Wipe the tray clean with a damp cloth or place it in the top rack of your
dishwasher for cleaning. Be certain to put the crumb tray back into the toaster before using
the toaster again.
WARNING: Empty the crumb tray frequently. Crumbs will accumulate in the crumb
tray and could catch fire if not emptied periodically.
3.
Wipe the non-stick surface on the top of the bread slots with a damp cloth and dry it with another
cloth or paper towel.
–––
F
OLD
–––
–––
F
OLD
–––
–––
F
OLD
–––
–––
F
OLD
–––
–––
F
OLD
–––
–––
F
OLD
–––
–––
F
OLD
–––
–––
F
OLD
–––
–––
F
OLD
–––
Visit us at www
.oster.com
––
– F
OLD
––
–
––
– F
OLD
––
–
One-Year Limited Warranty
S
unbeam Products, Inc., or if in Canada, Sunbeam Corporation (Canada) Limited (collectively “Sunbeam”)
warrants that for a period of one year from the date of purchase, this product will be free from defects
in material and workmanship. Sunbeam, at its option, will repair or replace this product or any component
of the product found to be defective during the warranty period. Replacement will be made with a new
or remanufactured product or component. If the product is no longer available, replacement may be made
with a similar product of equal or greater value. This is your exclusive warranty.
This warranty is valid for the original retail purchaser from the date of initial retail purchase and
is not transferable. Keep the original sales receipt. Proof of purchase is required to obtain warranty
performance. Sunbeam dealers, service centers, or retail stores selling Sunbeam products do not have
the right to alter, modify or any way change the terms and conditions of this warranty.
This warranty does not cover normal wear of parts or damage resulting from any of the following:
negligent use or misuse of the product, use on improper voltage or current, use contrary to the
operating instructions, disassembly, repair or alteration by anyone other than Sunbeam or an authorized
Sunbeam service center. Further, the warranty does not cover: Acts of God, such as fire, flood,
hurricanes and tornadoes.
What Are the Limits on Sunbeam’s Liability?
Sunbeam shall not be liable for any incidental or consequential damages caused by the breach of any
express, implied or statutory warranty or condition.
Except to the extent prohibited by applicable law, any implied warranty or condition of merchantability
or fitness for a particular purpose is limited in duration to the duration of the above warranty.
Sunbeam disclaims all other warranties, conditions or representations, express, implied, statutory or otherwise.
Sunbeam shall not be liable for any damages of any kind resulting from the purchase, use or misuse of, or
inability to use the product including incidental, special, consequential or similar damages or loss of profits, or
for any breach of contract, fundamental or otherwise, or for any claim brought against purchaser by any
other party.
Some provinces, states or jurisdictions do not allow the exclusion or limitation of incidental
or consequential damages or limitations on how long an implied warranty lasts, so the above
limitations or exclusion may not apply to you.
This warranty gives you specific legal rights, and you may also have other rights that vary from
province to province, state to state or jurisdiction to jurisdiction.
How to Obtain Warranty Service
In the U.S.A. –
If you have any question regarding this warranty or would like to obtain warranty service,
please call 1.800.334.0759 and a convenient service center address will be provided to you.
In Canada –
If you have any question regarding this warranty or would like to obtain warranty service,
please call 1.800.667.8623 and a convenient service center address will be provided to you.
In the U.S.A., this warranty is offered by Sunbeam Products, Inc., located in Boca Raton,
Florida 33431. In Canada, this warranty is offered by Sunbeam Corporation (Canada) Limited,
located at 5975
Falbourne Street
, Mississauga, Ontario L5R 3V8.
PLEASE DO NOT RETURN THIS PRODUCT TO ANY OF
THESE ADDRESSES OR TO THE PLACE OF PURCHASE.
For product questions contact:
Sunbeam Consumer Service
USA : 1.800.334.0759
Canada : 1.800.667.8623
www.oster
.com
©2003
Sunbeam Products, Inc. All rights reserved.
OSTER
®
and TOASTLOGIC
®
are registered trademarks of Sunbeam Products, Inc.
COOL-TOUCH
™
and TOASTW
ATCH
™
are trademarks of Sunbeam Products, Inc.
Distributed by Sunbeam Products, Inc., Boca Raton, FL 33431
Pour les questions de produit:
Sunbeam Consumer Service
États-Unis : 1.800.334.0759
Canada : 1.800.667.8623
www.oster
.com
©2003
Sunbeam Products, Inc. Tous droits réservés.
OSTER
®
et TOASTLOGIC
®
sont marques déposées de Sunbeam Products, Inc.
COOL-TOUCH
™
et TOASTW
ATCH
™
sont marques de commerceSunbeam Products, Inc.
Distribué par Sunbeam Products, Inc., Boca Raton, Florida 33431
Para preguntas sobre los productos llame:
Sunbeam Consumer Service
EE.UU. : 1.800.334.0759
Canadá : 1.800.667.8623
www.oster
.com
©2003
Sunbeam Products, Inc. Todos los derechos reservados.
OSTER
®
y TOASTLOGIC
®
son marcas registradas de Sunbeam Products, Inc.
COOL-TOUCH
™
y TOASTW
AT
CH
™
son marcas comerciales deSunbeam Products, Inc.
Distribuido por Sunbeam Products, Inc., Boca Raton, FL 33431
Printed in China
Imprimé en Chine
Impreso en China
6240 Toaster
Manual Large
Print 4/10/03
9:29
AM Page
1