Nettoyage avant la toute première utilisation
1. Lavez l’intérieur de la verseuse et le couvercle avec un détergent doux
et de l’eau. Rincez à fond. Ne plongez pas la verseuse ou le socle
chauffant dans l’eau ou dans tout autre liquide.
Ils ne sont pas
lavables au lave-vaisselle.
2. Remplissez la bouilloire d’eau fraîche jusqu’au repère «MAX» du tube
bouilleur. Branchez le socle chauffant sur la prise de courant, placez la
verseuse sur le socle puis mettez en MARCHE en appuyant sur
l’interrupteur MARCHE-ARRÊT. Le voyant MARCHE-ARRÊT
s’allumera, signe de fonctionnement. Portez l’eau à ébullition.
3. Quand l’eau et la bouilloire ont refroidi, videz l’eau. Rincez
l’intérieur de la verseuse à l’eau froide puis répétez l’opération.
4. Votre bouilloire électrique est maintenant prête à l’emploi.
Mode d’emploi de la bouilloire électrique
1. Posez le socle chauffant sur une surface plane et insensible à la
chaleur, aussi près que possible d’une prise de courant.
2. Voyez les points de sortie du cordon que présente le socle. Lorsque le
cordon est acheminé comme il se doit, le socle chauffant est
absolument plat quand vous y placez la verseuse. Ne faites PAS
fonctionner la bouilloire si le socle chauffant n’est pas d’aplomb mais
retirez la verseuse et réacheminez le cordon.
3. Retirez le couvercle pour remplir la verseuse. Veillez à ce que le
niveau de l’eau soit au-dessous du repère
«MAX»
.
REMARQUE : Ne
dépassez jamais le niveau du repère
«MAX»
.
4. Branchez le cordon sur la prise de courant. Réglez l’interrupteur à
MARCHE (ON) en levant l’interrupteur. Le voyant de marche-arrêt
s’allumera, signalant le fonctionnement. L’eau chauffera et la
bouilloire se metta automatiquement hors tension à l’ébullition.
REMARQUE : Veillez à ce que rien n’entrave le fonctionnement de
l’interrupteur MARCHE-ARRÊT et que le couvercle soit bien fermé,
sans quoi la bouilloire ne s’arrêtera pas automatiquement.
5. Retirez prudemment la verseuse du socle et versez l’eau chaude.
6. La bouilloire ne portera de nouveau l’eau à l’ébullition que lorsque
l’interrupteur aura été reréglé à MARCHE (ON). Laissez refroidir la
bouilloire de 15 à 20 secondes avant de la régler à MARCHE (ON).
4
Clean your electric kettle before first use
1. W
ash the inside of the kettle and lid with mild detergent and water .
Rinse each thoroughly. Do not immerse the kettle or power base
in water or any other liquid.
These items are not
dishwasher safe.
2.
Fill the electric kettle with fresh water to the “MAX” water level mark
on boil tube. Plug power base into power outlet. Place kettle into power
base. T urn the switch ON by pressing up on ON/OFF switch. ON/OFF
light will turn on indicating kettle is ON. Let the water boil.
3. When the water and unit have cooled, discard the water
. Rinse with
cold water and repeat.
4. Y
our electric kettle is now ready for use.
Using your Electric Kettle
1. Position the power base on a flat, heat resistant surface, as close as
possible to a power outlet.
2. Follow cord routing in power base according to exit patterns. Proper
cord routing will result in the power base laying flat when kettle is
placed in base. DO not operate kettle if power base is not flat.
Remove kettle from power base and repeat cord placement
instructions.
3. T
o fill with water
, remove the lid. Fill the electric kettle with water to
below the “MAX” water level mark.
NOTE: Do not exceed the
“MAX” water level mark indicated on the electric kettle.
4. Plug the electric cord into an electric outlet. T
urn the switch ON by
pushing up on the on/off switch. The on/off light will light to
indicate the unit is on. The water will heat and the electric kettle will
switch off automatically when the water boils.
NOTE: Ensure the
ON/OFF switch is clear of obstructions and the lid is firmly closed.
The electric kettle will not turn off automatically if the ON/OFF
switch is constrained, or if the lid is left open.
5. Carefully lift the kettle from the power base and pour the hot water
.
6. The kettle will not re-boil until the on/off switch is again switched ON.
Wait
15-20 seconds, allowing kettle to cool down, then switch ON.
4
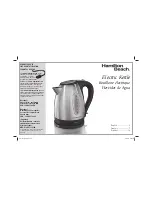
Summary of Contents for 3203-33 and warranty
Page 1: ...Instruction Manual and Warranty STAINLESS STEEL KETTLE MODEL 3203 33 P N 111051 MODEL 3203 33...
Page 10: ......
Page 12: ......
Page 14: ......
Page 16: ......