background image

10

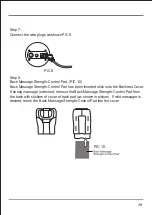
Step 7:

Connect the wire plugs as shown PIC 9.

Step 8:

Back Massage Strength-Control Pad. (PIC 10) 

Back Massage Strength-Control Pad has been inserted stick onto the Backrest Cover. 

If strong massage is desired, remove the Back Massage Strength-Control Pad from

the back with stickers of cover of back pad (as shown in picture). If mild massager is

desired, return the Back Massage Strength-Control Pad into the cover. 

PIC 9

PIC 10

Summary of Contents for OS-1000

Page 1: ...Instruction Manual OS 1000...

Page 2: ...ion Moving 7 11 Grounding Instructions 12 Chair Specifications 12 Operation Guide 13 17 Troubleshooting 18 Product Maintenance 18 Thank you for purchasing the OS 1000 Massage Chair Before using your m...

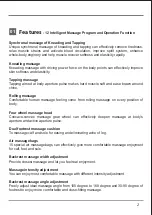
Page 3: ...e on every position of body Four wheel massage head Concave convex massage gear wheel can effectively deepen massage at body s aperture and active aperture pulse Dual footrest massage cushion To massa...

Page 4: ...ith wet hands Close and continuous supervision is necessary when this appliance is used by on or near children invalids or disabled persons Use this appliance only for its intended use as described in...

Page 5: ...swollen or inflamed part of body This product is non professional appliance designed to provide comfortable massage Do not use this product as substitute for medical treatment Do not use this applianc...

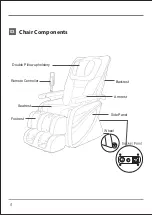
Page 6: ...Wheel Double Pillow upholstery Remote Controller Armrest Seatrest Backrest Footrest Side Panel 5 Chair Components 03...

Page 7: ...6 MASSAGE POSITION Roller...

Page 8: ...ease leave 24 of spaces behind the backrest and 24 of spaces at the front of massage chair when recline backrest and elevate leg rest PIC 1 Step 2 Lift the backrest then lower the backrest into the se...

Page 9: ...the chair may result Attached the connecting rod and the fork of the reclining actuator with a flat head rivet and secure with a split pin as demonstrated in below PIC 3 PIC 4 A Connecting rod on the...

Page 10: ...rest pad and the pillow pad PIC 7 A Attach the backrest pad with the zipper B Attach the pillow pad using the hook and look fasteners Step 6 Installing Remote Control Holder Please tighten the screws...

Page 11: ...rength Control Pad has been inserted stick onto the Backrest Cover If strong massage is desired remove the Back Massage Strength Control Pad from the back with stickers of cover of back pad as shown i...

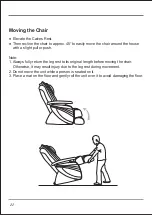
Page 12: ...l or push Note 1 Always fully return the leg rest to its original length before moving the chair Otherwise it may result injury due to the leg rest during movement 2 Do not move the unit while a perso...

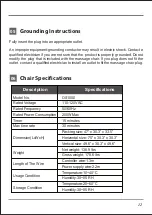
Page 13: ...alified electrician to install an outlet to fit the massage chair plug Description Specifications OS1000 110 120V AC 50 60Hz 200W Max 15 minutes 30 minutes Packing size 47 x 30 3 x 33 5 Horizontal siz...

Page 14: ...13 Operation Guide Controller 07...

Page 15: ...y be pressed Press the ON OFF button again to stop all massage functions and to return the massage rollers to their original position PAUSE Pause Control Button Press this button to stop all massage f...

Page 16: ...his button once to activate the kneading massage function for a full back massage Press the button again to stop the kneading massage function Press the FAST SLOW button to adjust the kneading speed w...

Page 17: ...lling Functions When the tapping and rolling functions are activated these three buttons adjust the width of movement to narrow medium or wide UPWARD DOWNWARD Position Adjustment Button for Spot or Pa...

Page 18: ...TY SEAT CALVES Press these buttons to strong or weak the intensity of the seat and calves air massage function These control buttons will not function in auto massage mode SPOT Spot Back Massage Press...

Page 19: ...on Please turn off the power and allow the Chair to cool off for 30 to 50 minutes 1 In the auto timing mode when the timing is appropriate Repress the power switch 2 Switch Off power and switch ON aga...

Page 20: ...www osakimassagechair com...

Reviews: