


Ortery USA
Tel: +1-949-859-5580
Web: www.Ortery.com
Ortery Taiwan
Tel: +886-2-2258-2180
Web: www.Ortery.com.tw
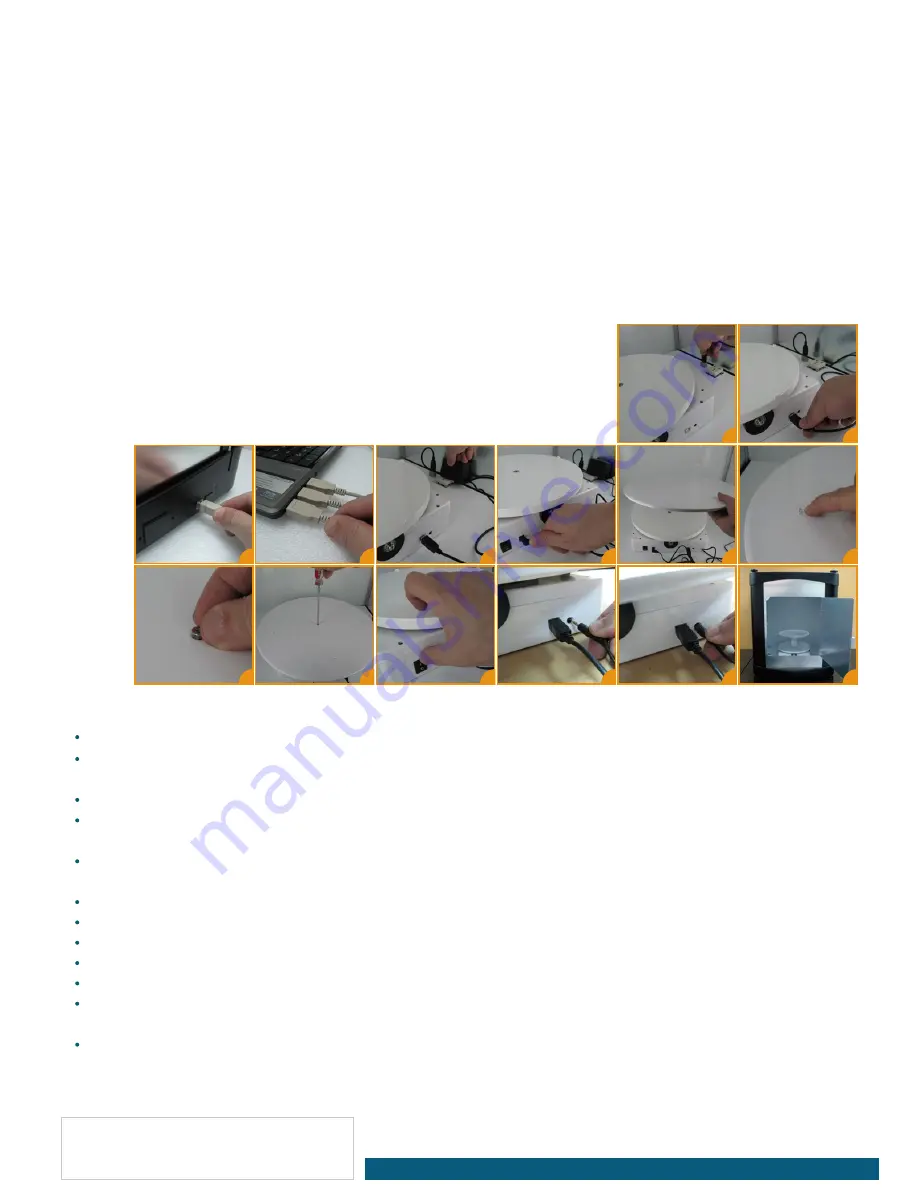
Connect the USB cable to the turntable. Plug the other end into the USB port on your computer. If your light box has a
USB port on the floor, utilize this port for convenience but remember to complete the connection by running another USB
cord from the back of the light box to your computer. The extra USB cord is supplied inside this package. Directions on
how to make that connection are in the Photosimile 200 User Guide.
Plug the power cord into the turntable. Plug the other end into a power jack or into the socket on the floor of the light box.
It's best to cover the cords using the side shot background.
Choose the rotation platform that best fits your task. The package is shipped with the 15.4" rotation platform covering the
11.4" platform. To utilize the 11.4" rotation platform, simply unscrew the screw located in the center of the 15.4"
platform holding it down. Do not misplace the (4M 0.7) screw. To replace the 15.4" rotation platform, line up the two
rotation plates so that they click into place (note the 4 protruding alignment knobs) then replace the screwto the center.
Turn on the power. Flip the power switch located on the side of the turntable to the "On" position.
If you intend on using a non-compatible camera, connect one end of the shutter release cable into the turntable and the
other end into your camera. If your shutter release cable does not fit, contact your Ortery representative for a custom
solution.
Use the matte round 360 product stand (sold separately) to assist in creating
images with pure white or transparent backgrounds.
b-e
f-g
h-k
l
m-n
o
Photography Tips:
b
c
i
e
d
f
g
h
k
j
l
m
n
o
Zoom the camera to avoid shooting the edges of the columns.
For convenience, use the system with a touch screen tablet device. Check for and download available remote desktop
applications.
Always focus on the center of your object and increase depth of field to avoid any noise along the object border.
To avoid serious reflections, try changing the shooting distance or rotating the object. In addition, black or white paper can be
used to block or further diffuse the light causing the reflection.
By overexposing a little or reducing depth of field, you can achieve pure white backgrounds and make the horizontal
line from the product stand disappear.
By clicking the "?" in the upper right corner of the software you can access the Installation, Operation and User Guides.
Use the AutoPNG feature to automatically create PNG files with transparent backgrounds, if required.
Use the Focus Stacking feature to ensure items are in clear focus from front to back.
When using a PhotoCapture 360 turntable, retake or recover captured 360 / 3D images you are not satisfied with.
Press the "Preview" button to refocus the camera.
If your resulting pictures need to be square or a specific proportion (length and width), enable this feature by changing the Crop
settings in the Preview Options area.
Slightly underexposing will yield the best results. Several editing tools can be used to make the background closer to pure
white, eliminating potential image noise and minimizing color differences between the rotating platform and the background.


