


24 pages 105mm x 148mm (A6) 160gsm Gloss Art Stock 4 colour process double sided - CPIN004616/2
Step 6:
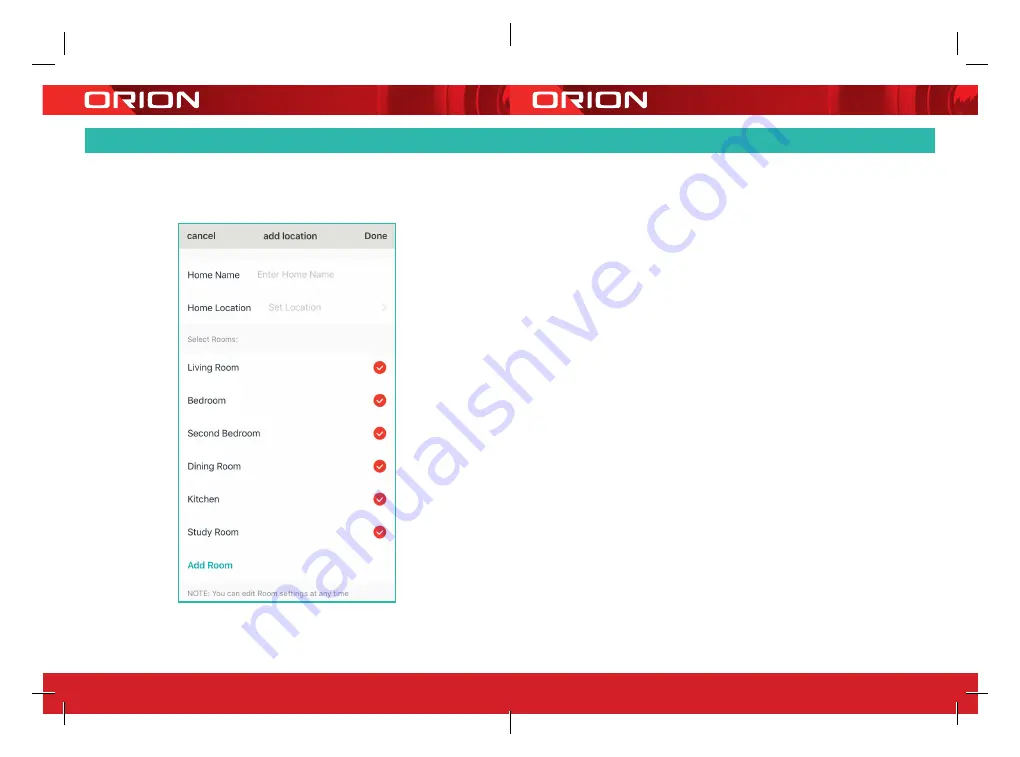
Adding a location
On the
Add location
setup page,
you can edit
Home name
, set up
Home location
and
Select rooms
or
Add room
.
This will help you manage your
GRID devices and assist you in
customising and scheduling the
time and order of one or multiple
devices, depending on your home
living needs.
Tap
Done
when you finish.
6
ADDING A LOCATION
9
8


