


http://www.orion.ua
[email protected]
4
1. Place the radiator body upside-down on a scratch-free location, make sure it is stable and
will not fall.
2. Screw off the wing nuts from the U-shaped bolt provided, attach the U-shaped bolt to the U-
facing flange between first and second fins (near the front cover).
3. To attach the castor mounting plate to the radiator body, you should insert the threaded
ends of the U bolt in the holes on the castor mounting plate.
4. Screw the wing nuts back to the U bolt and fasten the wing nut properly.
5. Screw off spherical nut from the castor, align the shaft to the hole of the castor mounting
plate, insert in, and screw on the spherical nut.
6. Repeat 2, 3, 4 and 5 on the rear of radiator for mounting of the rear castors.
Note: do not over tighten, which may cause the damage of radiator flange.
Note: the rear castors must be mounted between the end two fins.
INSTRUCTIONS FOR USE
1. Before using the heater, make sure that it is on a flat and stable surface, damage may
occur if it is placed on an incline or decline.
2. Set all the controls to OFF position and insert the plug into a socket-outlet with well
grounded. Be sure that plug fits firmly.
3. Rotate the thermostat knob clockwise to MAX position and switch the heater on as follow:
the switch I for low heat, the switch II for medium heat and both switches on for high heat
4. When your room reaches the desired temperature, now slowly rotate the thermostat knob
counter clockwise until the pilot light goes out. The thermostat can now be left at this
setting. As soon as the room temperature has dropped below the set temperature, the unit
will switch it self on automatically until the set temperature has been reached again. In this
way the room temperature remains constant with the most economical use of electricity.
5. If you want to change the room temperature setting, rotate the thermostat knob clockwise to
raise the temperature, or counter clockwise to lower it.
6. This heater includes an overheat protection system that shuts off the heater when parts of
the heater are getting excessively hot.
7. To completely shut the heater off, turn all the controls to OFF, and remove plug from the
socket-outlet.
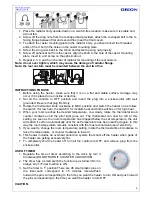
USE OF TIMER
1. Regulate the time of timer according to the clock by turn it
Clockwise(DO NOTRURN IT COUNTER CLOCKWISE)
2. The timer has a small swich,the function is as follow:I=Unit is
always On; =Timer function is ON
3. Set the timer to
position.There are 96 small plastic pins on
the timer,each correspond to 15 minutes interval.Push
ourward the pins corresponding to the time you want the heater to turn ON and push inward
the pins corresponding to the time you want the heater to turn OFF.
CAUTION: