4
2. Switch the appliance.
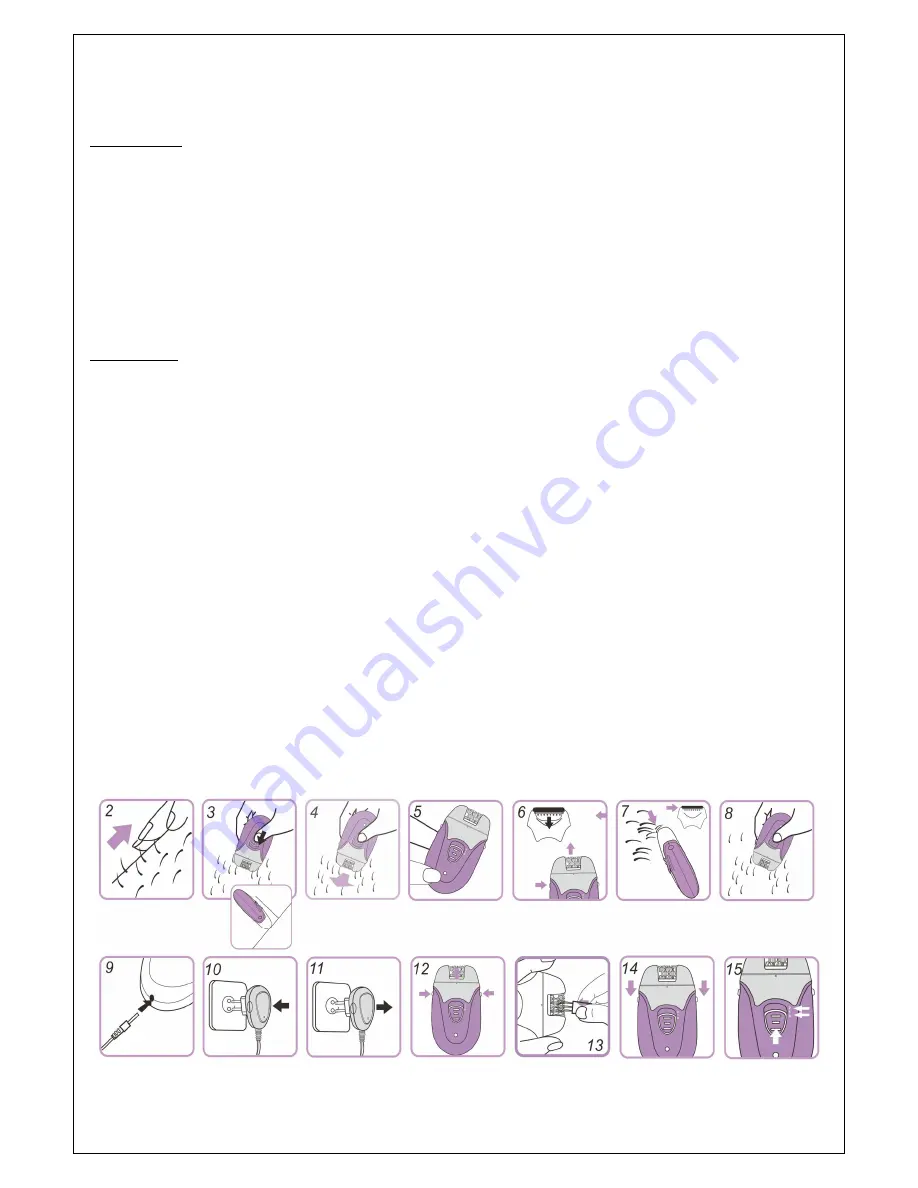
3. Use the trimmer first if the hair is longer (fig.7) then use the shaver.
4. Switch the appliance off by pushing the on/off slide to position OFF (Fig.5).
CHARGING
1. Insert the appliance plug into the appliance. (fig.9)
2. Insert the mains plug into the power socket. (fig.10)
3. When you connect the appliance to the mains to charge it, the power symbol lights up. The
charging needs 2-2,5 hours.
4. Remove the mains plug from the socket.The epilator can use 20-30 min after fully charged.
(fig.11)
5. When the power is completely finished during operation, please connect the charger with main
power to continue the shaving or epilating.
CLEANING
1. Switch the appliance off. (fig. 5)
2. Remove the mains plug from the socket. (fig. 11)
3. Remove the epilating head by pushing the ribbed section with your thumb in the direction of
the arrow indicated on the back of the epilating head and then lifting it off the appliance.
(fig.12)
4. Clean the epilating discs of the epilating head and all other parts that have become accessible
with the brush supplied. (fig. 13)
5. Attach the epilating head by placing it onto the appliance and pushing of the epilating head
until it snaps. (fig. 14)
The cleaning process of the shaving head is the same.
Notes:
For good and smooth epilating or shaving result, it is essential that you clean the epilating
head or shaving head after each use.
Never immerse the appliance in water.
Do not use aggressive cleaners, scouring agents, petrol, acetone etc. to clean the plastic
housing of the appliance.
Never try to remove the epilating discs from the epilating head.
Do not exert pressure on the shaving foil to avoid damaging it.


