5
framed is at least that distance away, or the focus of the image
will not be sharp.
Reviewing Images on the LCD Screen
After you have taken several pictures, you may want to review
the images stored in the SD card to determine which ones you
want to discard and which ones you want to keep.
1. With the camera in preview mode, press the ON/MODE
button. This will take you to the eView’s internal menu.
2. Use the up and down Function Selection buttons to scroll
to the “Review” menu selection. Press the CAMERA/SET
button to enter the review mode.
3. Use the up and down buttons to scroll through the images
currently stored in the SD card.
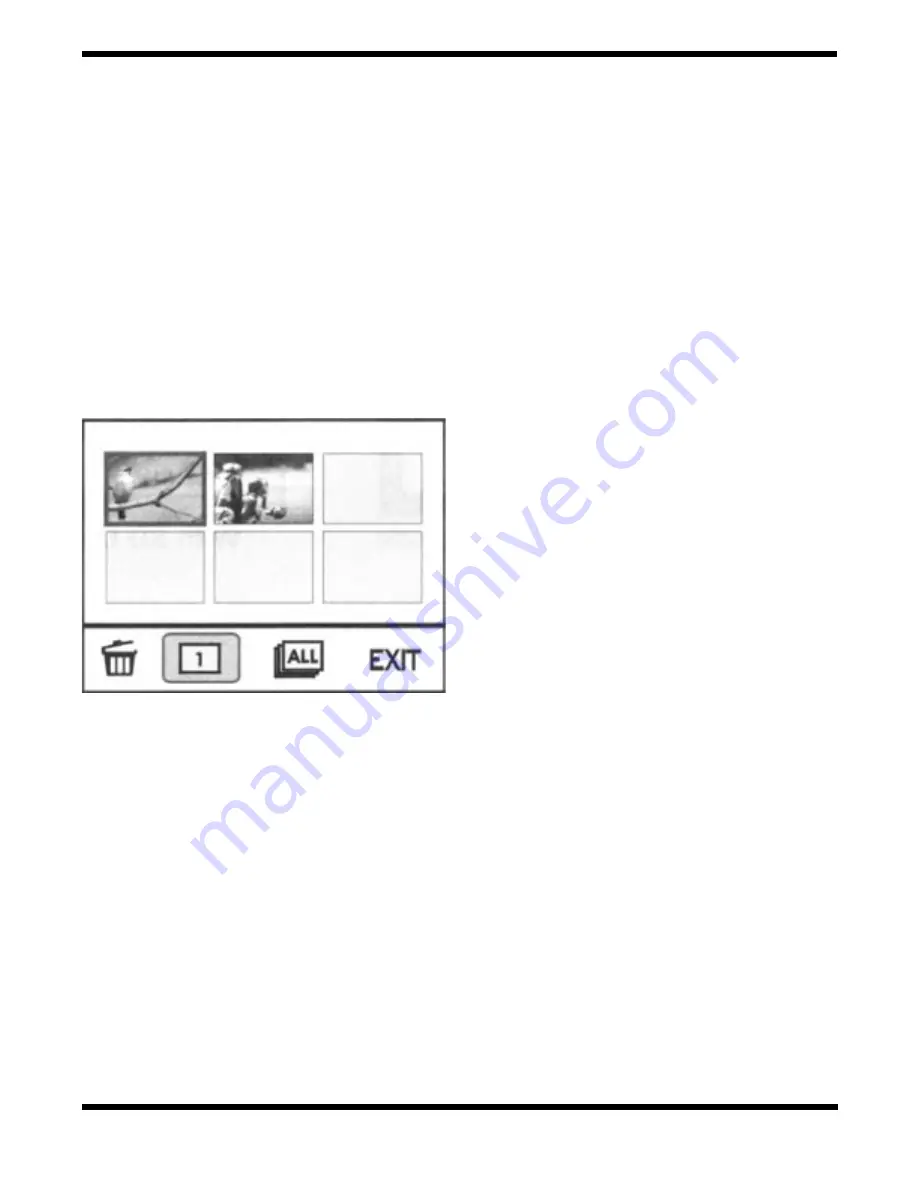
4. Select the image you wish to delete. Press the ON/MODE
button. You are now on the eView’s delete screen (Figure
4).
5. Use the up and down arrows to select “1” from the choices
at the bottom of the screen and press the CAMERA/SET
button. The image selected is now deleted from the SD
card. If you want to delete all images currently stored in the
SD card, select “ALL” instead of “1”.
6. To exit the review mode, press the ON/MODE button, and
select “EXIT” from the choices on the bottom of the delete
screen. Press the CAMERA/SET button to exit. This will
take you back to the eView’s internal menu. To get back to
regular preview mode, use the up and down arrow keys to
select “EXIT” from this menu, and press the CAMERA/SET
button.
Another easy way to review images is to simply press either
the up or down button when the eView LCD is in preview
mode. You can then scroll through full screen images to see
what your pictures currently stored in the SD card look like. You
cannot delete images when reviewing in this way, however. To
exit, press the ON/MODE button to return to the eView’s inter-
nal menu, select “EXIT”, and press the CAMERA/SET button.
Turning the eView Off
With the camera in preview mode, press the ON/MODE but-
ton. This will take you to the eView’s internal menu. Then use
the up and down Function Selection buttons to scroll to the
“Power Off” menu selection. Press the CAMERA/SET button,
and the eView will turn off.
Downloading Image Files
Transferring images from the SD card to your computer is
quite easy. The eView acts as an external hard drive, so you
can easily “click and drag” image files from the eView to your
PC. But first you’ll need to connect the eView and computer
with the USB cable.
1. Make sure the eView is off, and open its rear hatch (Figure
1). Plug the USB cable into the jack near the SD card slot.
2. Plug the other end of the USB cable into your computer. You
will hear two “beeps” indicating the eView is now actively
connected to the computer.
3. Click on the “My Computer” icon on the PC’s desktop
screen.
4. Click on the “Removable Disk” icon under the heading of
“Devices with Removable Storage”.
5. Click on the folder “DCIM”.
6. Click on the folder “100Image”. The image files (and/or
video files) will now be displayed. You can now use image
processing software (such as the included Photo Explorer)
to manipulate and save the images. Or you can just “click
and drag” the images to your PC desktop for processing
later.
Other Camera Functions
Besides taking pictures, the eView is also capable of making
movies and acting as a webcam. In addition, there are several
other built-in functions designed to give you flexibility in adjust-
ing camera settings for your specific usage.
Making a Movie
The eView is capable of recording video up to 80 seconds in
length.
1. With the camera in preview mode, press the ON/MODE
button. This will take you to the eView’s internal menu.
2. Use the up and down Function Selection buttons to scroll
to the “Movie” menu selection. Press the CAMERA/SET
button to select this function.
3. Use the up and down buttons to scroll to “EXIT”, and press
the CAMERA/SET button to return to preview mode.
4. Press the CAMERA/SET button to begin taking the movie.
You will hear a single “beep” when the camera begins to
record the video. The small green LED light on the front of
the LCD screen will be shining. The LCD screen itself will
still appear in preview mode.
5. When done making the movie, press the CAMERA/SET but-
ton again.
Figure 4.
The eView delete screen allows you to select one or all
images in the SD card for deletion.


