3
charged. Unplug the adapter from the Dynamo Pro 17, and
the “READY TO USE” LED should shine again once the power
switch is in the “ON” position.
3. using the Dynamo Pro 17
to start a Vehicle
The Dynamo Pro 17 can be used to help start a vehicle that
has a drained battery. It may not have sufficient power to
charge a severely drained, or extremely large (greater than
4000cc engine), car battery.
to use the Dynamo Pro 17 to help start a vehicle:
1) Put the power switch in the “ON” position.
2) Connect the red clip (+) on the Dynamo Pro 17 to the
positive pole (+) on the car battery
3) Connect the black clip (-) on the Dynamo Pro 17 to the
negative pole (+) on the car battery
4) Wait a few seconds, then attempt to start the car.
5) Remove the Dynamo Pro 17 clips from the car battery.
4. storage and Maintenance
To optimize the lifetime of the Dynamo Pro 17, several steps
should be taken for its proper storage and maintenance. Make
certain the Dynamo Pro 17 power switch is in the “OFF” posi-
tion before putting it in storage. Keep the Dynamo Pro 17 stored
a dry, cool area when not in use. Fully charge the Dynamo Pro
17 before putting it into storage. If you are going to store the
Dynamo Pro 17 for long periods of time, you should occasion-
ally recharge it (about every three months). Failure to do so
will void your warranty.
resetting the circuit Breaker
If the power indicator LED light does not come on when you
turn the power switch, the circuit breaker (Figure 1) will need
to be reset. Turn the power switch to the “OFF” position and
press the circuit breaker button to reset it. Keep in mind that
if you are drawing more than 10 Amps through the 12V/10A
adapters you will always cause the circuit breaker to break.
replacing the 2 amp Fuse
If the fuse for the 3V/6V/9V power jacks should blow, it can be
replaced with a new 2 Amp (5mm x 20mm long, 250 VAC, fast
acting) fuse. Turn the power switch to the “OFF” position, then
turn the fuse securing knob (Figure 1) in the indicated direc-
tion to free the old fuse. Replace it with the new fuse. Replace
the fuse securing knob.
replacing the Flashlight Bulb
Should the flashlight bulb break or burn out, it can be replaced
with a 12V, 0.5A Krypton bulb, available at most hardware
stores. Make certain the power switch is in the “OFF” position
before replacing the bulb.
To replace the bulb, unthread the flashlight head by turning it
counterclockwise. Replace the old bulb with the new bulb and
thread the flashlight head back onto the flashlight.
replacing the spotlight Bulb
Should the spotlight bulb break or burn out, it can be replaced
with an H3 12V 55W halogen bulb, available at most hardware
stores. Make certain the power switch is in the “OFF” position
before replacing the bulb.
To replace the bulb, unthread the spotlight head by turning it
counterclockwise. Make certain the old bulb and the reflector
have had plenty of time to cool down before you touch either
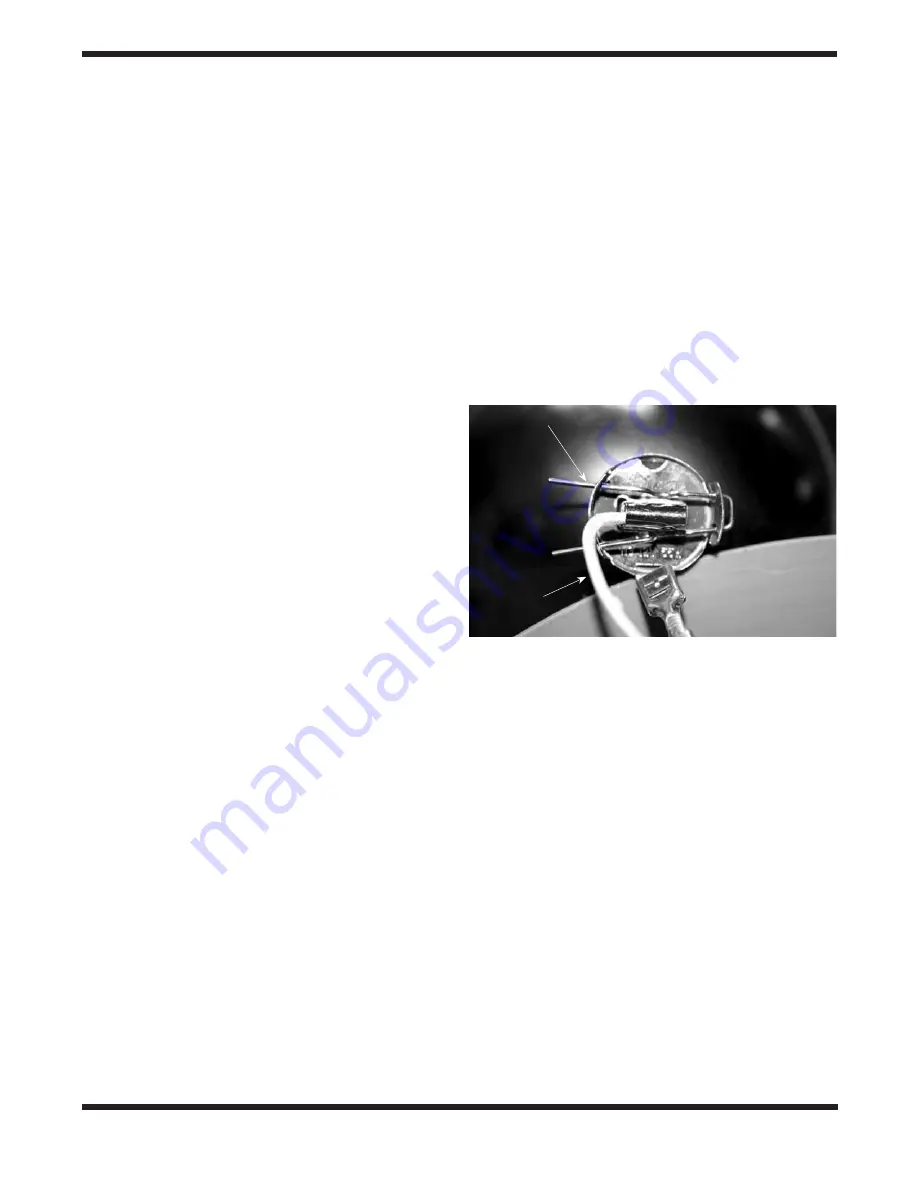
one. Separate the reflector from the bulb by removing the clip
shown in Figure 2. The entire bulb assembly, including its cord
(color white), is removed by detaching the end of the cord
from the connecting clip within the spotlight housing. Replace
the bulb assembly, and reassemble the spotlight.
5. specifications
Primary DC output: Two 12V cigarette-lighter type sockets,
maximum 10 Amp total, tip positive
Primary DC output regulation: 10 Amp circuit breaker
Secondary DC output: 3V, 6V, and 9V output jacks, maximum
1 Amp output, tip positive
Secondary DC output regulation: 2 Amp fuse. (5mmx20mm
long, 250 VAC, fast acting)
Internal battery: 12V/17Ah rechargeable sealed lead-acid bat-
tery
Recharging current requirements: 120v, 60Hz AC or 14.5 to
15.5V DC
Flashlight: 12V 0.5 A Krypton bulb, with red lens
Spotlight: H3 12V 55W Halogen bulb, 800,000 candlepower,
angle adjustable
Car battery clips: Can provide up to 250 Amps for 5 sec, will
jump start most cars with engine size less than 4000cc
Operating temperature: 32° F to 86°
Weight: 19 lbs 12 oz
Dimensions: 13.25" x 14.25" x 5.0"
Figure 2.
Remove the clip to separate the bulb assembly from the
reflector.
Clip
Bulb Cord


