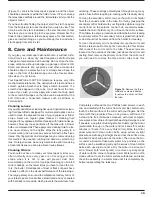
Finding Objects With the Setting Circles
Now that both setting circles are calibrated, look up in a star
atlas the coordinates of an object you wish to view.
1. Loosen the Dec. lock knob and rotate the telescope until
the Dec. value from the star atlas matches the reading on
the Dec. setting circle. Remember to use the +90° to -90°
scale that is on the eastern half of the Dec. setting circle.
Retighten the Dec. lock knob.
2. Loosen the R.A. lock knob and rotate the telescope until
the R.A. value from the star atlas matches the reading on
the R.A. setting circle. Retighten the lock knob.
Most setting circles are not accurate enough to put an object
dead-center in the telescope’s eyepiece, but they should
place the object somewhere within the field of view of the
finder scope, assuming the equatorial mount is accurately
polar aligned. Use the slow-motion controls to center the
object in the finder scope, and it should appear in the tele-
scope’s field of view.
The R.A. setting circle must be re-calibrated every time you
wish to locate a new object. Do so by calibrating the setting
circle for the centered object before moving on to the next one.
Confused About Pointing the Telescope?
Beginners occasionally experience some confusion about
how to point the telescope overhead or in other directions. In
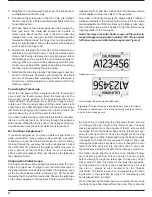
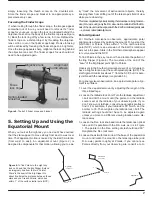
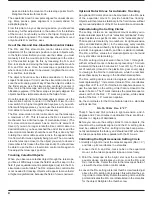
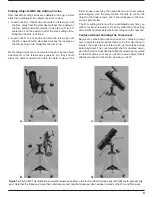
Figure 1 the telescope is pointed north, as it would be during
polar alignment. The counterweight shaft is oriented down-
ward. But it will not look like that when the telescope is pointed
in other directions. Let's say you want to view an object that is
directly overhead, at the zenith. How do you do it?
9
b.
d.
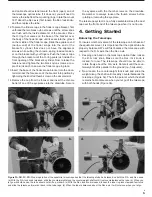
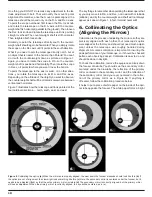
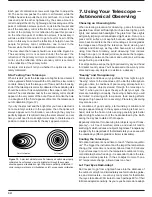
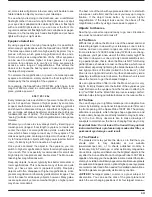
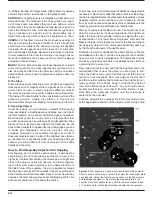
Figure 7a, 7b, 7c, 7d: This illustration shows the telescope pointed in the four cardinal directions: (a) north, (b) south, (c) east, (d)
west. Note that the tripod and mount have not been moved; only the telescope tube has been moved on the R.A. and Dec. axes.
a.
c.


