6
using the EZ Finder ii
The EZ Finder II is a non-magnifying “red dot” finder scope
that rides piggyback on the main telescope. It’s designed to
help you locate celestial objects and center them in the main
telescope’s eyepiece.
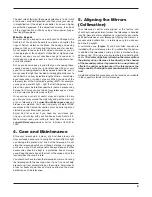
The EZ Finder II works by projecting a tiny red dot onto a
lens mounted in the front of the unit. When you look through
the EZ Finder II, you line up the red dot with the star or other
object you want to view
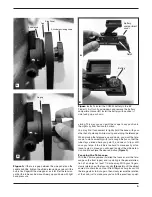
(Figure 9). The red dot is produced
by a light-emitting diode (LED), not a laser beam, near the
rear of the sight. The 3-volt lithium battery that you installed
previously provides the power for the red LED.
To use the EZ Finder II, turn the power knob clockwise until
you hear a “click” indicating that power has been turned on.
With your eye positioned at a comfortable distance behind the
EZ Finder, look through the sight tube with both eyes open to
see the red dot. The intensity of the dot can be adjusted by
turning the power knob. For best results when stargazing, use
the dimmest possible setting that allows you to see the dot
without difficulty. Typically, a dim setting is used under dark
skies and a bright setting is used under light-polluted skies or
in daylight.
At the end of your observing session, be sure to turn the
power knob counterclockwise until it clicks off.
Aligning the EZ Finder ii with the Optical tube
To work properly, the EZ Finder II has to be aligned with the
main telescope so that they both aim at exactly the same
point. When the EZ Finder II is so aligned, an object that is
centered on its red dot will also appear in the center of the
telescope eyepiece’s field of view. Alignment of the EZ Finder
II is easiest to do during daylight, before observing at night.
Here’s what to do:
1. Aim the telescope at a distant object at least 1/4 mile
away, such as a telephone pole or chimney, and center it
in the telescope’s eyepiece.
2. Now, turn the EZ Finder II on and look through it. The
object should appear somewhere near the red dot.
Note: Remember that the image in the eyepiece of
the FunScope will be rotated or upside-down. This is
normal for Newtonian reflector telescopes.
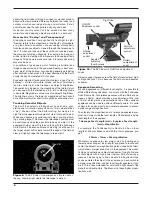
3. 3. Without moving the telescope, use the EZ Finder II’s
azimuth (left/right) and altitude (up/down) adjustment
knobs
(Figure 10) to move the direction of the EZ
Finder II until the red dot is superimposed right smack
on the object. Then check to make sure that the object
is still centered in the telescope’s eyepiece. If it isn’t,
re-center it and adjust the EZ Finder II’s alignment
again. When the object is centered both in the telescope
eyepiece and on the EZ Finder’s red dot, the EZ Finder
II is properly aligned with the telescope.
Check the EZ Finder II’s alignment before each evening’s
observing session, and make any necessary adjustments.
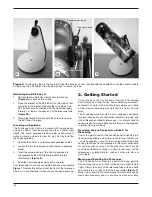
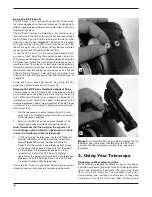
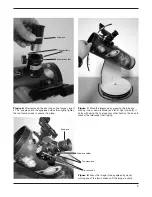
Figure 5.
To attach the EZ Finder II,
A) first remove the two
thumbnuts near the focuser, then
B) install the EZ Finder
II bracket over the two exposed screws, then replace the
thumbnuts.
3. using Your telescope
choosing an Observing location
When selecting a location for observing, get as far away as
possible from direct artificial light such as street lights, porch
lights, and automobile headlights. The glare from these
lights will greatly impair your dark-adapted night vision.
Avoid viewing over rooftops and chimneys, as they often
have warm air currents rising from them. Similarly, avoid
A
B


