background image


Apart from the obvious difference of aperture and physical size and shape, all the telescopes from the 
OD150 up to and including the OD400, are remarkably similar. Differences occur mainly in the 
technical specifications between the standard models and the de-luxe models.  
 

The main areas of ‘visible’ differences are: 

 
Finder scope. 

Standard are supplied with a 30mm aperture finder, De-Luxe with a 50mm finder 
but both work off exactly the same principle. 

Focuser. 

Standard are fitted with a rack and pinion 2” focuser (150mm models use a 
31.7mm focuser) The De-Luxe utilises a 2” precision Crayford focuser. 

 
Both the above two items are covered in more detail later. 
 

Differences which cannot be readily seen until you begin to use the telescope: 

 
Optics. 

Standard models are supplied with our normal coatings, De-Luxe models have our 
hi-tech Hilux high reflectivity coatings applied to both mirrors. This typically 
transmits around 25% more light to your eye than standard telescope optical 
coatings. 1/4PV wavefront optics are fitted to the standard models and 1/6 PV to 
De-Luxe models. With the De-Luxe models, you should also have a Zygo print out 
of data of the telescope on optical test. 

 
You may have requested and had some additional equipment added to your telescope, this is not 
covered in this manual. 


Model differences


Summary of Contents for OD150

Page 1: ...0 OD250 OD300 OD350 and OD400 Contents 1 Introduction 2 Main parts of telescope 3 Model differences 4 Assembly 5 Checking things 6 Collimation 7 Using the telescope 8 Care and Maintenance 9 Accessorie...

Page 2: ...optical coatings could result Please read through this document before commencing assembly of the telescope familiarise yourself with the names of the major components And finally when assembled abov...

Page 3: ...TYPICAL DOBSONIAN MODEL Fig 1...

Page 4: ...xe utilises a 2 precision Crayford focuser Both the above two items are covered in more detail later Differences which cannot be readily seen until you begin to use the telescope Optics Standard model...

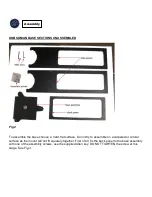
Page 5: ...t surface Do not try to assemble on a carpeted or similar surface as the mount will not fit squarely together First of all fix the back panel to the base assembly with one of the assembly screws use t...

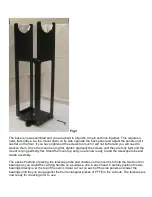
Page 6: ...Fig 3 Next fix one of the side panels to the base and back panel see Fig 4...

Page 7: ...Fig 4 Again DO NOT TIGHTEN the screws yet Now attach the other side panel see Fig 5...

Page 8: ...they are fully tight and the mount is lying perfectly flat Stand the mount up and you are now ready to add the telescope tube and cradle assembly The easiest method of placing the telescope tube and...

Page 9: ...th mirrors to the tube and each other Many people worry about collimation because on large short focal length telescopes can be sometimes difficult However if you follow the following exactly you will...

Page 10: ...n your head so as to see an even amount of inside the tube surrounding your mirror your eye should be blotted out with the secondary holder Try it you will immediately see what I mean If you are too c...

Page 11: ...and the following will be that much easier Up to this point there has been no need to look into the eyepiece draw tube If you have tried to collimate your primary mirror by looking into the draw tube...

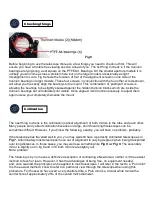
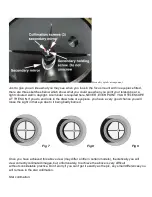
Page 12: ...THE SUN If you do and look in the draw tube or eyepiece you have a very good chance you will loose the sight in that eye due to it being badly burned Fig 7 Fig 8 Fig 9 Once you have achieved this abo...

Page 13: ...of flaring Continue with the 25mm eyepiece until all looks symmetrical Then repeat the procedure with a higher power eyepiece Eventually you will be able to collimate your telescope with this method...

Page 14: ...t is the centre and then just adjust slightly you finder scope until the object lies directly under the cross hairs When your telescope is fully assembled collimated and set up you are now in a positi...

Page 15: ...rfaces of your mirrors just as steam condenses on a cold mirror in a bathroom If you put your telescope away in this condition the moisture can remain on the mirrors for hours and slowly but very sure...

Page 16: ...iewing site Depending on which model you have it is possible to upgrade the optical performance of your telescope although it is easier and less expensive to do this at the time of ordering See our we...

Reviews: