background image

Notebook Manual


38

4.2.1 Main Menu

·

System Time

This item allows you to set the system time. There is a small

internal (CMOS) battery which is designed to maintain your

system clock.  It is designed to maintain time even when the

PC is powered down or in sleep mode.  The time format is

>KRXUPLQXWHVHFRQG@
8VH>@RU>@WRFRQ¿JXUHV\VWHP7LPH

·

System Date

This item allows you to set the system date. The date format is

>GD\PRQWKGDWH\HDU@
8VH>(17(5@>7$%@RU>6+,)77$%@WRVHOHFWD¿HOG

Summary of Contents for EVO17-S

Page 1: ...USER MANUAL EVO17 S NT 17...

Page 2: ...ated into any language THE MANUFACTURER OR RESELLER SHALL NOT BE LIABLE FOR ERRORS OR OMISSIONS CONTAINED IN THIS MANUAL AND SHALL NOT BE LIABLE FOR ANY CONSEQUENTIAL DAMAGES WHICH MAY RESULT FROM THE...

Page 3: ...nventions for this Manual 11 1 4 Release History 12 Getting to know the basics 13 3URGXFW 6SHFL FDWLRQ 14 2 2 Preparing your Computer 18 2 3 Product Overview 19 Getting started 3 1 AC Adapter 29 3 2 K...

Page 4: ...out BIOS Setup 35 4 1 1 When to Use BIOS Setup 35 4 1 2 How to Run BIOS Setup 35 4 2 BIOS Setup Menu 37 4 2 1 Main Menu 38 4 2 2 Advanced Menu 40 4 2 3 Security Menu 42 4 2 4 Boot Menu 43 4 2 5 Exit M...

Page 5: ...Notebook Manual 5 Preface Chapter 1...

Page 6: ...o the rate at which the body absorbs RF energy The SAR limit set by the ICNIRP Guidelines is 2 0 W kg 10g Testing for SAR is conducted using standard operating positions accepted by the EN standard Du...

Page 7: ...s hearing In order to reduce the risk of damage to hearing one should lower the volume to a safe comfortable level and reduce the amount of time listening at high OHYHOV HDGVHWV VKRXOG FRPSO ZLWK 1 U...

Page 8: ...ver there is no guar antee that interference will not occur in a particular installation If this equipment does cause harmful interference to radio or television reception which can be GHWHUPLQHG E WX...

Page 9: ...Tests for SAR are conducted using standard operating positions accepted by the FCC ZLWK WKH 87 WUDQVPLWWLQJ DW WKH VSHFL HG SRZHU OHYHO LQ GL HUHQW FKDQQHOV The FCC has granted an Equipment Authoriza...

Page 10: ...rating condition protect your work area from direct sunlight Never cover or block the air vents including those located at the base of the computer Never cover your computer or AC adapter with any obj...

Page 11: ...otebook Manual 11 1 3 Conventions for this Manual 87 21 7KLV PHVVDJH FRQWDLQV LPSRUWDQW LQIRUPDWLRQ WKDW PXVW be followed for safe operation 127 7KLV PHVVDJH FRQWDLQV LQIRUPDWLRQ IRU VSHFLDO VLWXDWLRQ...

Page 12: ...Notebook Manual 12 1 4 Release History 1 0 11 2021 9HUVLRQ Date Revision Initial release...

Page 13: ...Notebook Manual 13 Getting to know the basics Chapter 2...

Page 14: ...on how to operate this notebook for the customer Please read this manual carefully before using this notebook CPU Support Processor QWHO H Memory RAM DDR5 4800MHz Physical Characteristic Dimension 394...

Page 15: ...H HIW VLGH 86 HQ 3RZHU R PRGH VXSSRUW 86 SRZHU USB Type C x1 Rear side x1 7 7 RQO Z 9 RXWSXW Audio Speaker MIC x 2 Audio out Mic in XLOG LQ VSHDNHUV 6SHDNHU HDFK Digitial Microphone support x 1 USB3 0...

Page 16: ...er Down Mode D1 D3 support PCIe ASPM L1 1 L1 2 support UI for network package management Wireless LAN BT 0 Z 19 LQWHUIDFH QWHO L L IEEE802 11 a b g n ac ax support Communication Port Infrared capabili...

Page 17: ...OWDJH DGMXVWPHQW EHWZHHQ DQG 9 DWWV 9 3LQV IRU 0 3 0 3 DWWV 9 3LQV IRU 0 3 0 3 Input Keyboard 0HPEUDQH PP WUDYHO PP DFNOLJKW RQH 5 Pointing Device TDA3072 2XWOLQH PP PP Glass like QDEOH LVDEOH DUHD PP...

Page 18: ...Preparing your Computer Connect the AC adapter s DC output plug to the DC IN jack A B The display panel can be opened to a wide range of angles for optimal viewing C Press the power button to turn on...

Page 19: ...Product Overview Please become familiar with each component before you operate the computer 127 7KH SURGXFW V FRORU FRORU 2 SRUW LQGLFDWRU ORFDWLRQ DQG VSHFL cation will depend upon the actually ship...

Page 20: ...Camera Status LED The Camera Status LED shows the Camera status Microphone Infrared capability for facial reconition camera can be used to identify and authenticate user to unlock notebook conduct pa...

Page 21: ...FWLRQV OLNH WKH PRXVH Caps Lock Status LED HIDXOW ON White Touchpad LED indicator Touchpad switch 10 Power Button 3UHVV WKLV EXWWRQ WR WXUQ WKH FRPSXWHU V SRZHU RQ RU R 3RZHU 21 KLWH 6XVSHQG OLQNLQJ K...

Page 22: ...3 USB Port Connects an USB device such as USB Zip drive keyboard or mouse into this jack With charging function Card Reader Insert Memory Card Vents The thermal vents are designed to cool the internal...

Page 23: ...hermal vents are designed to cool the internal components and avoid overheating USB Port Audio Out Jack RQQHFWV DPSOL HG VSHDNHUV KHDGSKRQHV RU PLFURSKRQH LQWR WKLV MDFN Mic In Jack RQQHFWV DPSOL HG V...

Page 24: ...UHODWHG LQMXULHV RU RI RYHUKHDWLQJ the computer do not place the computer directly on your lap or obstruct WKH FRPSXWHU DLU YHQWV 8VH WKH FRPSXWHU RQO RQ D KDUG DW VXUIDFH Do not allow another hard s...

Page 25: ...Notebook Manual 25 If you need to upgrade your system 3OHDVH FRQWDFW WHFKQLFDO VXSSRUW Compartment View SSD BATTERY...

Page 26: ...Notebook Manual 26 Front Side View Light bar 1 1 Smart lighting color control of Light Bar...

Page 27: ...the internal components and avoid overheating 2 3 4 5 HDMI port Connected to the screen or home theater system Power Connector Connects the AC adapter into this connector Network Jack This jack lets...

Page 28: ...Notebook Manual 28 Getting started Chapter 3...

Page 29: ...pter included in the package is approved for your notebook using other adapter model may damage either the notebook or other devices attached to it 127 7KH SRZHU DGDSWHU FDQ EHFRPH KRW ZKHQ LQ XVH 3OH...

Page 30: ...W NH V RQ WKH H ERDUG 7KH FRORUHG FRPPDQGV FDQ RQO EH DFFHVVHG E UVW SUHVVLQJ DQG holding the function key while pressing a key with a colored command 127 7KH QXPEHU RI NH V DYDLODEOH RQ RXU NH ERDUG...

Page 31: ...scription Keypad RADIO 2Q 2 Press this key combination Fn F4 WR WXUQ DOO UDGLRV RQ RU R Display PRGH Press this key combination Fn F3 to enable Display Mode 6XVSHQG Press this key combination Fn F1 to...

Page 32: ...display 9ROXPH GRZQ Press this key combination Fn F9 WR HQWHU 9ROXPH GRZQ PRGH 087 Press this key combination Fn F8 to enter MUTE mode Brightness GRZQ Press this key combination Fn F11 to decrease bri...

Page 33: ...Notebook Manual 33 Search KDUP Optional For a full list of Windows keyboard shortcuts please visit the Microsoft official website https support microsoft com en us Function Keys...

Page 34: ...the touchpad clickpad produces similar results The touchpad clickpad is a rectangular electronic panel located just below your keyboard Click twice left corner will open or close light WRXFKSDG IXQFW...

Page 35: ...Notebook Manual 35 BIOS setup Chapter 4...

Page 36: ...to enter Setup either restart the system by turning it OFF and ON or simultaneously pressing Ctrl Alt Del keys to restart Be noted that the screen snaps and setting options in this chapter are for you...

Page 37: ...Show system overview about memory size and setting of system time and date Advanced Menu 7R VHOHFW WKH IHDWXUH HQDEOH RU GLVDEOH IHDWXUH RQO ZRUN with Intel platform Windows Security Menu Install or...

Page 38: ...which is designed to maintain your system clock It is designed to maintain time even when the PC is powered down or in sleep mode The time format is KRXU PLQXWH VHFRQG 8VH RU WR FRQ JXUH V VWHP 7LPH...

Page 39: ...om Sun to Sat which LV GHWHUPLQHG E 26 UHDG RQO Month Month The month from 01 January to 12 December Date Date The date from 01 to 31 Year Year The year can be adjusted by users Total Memory This allo...

Page 40: ...Notebook Manual 40 4 2 2 Advanced Menu...

Page 41: ...operating systems 190 HYLFH 190 66 LQIR ZLOO EH GLVSOD HG QWHO 9LUWXDOL DWLRQ 7HFKQRORJ KHQ HQDEOHG 900 FDQ WDNH DGYDQWDJH RI DGGLWLRQDO KDUGZDUH IHDWXUHV SURYLGHG E 9DQGHUSRRO WHFKQRORJ Operating mo...

Page 42: ...The password typed now will replace any previously set password from CMOS memory You may also press ESC to abandon new password setting It is extremely important to keep record for any BIOS password w...

Page 43: ...ake any change The Password Check item is used to specify the type of BIOS password protection that is implemented To clear a set Administrator Password User Password just press Enter under Change Adm...

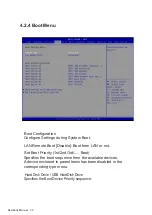
Page 44: ...1 5HPRWH RRW LVDEOH Boot from LAN or not Set Boot Priority 1st 2nd 3rd Boot 6SHFL HV WKH ERRW VHTXHQFH IURP WKH DYDLODEOH GHYLFHV A device enclosed in parenthesis has been disabled in the correspondin...

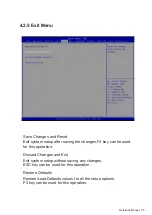
Page 45: ...er saving the changes F4 key can be used for this operation Discard Changes and Exit Exit system setup without saving any changes ESC key can be used for this operation Restore Defaults Restore Load D...

Reviews: