Fit the
Spindle
Oil the bearing
Run approximately 17 drops of the oil supplied into the
top of the bearing house. The spindle will appear a loose
fit in the bearing house until the oil is added. Do not use
anything other than Origin Live oil for performance
reasons.
Insert the spindle
Inserting the spindle into the bearing house needs
attention as careless handling can damage the bearing
surfaces. Wipe the spindle surface first to ensure that it's
absolutely clean and very gently insert it into the bearing
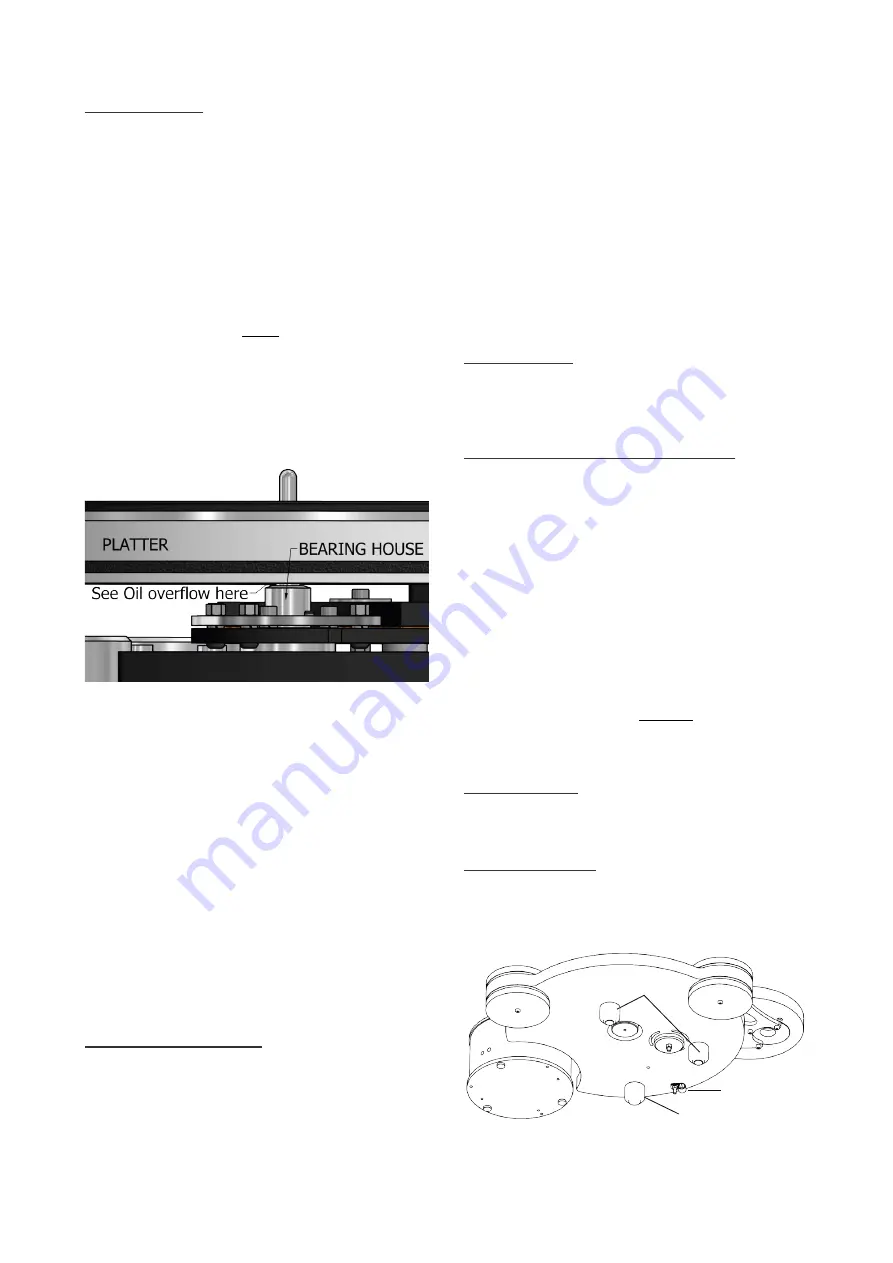
house. If the oil does not overflow when the spindle
touches the bottom then try 2 more drops repeatedly till
you achieve overflow. Overflow can only be seen by
looking at the top of the bearing house with the spindle
inserted. You should notice an oil ridge around the
spindle – see diagram below.
Wipe away excessive overflow at the top of the bearing
house but be careful to leave oil clinging to the spindle
as you need the top of the bearing to be lubricated by oil
overflow and things like tissue paper can suck this area
dry by capillary action. You should spin the spindle
slowly after it has settled into the bearing to ensure even
distribution of oil.
Note that when you oil the bearing, you can get a false
impression of overflow if the spindle has oil on it - the
oil simply scrapes off as the bearing slides in and ends
up on the top of the bearing house. You can “feel”
overflow when you insert the spindle and it meets
resistance at the bottom. This is not a “thud” of the
spindle hitting the bottom but rather a build up of
pressure as the bearing lands on a bed of oil. By further
pressing, you can then see the oil being squeezed out at
the top.
Notes on the bearing:
The bearing has significant play “rock” which runs
counter to expectations. However, this feature achieves
very low friction levels. The spindle effectively rotates
on a thick film of oil without contacting the bearing
sides.
This means there is almost imperceptible platter
movement in rotation. Small low frequency deviations of
this nature are insignificant to performance and far
outweighed by the advantages of low friction and
reduced vibration.
All platters are rigorously checked for level spinning up
to 45rpm - if you notice significant platter flutter once
the belt is fitted, then remove the platter and clean taper
surfaces. Refit it till it sits true.
Do not spin the platter faster than 45rpm as the bearing
relies on a high precision oil film designed for optimal
sound quality within a specific speed range. At higher
than normal running speeds there will be slight platter
flutter.
Fit the Platter
Fit the platter gently over to the spindle but ensure the
tapered mating surfaces are absolutely clean before
assembly by wiping with tissue paper.
For Multi-Layer platter if included
Holding the Multi-layer platter
The top thin layers of the multi-layer platter are fragile
so do not hold the weight of the platter using the top
layers – also avoid placing the platter upside down on
surfaces as the spindle is fastened to a relatively fragile
material.
Slacken screws in the Multilayer
P
latter by 2/3rds
of a turn
The screws are tightened for transit to keep all layers
concentric with one another. However once you have
mounted the multi-layer platter, slacken all the white
nylon screws in the top of the platter anti-clockwise by
2/3 rds of a turn. This step is
essential
to allow the multi-
layer platter to perform as intended and makes a big
difference.
Fit Platter Mat
Finally add the platter mat ensuring the printed logo is
uppermost for sound quality reasons.
Adjust deck feet
No foot should be tightened fully onto the plinth as
performance is best when the foot sits on the thread
alone.
REAR METAL THREADED
FOOT
PLASTIC THREADED FEET
CABLE CLIP


