Oricom PMR1280, Operating Instructions Manual
The Oricom PMR1280 is a powerful two-way radio with a range of up to 10km, perfect for outdoor adventures or professional use. To get started, simply visit our website and download the free Operating Instructions Manual. With step-by-step guidance and troubleshooting tips, this manual ensures a seamless experience with the product.
Share
Download


Reviews:
No comments
Related manuals for PMR1280

DAB 55
Brand: Xoro Pages: 16

900394
Brand: ConcealFab Pages: 22

RB 040
Brand: EGG Pages: 52

WTE 21
Brand: switel Pages: 56

HiLine
Brand: Mercedes-Benz Pages: 23

NR38
Brand: Emerson Pages: 4

MR HH450 DUAL
Brand: Cobra Pages: 43

DA-300E
Brand: Arion Pages: 31

PANTHER 300M
Brand: COMNET ERICSSON Pages: 32
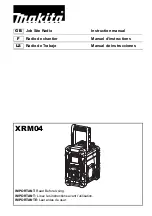
XRM04
Brand: Makita Pages: 28

PSA110/00
Brand: Philips Pages: 2

AZ6000/05
Brand: Philips Pages: 2

AZ6000/05
Brand: Philips Pages: 3

AE6780
Brand: Philips Pages: 2

AE1505
Brand: Philips Pages: 2

B7X14A
Brand: Philips Pages: 6

AL 990
Brand: Philips Pages: 7

AE3350
Brand: Philips Pages: 8


