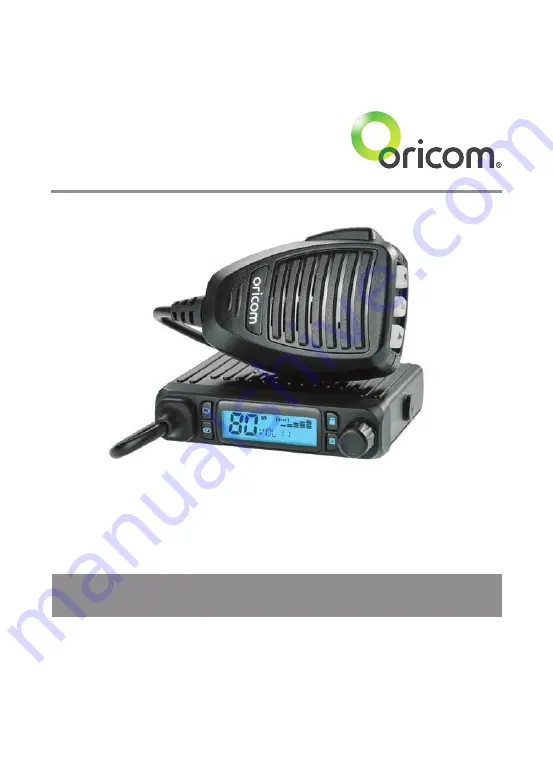
background image

Keep this user guide for future reference. Always retain your proof of purchase in case of

Warranty service and register your product on line at: 

AUSTRALIA: www.oricom.com.au  NEW ZEALAND: www.oricom.co.nz

Operating Instructions

DTX4300 80 Channel UHF Citizen Band Radio

Summary of Contents for DTX4300

Page 1: ...eference Always retain your proof of purchase in case of Warranty service and register your product on line at AUSTRALIA www oricom com au NEW ZEALAND www oricom co nz Operating Instructions DTX4300 8...

Page 2: ...ent wideband channels This increased the number of channels up to 80 75 of which are useable voice channels What issues may users experience during the transition phase When a new narrowband radio rec...

Page 3: ...frequencies 23 Customer Support 26 Express Warranty Australia 27 Need Help If you need assistance setting up or using your Oricom product now or in the future call Oricom Support Australia 1300 889 7...

Page 4: ...tors Controls and Indicators Front View 1 2 3 4 5 6 7 1 Microphone connector 2 Open Scan Priority Scan 3 Memory Scan Group Tone Scan 4 Memory recall Memory write 5 Remove memory Menu 6 Volume Channel...

Page 5: ...ators Rear View 2 1 3 1 Antenna Connection 2 Power supply connection 3 3 5mm external jack for optional 8 ohm speaker Microphone 1 Push to talk 2 Volume Channel SQ down 3 Mode On off switch 4 Volume C...

Page 6: ...icators LCD Icons Indicators 1 2 4 3 5 7 8 9 6 1 Channel display 6 Priority 2 CTCSS or DCS on 7 Memory Group number 3 Duplex On 8 Memory Group I II or III 4 Channel busy indicator 9 Status display 5 S...

Page 7: ...ot always clearly marked They include fueling areas such as below deck on boats fuel or chemical transfer or storage facilities areas where the air contains chemicals or particles such as grain dust o...

Page 8: ...ounting it close to heaters or air conditioners Never press the PTT or CALL button before connecting the antenna to the radio Wiring Methods There are two possible wiring configurations for connecting...

Page 9: ...Hz frequency band Antenna installation 1 Connect the antenna to the rear antenna socket using a PL259 coaxial connector not supplied 2 To obtain maximum performance from the radio select a high qualit...

Page 10: ...fortable reception On the microphone push the up or down buttons to increase or decrease the volume If held down the volume will increase or decrease quickly Selecting a channel Press channel selector...

Page 11: ...times and adjust Squelch with the up and down buttons Note If a button is not pressed within 5 seconds the radio will automatically exit the sub display of VOL CH and SQL PTT Push To Talk button Press...

Page 12: ...is clear again The scan resume time can be set as an optional pause of P5 default ch 1 2 3 4 5 6 7 77 78 79 80 Priority Scan Priority Scan scans for activity but in addition it also inserts your Prior...

Page 13: ...mode which allows continual communication across congested channels Group Tone Scan channels are stored into Group memory scan and only opens the squelch for signals with the correct sub code 38CTCSS...

Page 14: ...n Group indicator will flash to indicate which group is selected The DTX4300 has 48 stored channels as below CH Group Group I Group II Group III 0 9 25 1 10 26 2 11 27 3 4 5 6 7 8 9 A B C D E F Each m...

Page 15: ...onds to save exit from memory write Remove Memory in Scanning While the radio stops scanning on a busy channel press and hold button for 2 seconds Channel will be removed from current scanning The rem...

Page 16: ...cycle through each available function 3 Rotate the channel knob to alter the parameters of the selected function Use the channel dial to change the value of each setting If a button is not pressed wi...

Page 17: ...Beep Off Off On Busy channel lock Off Off On Scan resume time p5 P5 to 5 10 15 Auto power Off Off Off to 1H 2H 4H Group Tone Scan CT1 67Hz On Off Reset User User Factory Flip Top UP Bottom UP Top UP...

Page 18: ...and 41 48 used by local repeater stations When activated your radio will receive the Repeater on its specific channel all repeater output are on channel 1 to 8 and 41 to 48 but transmit to the repeat...

Page 19: ...1 476 4375 477 1875 CH71 42 476 4625 477 2125 CH72 43 476 4875 477 2375 CH73 44 476 5125 477 2625 CH74 45 467 5375 477 2875 CH75 46 476 5625 477 3125 CH76 47 476 5875 477 3375 CH77 48 476 6125 477 362...

Page 20: ...lia channel 05 and 35 are reserved for Emergency calls 96 multi colour Backlight You can select from 96 different multi colour backlighting for the LCD backlight LCD backlight brightness You can reduc...

Page 21: ...me The automatic power off time can be set to OFF 1 2 4 hours at menu mode Group Tone setting The group tone scan default tone selected is CTCSS 01 67Hz You can select from CTCSS 01 38 to DCS 01 to 10...

Page 22: ...to the factory default settings User reset will clear all settings except user programmed memory channels they will be preserved The type of reset is selected in Menu list see pages 14 and 15 Flip Rot...

Page 23: ...5625 66 477 0625 477 0625 07 476 5750 476 5750 27 477 0750 477 0750 47 476 5875 67 477 0875 477 0875 08 476 6000 476 6000 28 477 1000 477 1000 48 476 6125 68 477 1125 477 1125 9 476 6250 476 6250 29...

Page 24: ...channel may be used for simplex operation in areas where it is not used for repeater operation Speech telephony shall be inhibited on these channels At the time of production Channels 61 62 and 63 are...

Page 25: ...7 0 21 136 5 2 71 9 22 141 3 3 74 4 23 146 2 4 77 0 24 151 4 5 79 7 25 156 7 6 82 5 26 162 2 7 85 4 27 167 9 8 88 5 28 173 8 9 91 5 29 179 9 10 94 8 30 186 2 11 97 4 31 192 8 12 100 0 32 203 5 13 103...

Page 26: ...sing the product after reviewing the resources above or would like to purchase replacement parts or accessories please call our Customer Support Team Our dedicated local support team are more likely t...

Page 27: ...right or remedy pursuant to the Australian Consumer Law and which may not be so excluded restricted or modified For such conditions terms guarantees and warranties that cannot be excluded restricted...

Page 28: ...ange to the conditions of this Express Warranty is valid unless it is made in writing and signed by an authorised representative of Oricom Oricom will not be liable under this Express Warranty and to...

Page 29: ...member advises that your product does not qualify for return this warranty does not apply to your product Products that are authorised to be returned to Oricom in Australia must include all of the fo...

Page 30: ...any user generated data such as stored telephone numbers text messages and contact information Please ensure that you have made a copy of any data saved on your goods before sending for repair Please...

Page 31: ...Windsor NSW 2756 Australia Email support oricom com au Phone 1300 889 785 or 02 4574 8888 Monday to Friday 8am to 6pm AEST Web www oricom com au Fax 02 4574 8898 Contact details for Oricom support and...

Reviews: