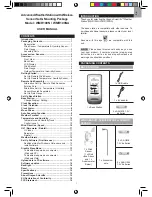


1
EN
Advanced Weather Station with Wireless
Sensor Set & Mounting Package
Model: WMR100N / WMR100NA
USER MANUAL
CONTENTS
Introduction ............................................................... 1
Packaging Contents ................................................. 1
Base station ........................................................... 1
Wind Sensor / Temperature & Humidity Sensor ..... 1
Rain Gauge ............................................................ 2
Assembly Parts ...................................................... 2
Accessories - Sensors ............................................. 2
Overview .................................................................... 2
Front View .............................................................. 2
Back View .............................................................. 3
LCD Display ........................................................... 3
Wind Sensor ........................................................... 4
Rain Gauge ............................................................ 4
Outdoor Temperature / Humidity Sensor ................ 5
Getting Started .......................................................... 5
Set Up Remote Wind Sensor ................................. 5
Set Up Remote Temperature / Humidity Sensor .... 5
Remote Unit Assembly ............................................. 5
Alternative Set Up: Remote Wind Sensor on
Existing Pole .......................................................... 6
Alternative Set Up: Temperature / Humidity
Sensor Mounted Separately ................................... 7
Set Up Rain Gauge ................................................ 7
Set Up Base Station ................................................. 8
Base Station .............................................................. 8
Change Display / Setting ........................................ 8
Clock Reception ....................................................... 8
Clock / Calendar ....................................................... 9
Clock Alarm ............................................................... 9
Moon Phase .............................................................. 9
Auto Scanning Function .......................................... 9
Weather Forecast ..................................................... 9
Temperature and Humidity .................................... 10
Temperature and Humidity Trend ......................... 10
Comfort Level ....................................................... 10
Wind Direction / Speed .......................................... 10
UVI / Barometer / Rainfall ....................................... 11
UV Index .............................................................. 11
Barometer ............................................................ 12
Rainfall ................................................................. 12
Weather Alarms ...................................................... 12
Set Up Software (First time use) ........................... 12
Additional step for Windows Vista users only ...... 12
Install software ..................................................... 13
Disable Sleep Mode ................................................ 13
To disable sleep mode on computer .................... 13
(Windows XP)
To disable sleep mode on computer .................... 13
(Windows Vista)
Upload data to PC software ................................... 13
Software updates .................................................... 14
Backlight ................................................................. 14
Reset ........................................................................ 14
Specifications ......................................................... 14
Precautions ............................................................. 15
About Oregon Scientific ........................................ 15
EU Declaration of Conformity ............................... 15
FCC Statement ........................................................ 16
INTRODUCTION
Thank you for selecting the Oregon Scientific™ Weather
Station (WMR100N / WMR100NA).
The base station is compatible with other sensors. To
purchase additional sensors, please contact your local
retailer.
Sensors with this logo
are compatible with this
unit.
NOTE
Please keep this manual handy as you use
your new product. It contains practical step-by-step
instructions, as well as technical specifications and
warnings you should know about.
PACKAGING CONTENTS
BASE STATION
1 x Base Station
1 x USB cable
1 x 6V adapter
4 x AA UM-3 1.5V
batteries
WIND SENSOR / TEMPERATURE & HUMIDITY
SENSOR
1 x Wind
Sensor
(1 x Wind
Vane Above
and 1 x
Anemometer
Below)
1 x Aluminium
pole
2 x AA UM-3
1.5V batteries
2 x AAA UM-4
1.5V batteries