background image

EN

23

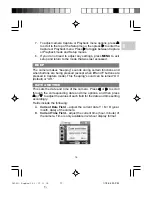
To change the settings in Playback (Photo or Video Playback) mode:

1. If the camera is in Capture mode, press 

 to switch to Playback

mode.

2. Press 

MENU 

to access the Playback menu.

3. Use 

 or   to navigate the menu screen press   to enter the

selected option in the middle of the LCD.

4. Use 

 or 

 to scroll through the menu option settings and

press 

SET 

to select and confirm the desired setting.

DELETE

See section on "Displaying and Deleting Photos" for more information.

ROTATE

Once Rotate is selected from the Playback menu options, the LCD
will show the photo that you want to rotate.

1. Press 

 or   to rotate the photo clockwise or counterclockwise

at 90

°

 intervals, respectively.

2. Press 

SET 

to confirm and save rotation of photo OR if you decide

to cancel photo rotation, press 

MENU 

to exit.

NOTE:

 Video files cannot be rotated.

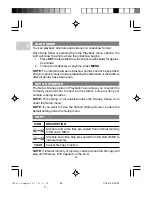
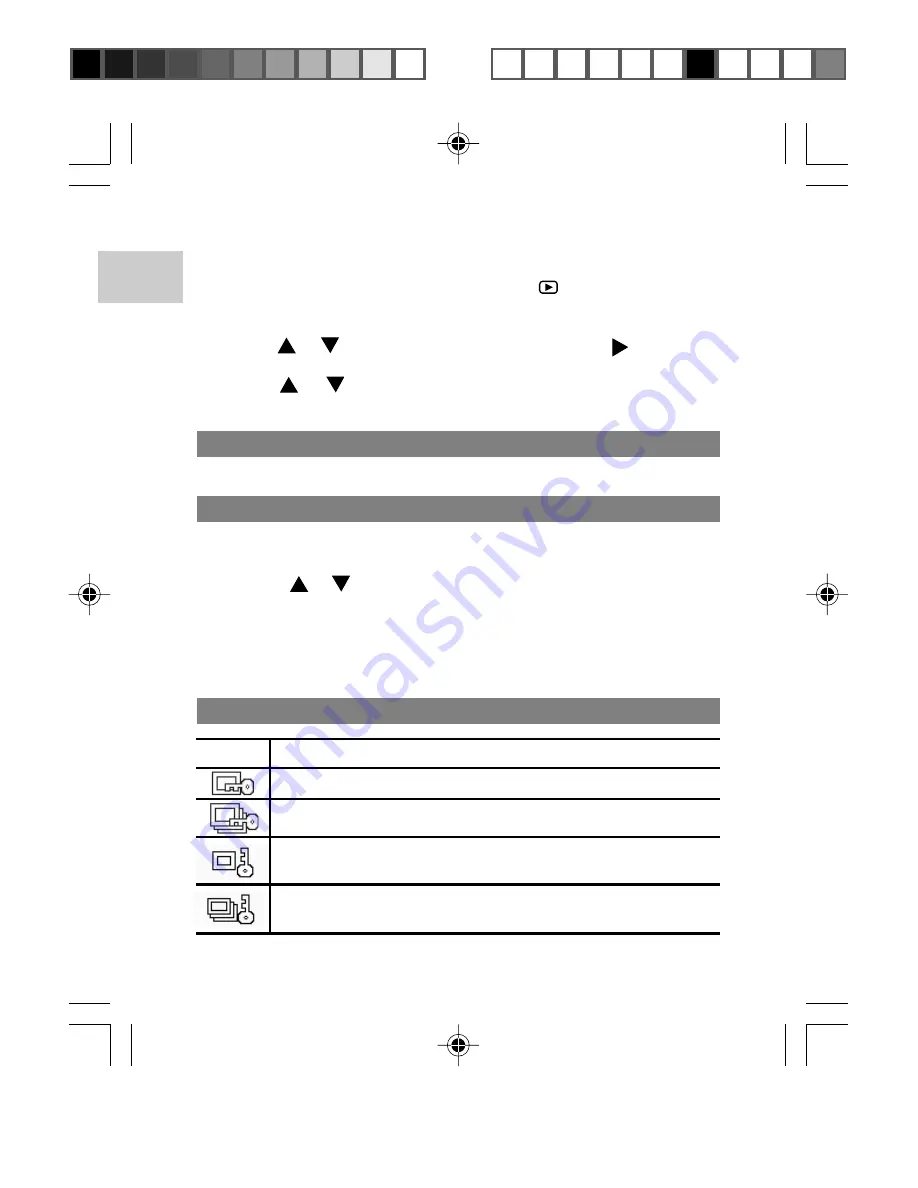
PROTECT

ICON

DESCRIPTION

Protects the current photo or video from accidental deletion.

Protects all photos and videos from accidental deletion.

Unprotects the current photo or video. The file can be
deleted.

Unprotects all photos and videos. All files can be subjected
to deletion.

DS9810 EngManl R3 (V2.0) OP

1/7/05, 4:00 PM

24

¶´ƒ

Summary of Contents for DS9810

Page 1: ...Model DS9810 User Manual Manuale d uso Manuel d utilisation DS9810 EngManl R3 F V2 0 OP 1 7 05 3 59 PM 1 ƒ ...

Page 2: ...he Battery 3 Attaching the Strap 4 Memory Storage 4 Basic Photography 5 Preparing the Camera 5 Taking Basic Pictures 6 Auto Focus 6 Displaying and Deleting Photos 7 Selecting Flash Mode 8 Zooming 8 Using the Self Timer 9 Camera Capture Menu Options 10 Capture Mode 11 Resolution 12 Quality 12 White Balance 13 ISO 13 Effect 14 Scenery 14 EV 14 Instant Review 15 Camera Setup 15 DS9810 EngManl R3 C V2...

Page 3: ... Menu 22 Delete 23 Rotate 23 Protect 23 Crop 24 Slide Show 25 Set as Startup 25 Copy 25 Connecting to External Devices 26 Connecting to a TV 26 Installing Software Drivers Windows Based PC 26 Transferring Files from Camera to PC or Macintosh 27 Disconnecting the Camera from the PC 28 Addendum 28 Memory Capacity Size and Quality 28 Troubleshooting 29 Specifications 32 Important Notice 34 Statement ...

Page 4: ...EN Cleaning the Digital Camera 35 About Oregon Scientific 35 Trademark Information 36 FCC Statement 36 Ver 2 0 DS9810 EngManl R3 C V2 0 OP 1 7 05 3 59 PM 3 ƒ ...

Page 5: ...s designed to give you many years of reliable service Other features Include Video capture with audio playback Scenery continuous shooting modes Macro White Balance and Exposure compensation settings 3x optical zoom lens Auto focus lens Self timer Video output USB 1 1 interface Rechargeable lithium battery Compatible with Windows 98SE ME 2000 XP and MAC OS 9 x 10 x FRONT AND TOP VIEW 1 1 SHUTTER R...

Page 6: ...on 8 Strap hole 9 RESET hole 10 SET button 4 way direction buttons 11 PLAYBACK button 12 Speaker 13 DELETE button 14 Video output 15 Battery compartment SET BUTTON 4 WAY DIRECTION BUTTONS 1 button Macro 2 button 3 SET button Camera Effects 4 button Self timer 5 button Flash 1 3 4 2 7 5 6 8 9 11 12 13 14 15 10 1 2 5 4 3 DS9810 EngManl R3 V2 0 OP 1 7 05 4 00 PM 3 ƒ ...

Page 7: ...HE BATTERY Your camera comes with a rechargeable lithium battery To prevent damage correctly insert the battery as shown Once the battery is inserted into the camera plug one end of the AC adaptor s into the wall power outlet and the other end directly into the camera s DC input to begin charging the battery Battery charging time is approx 2 5 hours TIP To maximize the performance of your camera a...

Page 8: ...into memory slot until it clicks into position 4 To remove push against the card lodged inside the memory slot The card automatically ejects itself out of the slot NOTE The SD card MMC will not insert fully into the slot if it is facing the wrong way Be careful not to apply undue force to the card NOTE Do not insert or remove SD card MMC while camera is on You must turn off the camera when inserti...

Page 9: ... of power the zoom lens will not retract to its non operation condition The lens will re initialize and start up again after the battery is replaced NOTE When the battery is running low on power the flash if turned on will automatically turn off This indicates that you will need to recharge the battery soon The DS9810 has 2 basic operating modes Capture Still Photo Shooting and Video Capture modes...

Page 10: ...cus the bottom LED by the viewfinder turns to green When focusing the LED blinks green slowly The bottom LED will light up and blink slowly during auto focus and stop blinking once auto focus is ready The bottom LED will blink quickly to indicate auto focus is not ready AUTO FOCUS The camera s auto focus lens takes photos at a range of 1 m to infinity normal and approximately 10 cm macro The macro...

Page 11: ...OTOS 1 You can display the last photo taken as well as other photos by pressing and or 2 Enter the delete option by pressing 3 Press once to scroll to or press twice to scroll to Press SET to select Delete All or Delete One appears onscreen 4 Press or to scroll to and press SET to confirm deletion NOTE If you decide to cancel file deletion at this stage press MENU to exit 5 All files or the last c...

Page 12: ...ZOOMING Your digital camera comes with a 3x optical and 4x digital zooming function 1 W ZOOM OUT button 2 T ZOOM IN button 1 In Capture mode increase zooming by pressing T The zoom progress bar appears on the LCD and moves left or right to indicate the zoom level 2 To decrease the zooming press W SELECTING FLASH MODE Press repeatedly to toggle between auto flash on flash on and flash off Observe t...

Page 13: ...ss to activate the Self Timer function The Self Timer icon appears on the LCD TIP If you wish to cancel the Self Timer function at this stage press again and the icon disappears from the LCD 2 Press the SHUTTER RELEASE button The Self Timer LED starts blinking The camera starts counting down from 10 seconds until the photo is automatically taken The Self Timer then automatically disables 9 Battery...

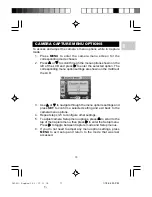
Page 14: ...ddle of the LCD 3 Use or to navigate through the menu option s settings and press SET to confirm a selected setting and exit back to the camera menu options 4 Repeat steps 3 5 to configure other settings 5 To adjust camera Setup menu options press to scroll to the top of the Capture menu then press to enter the Setup menu Press to toggle between Capture mode and Setup menus 6 If you do not need to...

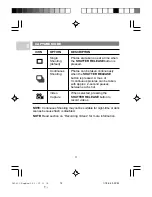
Page 15: ...R RELEASE button is pressed A max of 3 continuous pictures can be taken with approx 2 second pauses between each shot Video Capture When selected pressing the SHUTTER RELEASE button to record videos NOTE Continuous Shooting may not be suitable for night time or dark scenes because flash is disabled NOTE Read section on Recording Videos for more information 11 DS9810 EngManl R3 V2 0 OP 1 7 05 4 00 ...

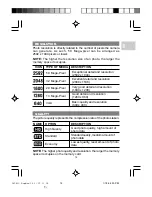
Page 16: ...olution 2592 x 1944 ICON TYPE OF MEDIA 3 2 Mega Pixel Excellent detail and resolution 2048 x 1536 2 0 Mega Pixel Very good detail and resolution 1600 x 1200 VGA Basic quality and resolution 640 x 480 NAME DESCRIPTION Economy Lowest quality least amount of photo data OPTION High Quality Good photo quality high amount of photo data Standard Standard quality medium amount of photo data NOTE The highe...

Page 17: ...n light Fluorescent Use under fluorescent lamp Shade Use outside in the shade ISO The ISO setting affects the camera s sensitivity to light DESCRIPTION Auto default Sets the speed automatically No icon is shown on LCD screen ICON SETTING ISO rating 100 Use for very brightly lit scenes ISO rating 200 Use for brightly lit scenes ISO rating 400 Use for normally lit scenes NOTE A photo taken at higher...

Page 18: ...pe default Use to take photos of both the subject and the surrounding landscape No icon is shown on LCD screen SCENERY SETTING Landscape Use to take photos of outdoor landscapes Portrait Use to take portrait photos where emphasis is placed on skin texture and tone Night scene Use for taking photos at night where the camera sets a slower shutter speed than is used in normal shooting EV EV exposure ...

Page 19: ...yback mode menu screen 3 Press to switch over to the camera Setup menu 4 Use or to navigate through the setup options shown on the left of the LCD and press to enter the selected option The corresponding setup option settings are shown on the right of the LCD 2 00 1 75 1 50 1 25 1 00 0 75 0 50 0 25 0 default 0 25 0 50 0 75 1 00 1 25 1 50 1 75 2 00 EV 5 Use or to navigate through the setup option s...

Page 20: ...ing pressed except when W and T buttons are pressed in Capture mode This beeping sound can be turned On default or Off DATE AND TIME This sets the date and time of the camera Press or to scroll through the corresponding date and time options and then press or to adjust the values of each field for the date and time setting accordingly Fields include the following A Current Date Field adjust the cu...

Page 21: ...Portuguese Traditional Chinese Simplified Chinese and Japanese AUTO OFF You can set the camera to turn off automatically when no operation is performed The period of time before shutdown can be adjusted Off 1 min or 2 min NOTE Auto Off is not available during slideshow and video playback or when the camera is connected to a PC TV MODE If connecting the camera to a TV you can set the camera s video...

Page 22: ...echanism that prevents data from being deleted and the card from being formatted To format such cards make sure the lock is disabled first LCD BRIGHTNESS You can adjust the LCD brightness level 2 0 2 to compensate for different lighting conditions 0 is the default setting If there is plenty of ambient light such as in bright sunshine or if ambient light levels are relatively low such as indoors or...

Page 23: ...layback mode The display is switched to the photo video preview mode 2 To exit the Playback mode and enter Capture mode press again The Playback mode can be divided into two sub modes Thumbnail selection mode Photo video display mode default DISPLAYING THUMBNAILS Thumbnails of photos and videos in 3 columns x 3 rows are displayed a maximum of 9 at a time To display a thumbnail 1 Press W to enter t...

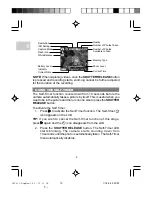
Page 24: ... the photos and videos taken NOTE If the current memory setting is the SD card MMC Playback mode will only show photos and videos stored on that card If the current memory setting is internal memory Playback mode will only show photos and videos stored in internal memory PHOTO PLAYBACK Protected Image Movie File Current Selected File Playback Mode File Type Protect Mode Indicator File No Folder nu...

Page 25: ...pear from the playback photo 2 Press T to zoom in any photo A magnification indicator appears on the top left of the LCD indicates zoom level The smaller the rectangular box inside the magnification indicator becomes the higher the zoom level 3 To zoom out of the photo press W 4 While a photo is magnified only a portion of the photo will be visible To scroll to and view different parts of the magn...

Page 26: ...the following section for more infomation 5 Press SET to exit zooming mode NOTE In Video Capture mode you may zoom in or out of a scene before you begin recording a video but not during video capture or previewing the video after it has been captured VIDEO PLAYBACK 1 Press SET to start playback 2 Press SET to pause playback and again to continue playback 3 Press or anytime during video playback to...

Page 27: ... Once Rotate is selected from the Playback menu options the LCD will show the photo that you want to rotate 1 Press or to rotate the photo clockwise or counterclockwise at 90 intervals respectively 2 Press SET to confirm and save rotation of photo OR if you decide to cancel photo rotation press MENU to exit NOTE Video files cannot be rotated PROTECT ICON DESCRIPTION Protects the current photo or v...

Page 28: ...ction button to select the area of the photo you want to crop 2 Press SET to view the selected area of the photo to crop 3 Press SET again to save the cropped area OR press MENU to exit if you decide not to crop the photo NOTE Cropping a photo creates a new file that contains the cropped photo The file with the original cropped photo also remains in the camera s internal or external memory A video...

Page 29: ...e press MENU NOTE The interval between slideshow photos cannot be specified and you cannot choose to keep repeating the slideshow or discontinue after all photos have been seen SET AS STARTUP The Set as Startup option in Playback menu allows you to select the currently viewed photo to show as the startup screen when your camera is being turned on NOTE This setting is not enabled unless the Startup...

Page 30: ...f your TV 4 Turn the TV and camera on Make sure to switch the TV to the appropriate AV channel display NOTE The LCD is automatically turned off when the camera is connected to a TV NOTE All photos videos can be viewed in Playback Mode or the camera can be used as a TV Cam in Capture Mode INSTALLING SOFTWARE DRIVERS WINDOWS BASED PC Use the USB cable included to connect the camera to your Windows b...

Page 31: ... Macintosh To transfer files from your camera to your computer 1 Turn on your PC or Macintosh and allow your system s operating system to boot 2 Turn on your digital camera Connect the camera to your PC or Macintosh using the USB cable Once connected the camera s top LED will blink 3 The camera will then appear as a Removable Disk drive on your PC s My Computer screen NOTE When you connect your di...

Page 32: ...USB Disk option will pop up Highlight and left click on the option 3 A pop up window will inform you that the USB device can now be safely removed 4 Disconnect the USB cable from the camera and or from the PC NOTE For MacIntosh systems drag and drop the Untitled icon from the desktop to the Trash icon before disconnecting TIP Before unplugging your camera from your computer wait at least 15 second...

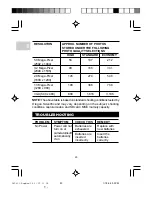
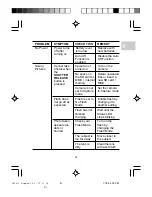
Page 33: ...sed on standard shooting conditions tested by Oregon Scientific and may vary depending on the subject shooting conditions capture modes and SD card MMC memory capacity TROUBLESHOOTING PROBLEM SYMPTOM CHECK THIS REMEDY Power will not turn on or cameraturnsoff automatically if on Batteries are exhausted Replace with new batteries Batteries are inserted incorrectly Insert the batteries correctly No P...

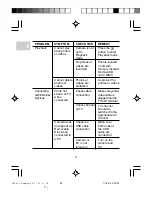
Page 34: ...turning on Battery level is too low Replace with new batteries Auto Off Function is enabled Disable the Auto Off Function Cannot take photos when the SHUTTER RELEASE button is pressed Taking Pictures Camera not turned on Turn on the camera No space on the SD card or MMC internal memory Delete unwanted files or insert a new SD card MMC Camera is not set to Capture mode Set the camera to Capture mod...

Page 35: ...annot delete photos or videos Photo not shown on TV when connected Check cable connection Make sure yellow video cable is plugged into the TV s AV terminal Connecting with External Devices Check channel on TV TV channel should be switched to the appropriate AV channel Camera does not appear as Removable Disk when connected to a PC Make sure both ends of the USB cable are connected Check the USB ca...

Page 36: ...0 pixels 1280 x 960 pixels 640 x 480 pixels Still photos DCF Exif ver 2 2 JPEG compliant Video AVI format Type auto focus Focus range 1m to infinity normal Approx 10 cm macro F number F2 65 to F4 97 Focal length 5 9 mm to 17 7 mm 3x 4x Approx 1m 2 5m Temperature Approx 0 C 40 C 1 8 TFT LCD Internal Memory Digital Video Recording Approx 8 MB QVGA 320 x 240 with audio AVI format SPECIFICATIONS DS981...

Page 37: ...hite Balance Exposure Compensation ISO Sensitivity Language user interface PC Compatibility Auto Daylight Tungsten Fluorescent Shade 2 EV Auto 100 200 400 English French German Spanish Italian Portuguese Traditional Chinese Simplified Chinese and Japanese Windows 98SE ME 2000 XP Mac OS9 x 10 x Software ArcSoft PhotoImpression 5 0 Power Requirement DC 5V 5 with 1 5A output current Testing Standards...

Page 38: ...ice in water or subject the camera to impact or shock Do not under any circumstances touch the exposed electronic circuitry of the device as there is a danger of electric shock Take special care when handling a damaged LCD display as the liquid crystals can be harmful to your health Do not use or store the device in locations that may adversely affect the product such as rain snow desert and magne...

Page 39: ...c com to learn more about Oregon Scientific products such as digital cameras MP3 players children s electronic learning products and games projection clocks health and fitness gear weather stations and digital and conference phones The website also includes contact information for our customer care department in case you need to reach us as well as frequently asked questions and customer downloads...

Page 40: ...must accept any interference received including interference that may cause undesired operation This equipment has been tested and found to comply with the limits for a Class B digital device pursuant to Part 15 of the FCC Rules These limits are designed to provide reasonable protection against harmful interference in a residential installation This equipment generates uses and can radiate radio f...

Page 41: ...e to this device that are not expressly approved by Oregon Scientific Inc may void the user s authority to operate the equipment Interface cable Use the shielded cable sold or provided by Oregon Scientific Inc for your equipment Using other interface cable may exceed the limits of Class B Part 15 of the FCC rules Legal Company Name Oregon Scientific Inc Address 19861 SW 95th Place Tualatin Oregon ...

Page 42: ... 2005 Oregon Scientific All rights reserved 086 003656 106 DS9810 EngManl R3 B V2 0 OP 1 7 05 3 59 PM 1 ƒ ...

Reviews: