


ESP
AÑOL
ENGLISH
FRANÇAIS
DEUTSCH
POR
TUGUÊS
DS8118 Manual-6 Lang. (086-002937-017)
POR
TUGUÊS
ENGLISH
FRANÇAIS
DEUTSCH
IT
ALIANO
IT
ALIANO
ESP
AÑOL
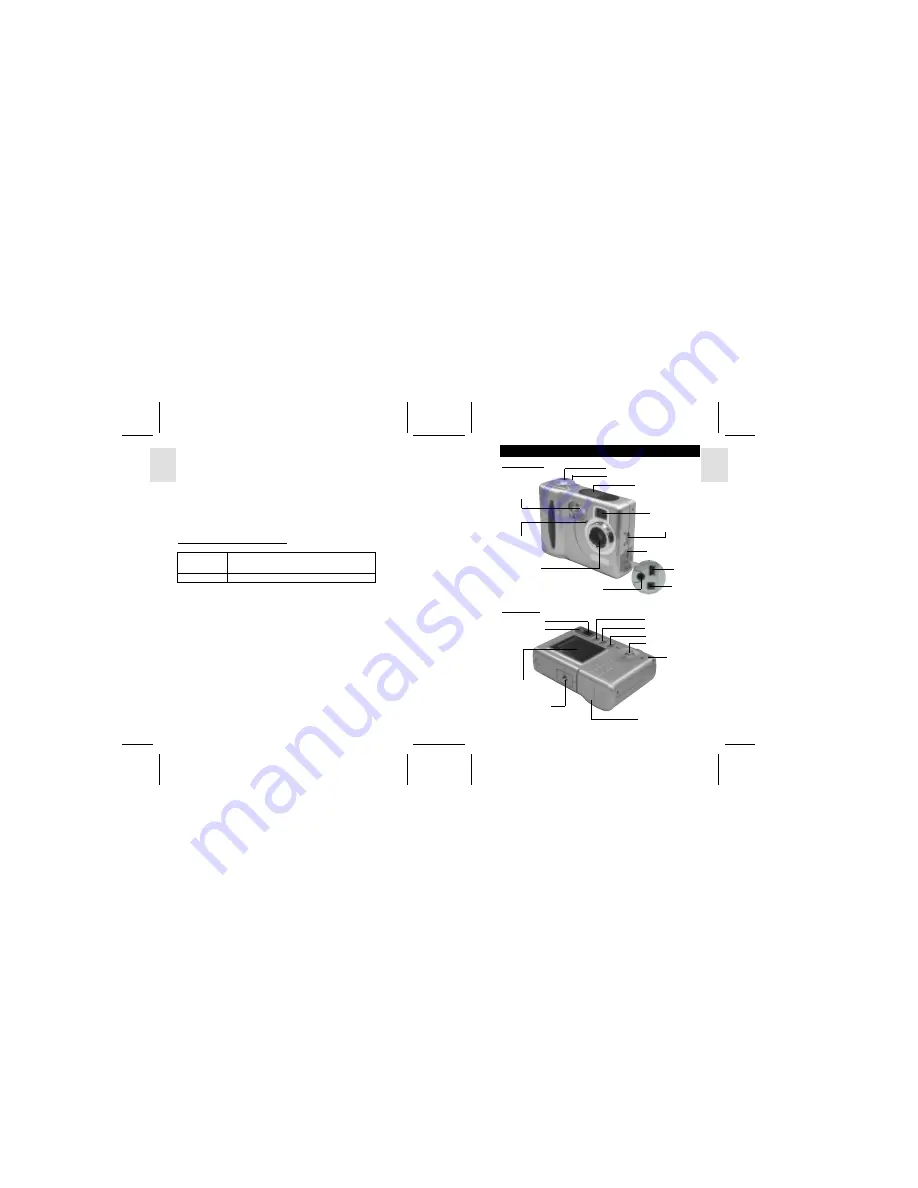
KEY FEATURES
FRONT VIEW
BACK VIEW
2
3
•
Do not, under any circumstances, touch the exposed electronic circuitry of the
device, as there is a danger of electric shock.
•
Take special care when handling a damaged LCD display, as the liquid crystals
can be harmful to your health.
•
Do not use or store the device in locations that may adversely affect the product
such as rain, snow, desert, and magnetic fields.
•
Check all major functions when the device is unused for a long period of time.
This is to ensure its full operation. Maintain regular testing and cleaning of your device.
•
Do not look through the viewfinder at the sun or other strong lights. This could
damage your eyesight.
•
Avoid leaving the camera exposed to direct sunlight, as the action of the lens
could cause fires.
•
Remove the batteries and memory card before storing the camera for long periods
of time. Then, keep it in a well-ventilated place in order to prevent moulding.
NOTES ON THE DIGITAL CAMERA
Cleaning your Camera
Lens / Viewfinder
Use a blower or a lens brush to remove dirt or dust. Wipe
carefully with a soft cloth to remove fingerprints and other
stains. Do not touch with fingers.
Body
Clean with a damp cloth; dry immediately.
•
Do not use benzene, thinner, or similar cleaning agents to clean your camera, as
these may cause permanent damage not covered by the warranty.
•
Do not scratch hard objects against the lens, LCD or viewfinder as these surfaces
are easily damaged.
Handling your Camera
•
For important photographs (such as weddings and overseas trips), always take a test
photograph and view the image to make sure that the camera is functioning normally.
•
Do not use the camera while you are walking, running, driving or operating
machinery. This can result in serious accidents.
•
Do not use this device in aircrafts or hospitals. It can cause malfunctions in the
control devices of other equipment.
•
If the camera is carried suddenly from a cold location into a warm place, con
densation may form inside the device. Switch the camera off in such cases and
wait an hour before using it again.
Menu Button
Flash/Delete Button
Tripod Hole
Viewfinder
Strap Ring
Battery Door
4-Way Controller
Display/OK Button
Flash Lamp
On-Screen Display
Shutter Release Button
Built-In Flash
Self-Timer
Lamp
Viewfinder
Focus Switch
Terminal Cover
Lens
Mode Dial
Mini-USB
Terminal
AC Adaptor
Socket
Video/Audio Socket
Status LCD


