ENGLISH
FRENCH
GERMAN
IT
ALIAN
SP
ANISH
ENGLISH
FRENCH
GERMAN
IT
ALIAN
SP
ANISH
POR
TUGUESE
POR
TUGUESE
6
7
Important:
Do not mix old batteries with new batteries. Always dispose of exhausted batteries properly.
Do not insert anything except appropriate batteries into the battery compartment as this may
cause damage to the camera.
Inserting/Removing Memory Card
1. Turn off the power of your DShot II/III digital camera.
2. Open the memory card slot cover.
3. Insert memory card as indicated fully.
4. Close the memory card slot cover.
Note:
When memory card has been inserted, the built-in memory will not be available.
Important:
Removing memory card when the power of your DShot II/III digital camera is turned on may
lead to data loss.
Basic Operation
Turning Power On or Off
•
When the camera is turned off, press Power button to turn the power of the camera on.
•
When the camera is turned on, press Power button to turn the power of the camera off.
Note:
In order to minimize power consumption, the camera will automatically turn off after 1 minute
(default) of inactivity or processing complete. Please refer to Settings in TV Playback mode for
customization of the auto-power-off duration.
Operation Modes
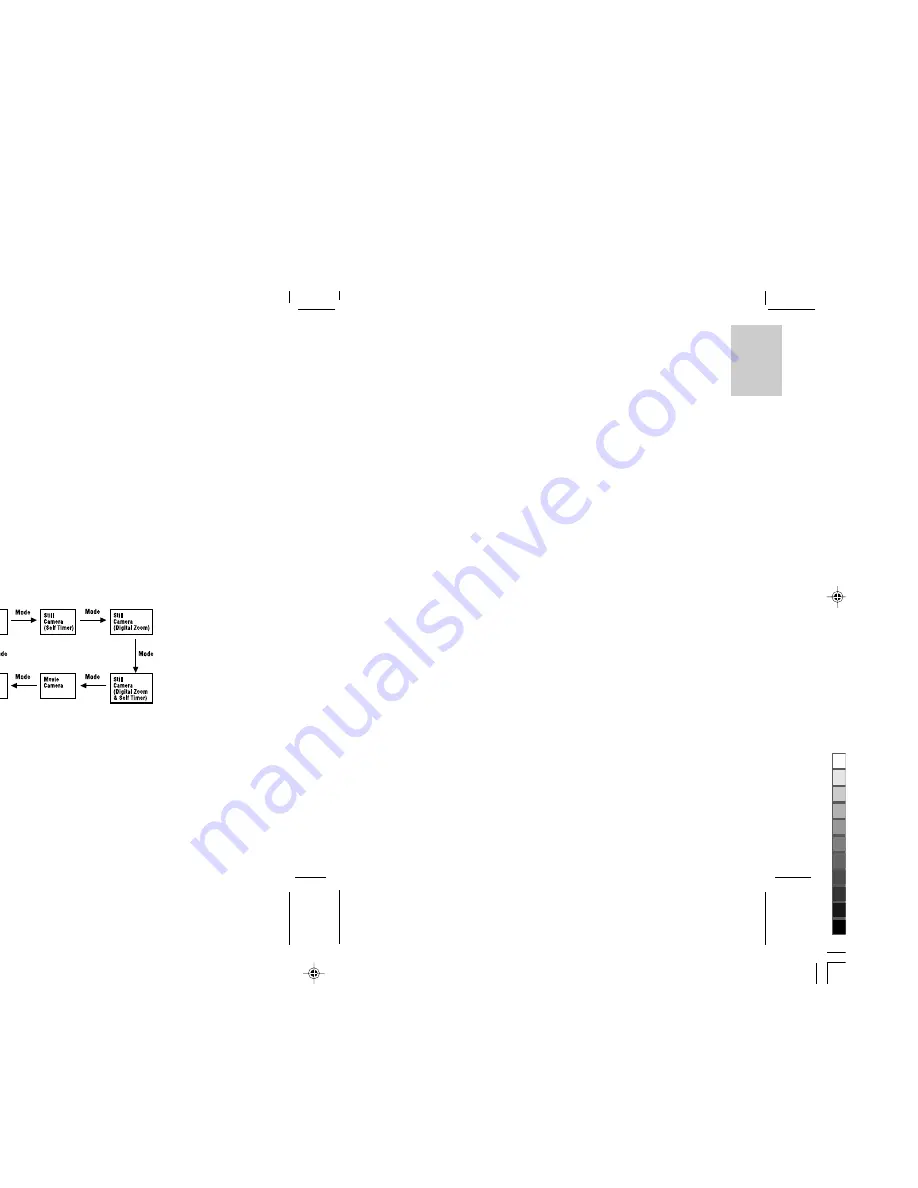
The DShot II/III digital camera will be in still camera mode when it is turned on. Press Mode button to
cycle through the various operation modes:
1. Still Camera mode (Normal)
Photo will be taken when Shutter button is pressed.
2. Still Camera mode (Self-timer)
Photo will be taken in 10 sec. after Shutter button has been pressed.
3. Still Camera mode (Digital Zoom)
Zoomed-in photo will be taken when Shutter button is pressed.
4. Still Camera mode (Self-timer and Digital Zoom)
Zoomed-in photo will be taken in 10 sec. after Shutter button has been pressed.
5. Movie Camera mode
Recording of movie starts when Shutter button is pressed once and stops when Shutter button is pressed again.
6. Setting mode
• Press Shutter button to delete photos or movies.
• Press Quality button to set video output system (NTSC or PAL) and confirmation tone (on or off).
• Press Flashlight button to set behavior of the photo counter (count up or count down).
Taking Photos
1. Select one of the 4 Still Camera modes desired.
2. Select one of the 3 levels of photo quality.
3. Select one of the 3 Flashlight modes according to lighting condition.
4. Select Scene or Close-up mode according to the distance of the object.
5. Press Shutter button to take photo.
Note:
When photo counter is set to “Counting down”, the photo count shown is only an estimation of
number of additional photos that can be taken. Since the file sizes of photos differ, the counter may
not decrease or decrease by 2 occasionally.
Recording Movies
1. Select Movie Camera mode.
2. Press Shutter button to start recording movie, press again to stop.
Note:
•
Flashlight is turned off in movie camera mode.
•
With a Compact Flash memory card (with minimum 7MB memory available), the maximum duration
of a movie clip is approximately 90 seconds. In case the camera is operating with the internal memory,
the maximum duration of a movie clip is approximately 18 seconds.
Deleting Photos or Movies
1. Select Setting mode.
2. Press Shutter button to select File Deletion mode.
3. Press Quality button to select file type (photos or movies) to be deleted.
4. Press Flashlight button to select the identification number of the photo or movie to be deleted.
5. Press Shutter button to delete the selected photo or movie. For delete all (display shows “ALL”), press
and hold the Shutter button for 3 seconds to delete all photos or movies.
6. Press Mode button to exit to Setting mode.
Setting Photo Counter Behavior
1. Select Setting mode.
2. Press Flashlight button to set photo counter behavior:
• Counting up (showing the number of photos taken)
• Counting down (showing the number of additional photos that can be taken)
Setting Video Output System
1. Select Setting mode.
2. Press Quality button to set video output system (NTSC or PAL) and confirmation tone (on or off).
Connecting to TV, Computer
Connecting to TV
1. Open the connector cover.
2. Plug the camera end of the video cable into the video output connector on your DShot II/III digital camera.
3. Plug the TV end of the video cable into the video input connector on your TV.
4. Press Quality button to set video output system (NTSC or PAL) to match with the video system of your TV.
.DS6888ASX1
16/12/02, 10:46 am
4
¶´ƒ


