English
.........................................................................................................................
.........................................................................................................................
.........................................................................................................................
.........................................................................................................................
English
English
English
20
21
22
23
The main window opens.
*
You can change the “Oregon Scientific Photo
Album” settings in [Options].
*
You can change the save destination folder for
the images.
e
DELETING IMAGES
You cannot check images as you delete them, but you can use
S
to delete the last image you shot, or
D
to
delete all the images.
1
2
1
Holding down the
e
button for roughly 1 second
sets the delete mode to
S
/Delete frame.
Press the
e
button again to select
D
(delete all frames).
Point
Each time you press the shutter button, images
are deleted sequentially from the newest image.
Point
• When you select “
S
”, the newest frame
(frame 5 if you have taken 5 shots) is deleted.
Pressing the shutter button again deletes
frame 4, then frame 3, etc.
• You can delete all the frames at once by
selecting “
D
”.
• If you leave the camera in
e
delete mode
for 3 seconds without using the camera at all,
it automatically reverts to photography mode.
l
SETTING THE BEEP TONE
You can select whether or not the beep tone sounds.
You can turn the beep tone on and off by pressing the
l
button.
*
When “
l
” is displayed, the beep tone sounds.
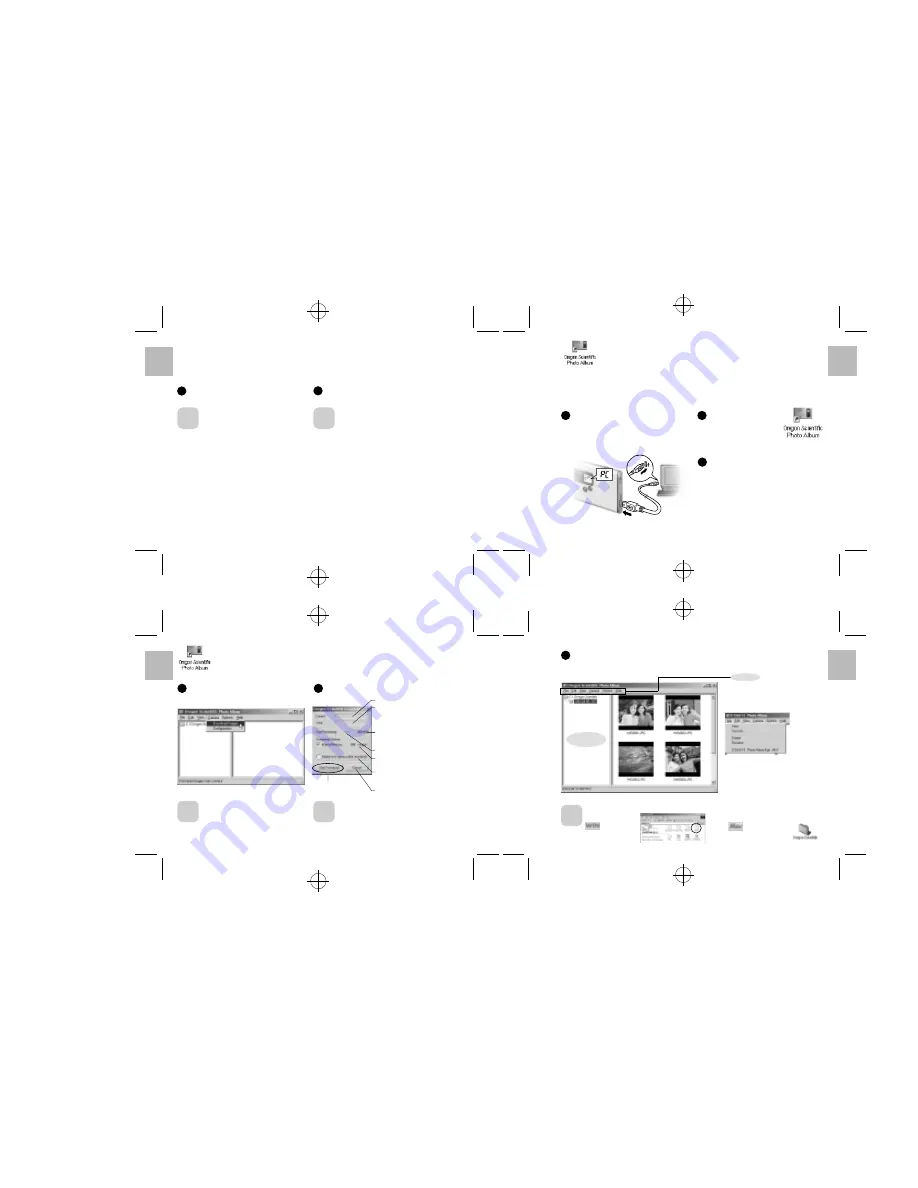
USING Oregon Scientific Photo Album
You can use “Oregon Scientific Photo Album” software to download images in the camera to
your PC’s hard disk, check and delete the downloaded images, and modify the camera settings.
*
This description shows the Windows screens, but the procedure is the same for Macintosh
computers.
Switch the camera on and then connect it to your
PC using the USB cable (
/
P.16).
*
Charging starts automatically when you connect
the camera to your PC with the USB cable
(
/
P.17).
2
3
Double-click the [Oregon
Scientific Photo Album] to
launch “Oregon Scientific
Photo Album”.
You can select functions such as [Save As],
[Delete (Delete the files)], [Rename (Change
the file name)], [Rotate], [View (Change the
display format)] and [Configuration (Camera
Configuration)], etc. from the pull-down menu.
■
Delete the files
• Select the file you want to delete and
then select [Delete] from the [File] menu.
■
Rename the file/folder name
• Select the file/folder you want to rename
and then select [Rename] from the
[File] menu.
• Click the file/folder you want to rename
and then click again in the file/folder
name box.
DOWNLOADING IMAGES
You can download the images from the camera to your PC.
1
Select [Camera]
/
[Download images] from the
menu.
2
Click the [Start download] button to begin image
downloading.
Point
• When you connect the camera to a PC, “
6
”
appears on the camera’s LCD to indicate that
the camera is communicating with the PC.
*
The PC switches to standby mode until it
recognizes the camera.
• The counter flashes (rotates) during image
downloading.
• If you cancel image downloading before
completion, downloading stops after downloading
of the current image is completed.
• The images in the camera are all downloaded
together. If you take more shots and then
download them without first deleting the images
you have already downloaded, the previously
downloaded images are downloaded again.
Point
Progress of image downloading
Overall download progress
*
When the progress bar
reaches the right-hand end,
downloading is completed.
Number of downloaded images/
Total number of images in the
camera
Time until downloading is complete.
Total number of images in the
camera
When this checkbox is selected, the
images in the camera are deleted
when downloaded is complete.
Cancels downloading.
Start to download
the image
3
When image downloading is complete, the images are displayed as thumbnails.
☞
A folder named “(year)-(month)-(day)-(number)” is automatically created in the folder tree display area.
*
If you download more images on the same day, the number automatically increments.
■
Thumbnail display window
Menu
Point
Images are downloaded to the locations given below.
Windows:
[Oregon Scientific]
folder on the local disk
Macintosh:
[Oregon Scientific] folder
on the desk top
Folder tree
display area


