


3
4
Chapter 2
Chapter 2
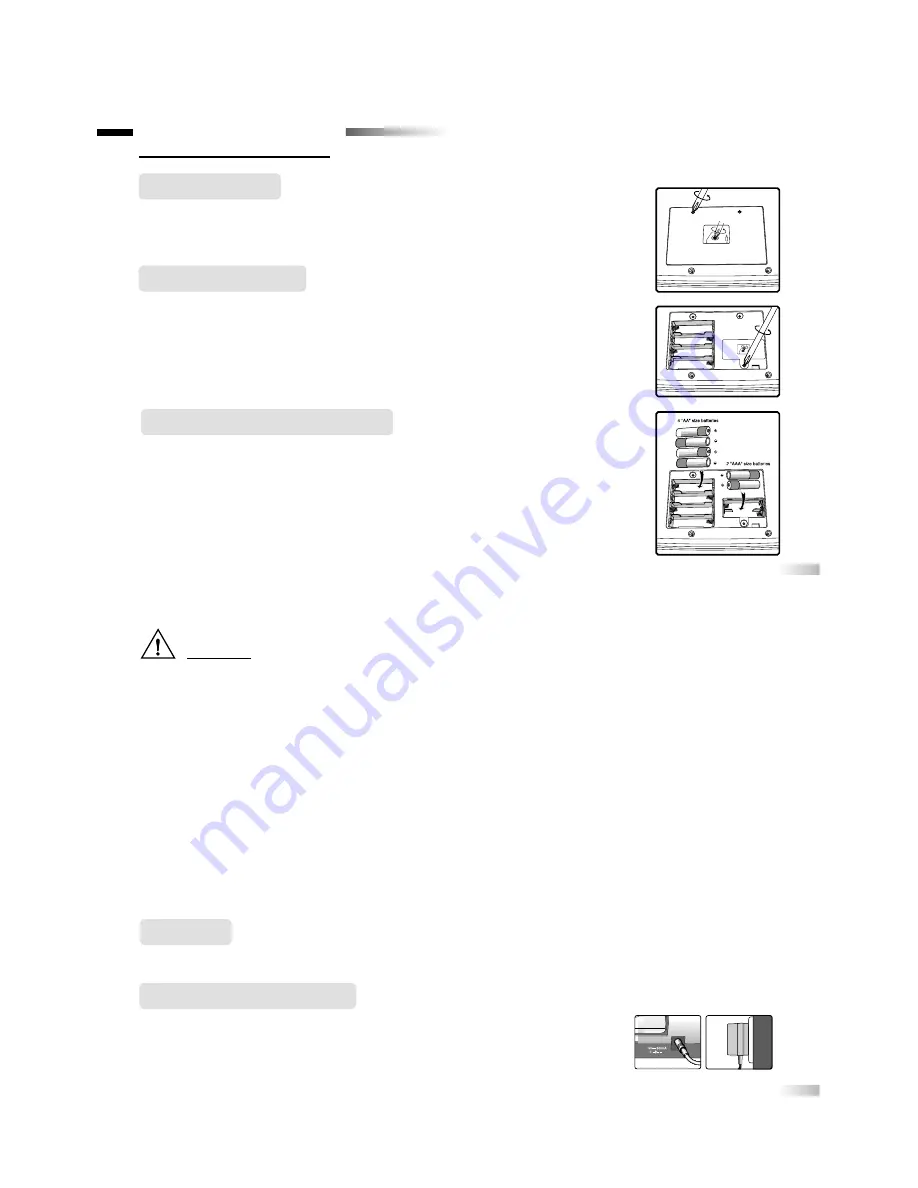
1. Make sure the unit is turned off.
2. Using a Phillips screwdriver, open the big battery cover at the back of the unit.
3. Insert 4 “AA” size batteries. (Note the correct po, – ).
4. Replace the cover. (The unit is automatically turned on as soon as the batteries are
installed or the adaptor is plugged in.)
1. Make sure the unit is turned off.
2. Using a Phillips screwdriver, open the small battery cover at the back of the unit.
3. Insert 2 “AAA” size batteries. (Note the correct po, – ).
4. Replace the batteries and cover.
NOTE: Back-up batteries are essential for the retention of stored data.
Back-up battery installation
Your Accelerator Vision operates on 4 “AA” size batteries plus 2 “AAA” size batteries
(not included), or a 9V AC adaptor (not included).
Getting Started
Battery Installation
Caution
• Do not mix different types of batteries or old and new batteries.
• Only use batteries of the same or equivalent type as recommended.
• Remove all batteries when replacing.
• Remove batteries from the unit if the unit is not going to be used for long periods of time.
• Do not dispose of batteries in fire.
• Do not recharge non-rechargeable batteries.
• Rechargeable batteries are to be removed from the toy before being charged.
• Rechargeable batteries are only to be charged under adult supervision.
• Remove exhausted batteries from the toy.
• Do not short-circuit the supply terminals.
• The unit must not be connected to a power supply greater than 9V.
• Only use the recommended adaptor.
• The adaptor is not a toy.
• Do not short-circuit the supply terminals.
• Toys liable to be cleaned with liquid are to be disconnected from the transformer before cleaning.
Power failure may corrupt data stored in the memory. To reset your Accelerator Vision, see “Memory Failure”
in the Trouble Shooting section.
Auto-off
The learning PC will be automatically turned off after about 6 minutes of no input from the player.
AC Adaptor Connection
1. Plug the adaptor into the adaptor jack at the back of the unit.
2. Plug the adaptor into a wall outlet.
3. Please turn off the unit before plugging in the AC adaptor.
Otherwise the unit may be damaged.