background image

5

Operation

2.  

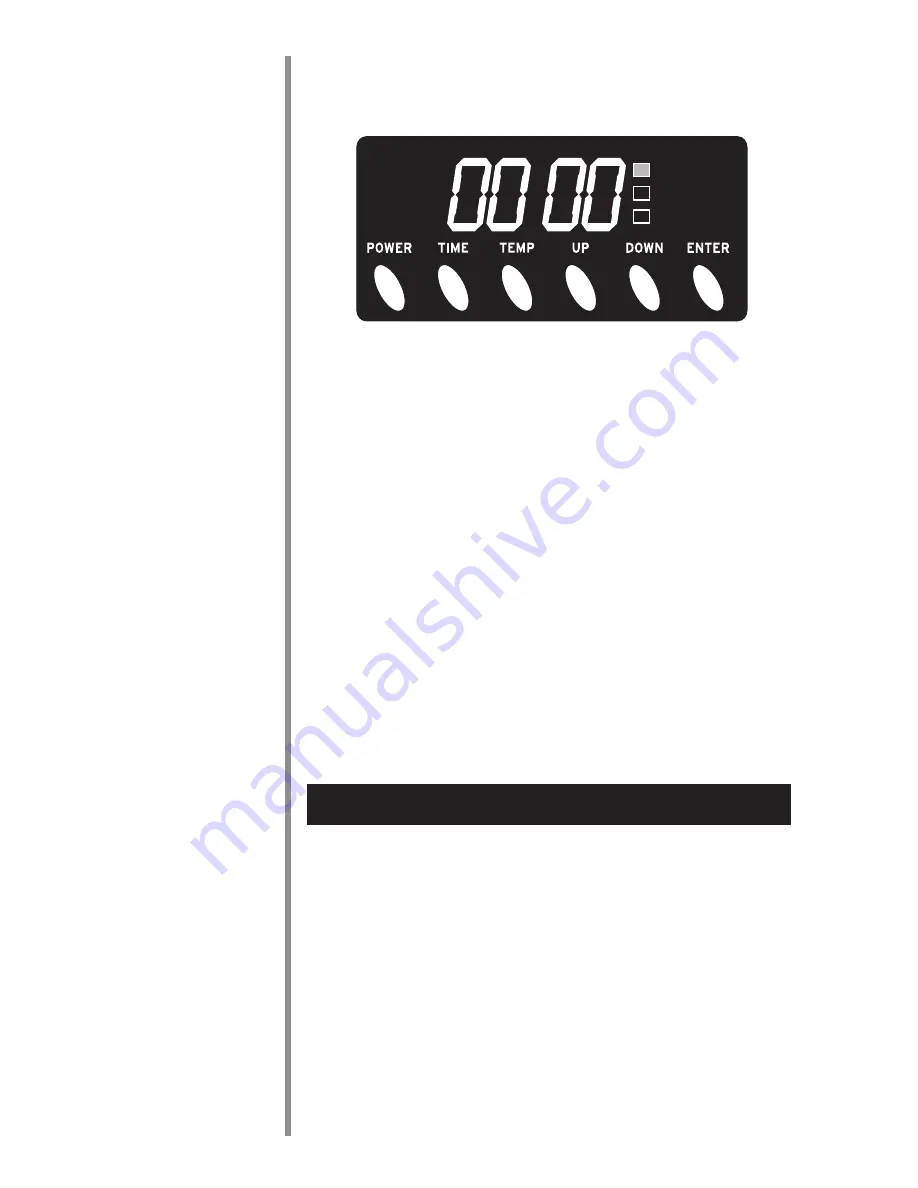
Press the Time button of the Control Panel - the two zeros to 

the right will flash (:00), indicating 0 minutes have been set 

and the DELAY START indicator will illuminate.

3.  

Press the UP or DOWN button to select desired number of 

minutes (up to 59 minutes) that you would like the heater to 

wait to turn itself on.

4.  

Press the ENTER button - the two zero button to the left 

will flash (00:), indicating 0 hours have been set.

5.  

Press the UP or DOWN button to the desired number of 

hours (up to 24 hours) and then press the ENTER button.

6.  

DELAY START indicator will flash until the unit comes on 

after waiting the period of time you have set.

7.  

To cancel the timer, press the power button and the timer 

will stop.

Switching between Fahrenheit & Celsius


Press the DOWN & ENTER buttons simultaneously and hold 

for about 3 seconds. The display will update automatically.

DELAY START

SET TEMP

INFRARED-ON

DELAY START

SET TEMP

INFRARED-ON

DELAY START

SET TEMP

INFRARED-ON

Suggestions for Best Performance

To assure maximum performance of your Oreck Heatwise™ 

Infrared Heater, please review the following recommendations:

•   Do not locate the heater in an area with a high air exchange 

rate in and out of the room. Heat produced should be 

contained in the room.

•   Try placing the heater near a warmer inside wall and direct 

the output toward a cooler outside wall. The cooler outside 

wall will tend to draw the generated heat towards it, which 

will allow for more efficient heating.

•  Placing the heater next to a cord air return will draw the heat 

away from the area to be heated. Try closing or covering the 

Summary of Contents for HEATWISE HW1000P

Page 1: ...Heatwise Heater Important Read this manual carefully and keep for future reference User s Guide MODELS Heatwise HW1500W Heatwise HW1500P Heatwise HW1000P...

Page 2: ...Heatwise Infrared Heater The infrared heating technology utilized in the heater warms the objects in the room from top to bottom The heat in the room will never hover uselessly near the ceiling again...

Page 3: ...neral Warnings 1 Features 3 Operation 4 Power On Off 4 Setting Temperature 4 Setting Timer 4 Fahrenheit Celsius 5 Performance Suggestions 5 Maintenance 7 Cleaning the Electrostatic Filter 7 Troublesho...

Page 4: ...he heater to malfunction DO NOT use the heater outdoors or for heating construction sites This heater is not intended for use in bathrooms laundry areas and similar indoor locations Never locate heate...

Page 5: ...or exhaust in any manner DO NOT use on soft surfaces like a bed where openings may become blocked Use this heater only as described in this manual Any other use not recommended by the manufacturer ma...

Page 6: ...uscan walnut finish Plastic ABS 94 VO fire retardant plastic 4 Caster Wheels Free floating for easy relocation 5 Handle Easy transport 6 Power Cord Plug into the outlet to begin use 7 Cord Wrap Conven...

Page 7: ...until the sound of the fan has stopped Doing so may cause damage to the unit Setting the Temperature This feature allows you to set the temperature measured by the units thermostat 1 Press the Temper...

Page 8: ...tton and the timer will stop Switching between Fahrenheit Celsius Press the DOWN ENTER buttons simultaneously and hold for about 3 seconds The display will update automatically INFRARED ON DELAY START...

Page 9: ...closed in that area if possible This allows the heater to maintain the isolated area more efficiently If placing the heater a few feet above the floor such in rooms with large areas of bare concrete...

Page 10: ...te The sound of the heater s fans will continue until the heat has been completely vented thus protecting the unit and preventing waste by cycling the remaining heat into the room DO NOT unplug the he...

Page 11: ...rd into the cord storage compartment in the back of your heater This will help prevent undue wear and tear on the cord Cover the heater to prevent dust from accumulating on or in heater Store heater i...

Page 12: ...ode to conserve opwer This will not affect the heater s operation When any function key is pressed the heater s display will reappear Heater thermostat tem perature does not match wall thermostat temp...

Page 13: ...ume or grant any other warranty obligation with the sale of this product Oreck s limited warranty is valid only if you retain proof of pur chase from Oreck or an Oreck Authorized Retail Dealer for thi...

Page 14: ...11...

Page 15: ...12...

Page 16: ...9 Oreck Holdings LLC All rights reserved All marks text logo s product configura tions and registered trademarks are owned and used under the authority of Oreck Holdings LLC 21085 01 REV A 07 09 ECN R...

Reviews: