


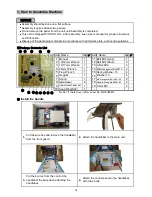


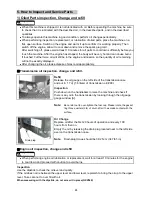


3, How to Assemble Machine
●
Assembly should be done on a flat surface.
●
Assembly requires at least two people.
●
Do not remove the pallet from the unit until assembly is completed.
●
This unit is shipped WITHOUT OIL. After assembly, see owner’s manual for proper oil amount
and fill location.
●
Dispose of the packaging materials in accordance with all federal, state, and local regulations.
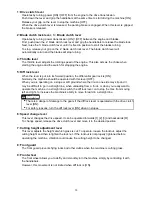
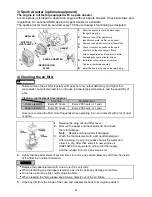
■Package Contents List
Ref.
ts Name
Qty
ゝ
Ref.
ts Name
Qty
ゝ
1
Manual
1
11
Bolt M12(Long
)
1
2
10/12mm Wrench
1
12
Bolt M12(Short
)
2
3
14/17mm Wrench
1
13
U Nut M12
3
4
24mm Wrench
1
14
Mini Hexagonal Nut M10
4
5
Plug Wrench 1
15
Spring Washer 10
4
6
Goggles
1
16
Washer 10
4
7
Spring
1
17
Mini Hexagonal Bolt M10
×
20
4
8
Axle Cover
2
18
Handle Fixing Bolt M8
×
45
2
9
Adjustment Lever set
1
19
U Nut M8
2
10
Snap Ring(S22)
1
-
No Ref. 8 (Axle Cover) after serial No. WL10J00013
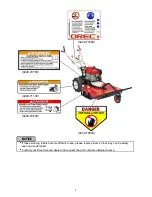
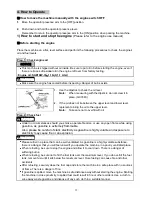
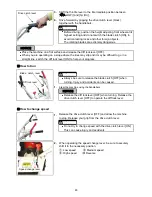
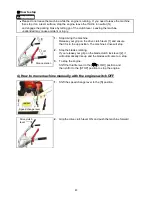
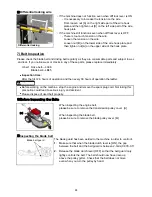
■
Install the handle
3.
Put the 4 wires from the control the
handlebar the bars when attaching the
handlebar.
4.
Attach the control panel to the handlebar
with the 4 bolts.
1.
Cut the wire ties and remove the handlebar
from the front guard.
2.
Attach the handlebar to the main unit.
NOTICE
⑥
⑨ ⑦
⑬
⑪ ⑤ ② ③ ④
①
⑮
⑱
⑩
⑫
⑭
⑲
⑰
⑯
⑧
14


