6
Aligning Your Finder Scope:
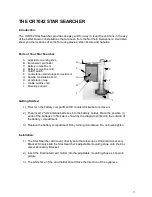
1) To work effectively your Finder Scope needs
to be aligned with your telescope. This is
most easily done during the daytime.
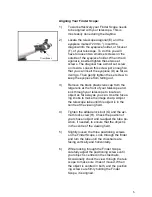
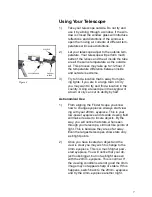
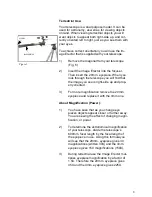
2) Locate the telescope diagonal (E) and the
eyepiece marked “20mm.”). Insert the
diagonal into the eyepiece holder, or focuser
(F), of your telescope. To do this you will
have to loosen two small set screws on the
outside of the eyepiece holder. When the di
agonal is inserted tighten these two set
screws. The diagonal has a small set screw
on its side. Loosen this screw just enough so
that you can insert the eyepiece (D) as far as
it will go. Then gently tighten the set screw to
keep the eyepiece from falling out.
3) Remove the black plastic lens cap from the
large lens at the front of your telescope and
l
ook through your telescope to locate an
object as far away as you can. Use the focus-
ing knobs to make the image sharp. Adjust
the telescope tube until this object is in the
centre of the viewing field.
4) Tighten the altitude lock bolt (G) and the azi-
muth lock screw (H). Check the position of
your chosen object and re-adjust the tube po-
sition, if needed, to ensure that the object is
in the centre of the viewing field.
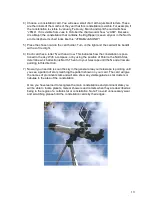
5) Slightly loosen the three positioning screws
on the Finder Scope. Look through the finder
and turn the tube until the crosshairs are
facing vertically and horizontally.
6) While looking through the Finder Scope,
carefully adjust the positioning screws until
your object is centred in the crosshairs.
Occasionally check the view through the tele
scope to make sure it hasn’t moved. When
the object is centred in both, and the position
ing screws are firmly holding the Finder
Scope, it is aligned.
Viewfinder


