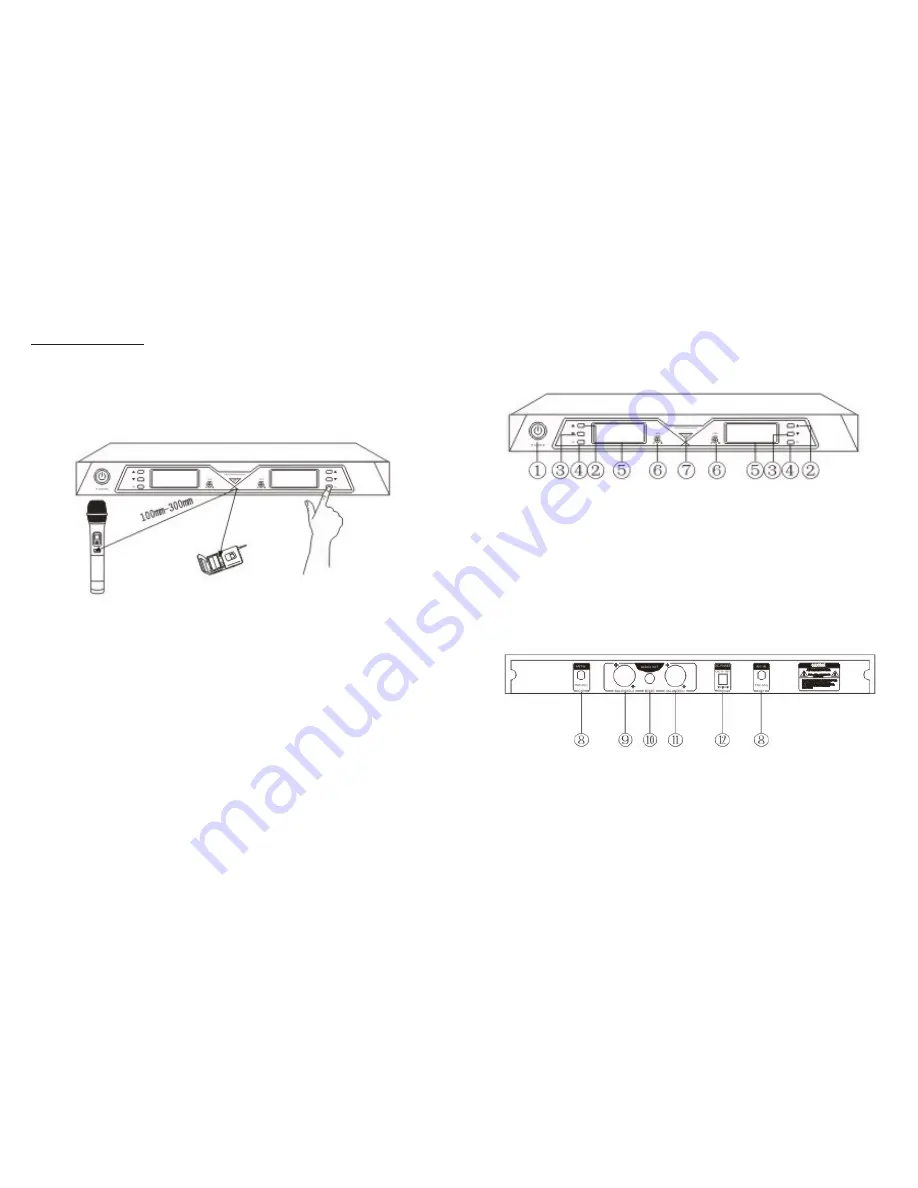
System Controls:
1. Receiver:
FRONT PANEL:
REAR PANEL:
1 : Power Switch
2 : UP button (frequency selection)
3 : Down button (frequency selection)
4 : IR button
5 : LCD Display
6: Volume adjustment.
7: IR LED Receiver
8 : Receiver Antennae (2)
9 : Balanced Output Connector (Channel B)
10 : Unbalanced Output Connector (6.3mm cable included)
11 : Balanced Output Connector (Channel A)
12. DC power socket
System Set Up:
2. Frequency Setting:
Your system comes with the hand held microphone already set to match
the existing frequency of the Receiver. To get a suitable frequency for your
area, a simple “trial and error” approach is usually the fastest solution.
Simply follow the operating instructions to test the signal quality of the
existing frequency set in the system. If you do suffer some interference,
then follow the instructions below to change your frequency.
A. Press UP button or Down button on Channel A to choose the working frequency
and press IR Button to confirm.
B. Turn on the Power of the Microphone or Beltpack, put its infrared receiver
towards the infrared Transmitter LED of the Receiver and then press IR Button
on the Receiver. This will match the frequency of the Microphone or Beltpack to
the Receiver. When tho setting is completed, the receiver will exit the IR
transmitting mode.
C. Note that the IR receiver of the Beltpack is in the battery compartment area, so
the compartment door must be opened for the IR receiver to receiver the signal
from the Receiver unit.
D. Repeat Steps A & B on Channel B to choose the working frequency for the
second Transmitter.
E. Your system frequency should now be set (matched) and your system ready to
use.
--- 3 ---
--- 6 ---


