


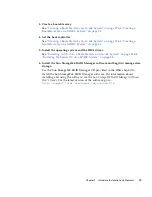


Chapter 2
Hardware Installation and Removal
15
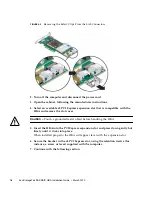
▼
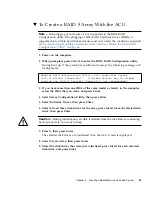
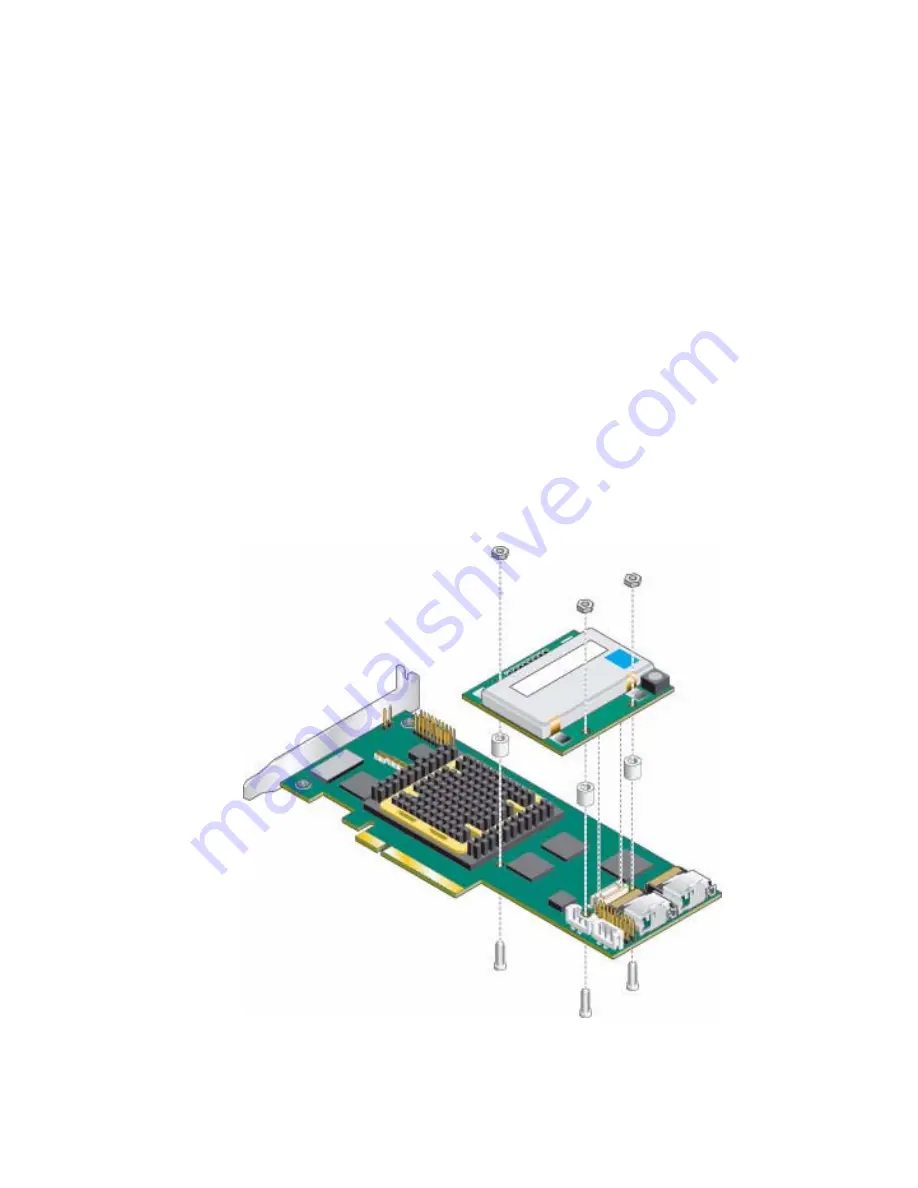
To Install the Battery Backup Module
1. Attach an ESD wrist strap.
See
“Observing ESD and Handling Precautions” on page 9
.
2. Lay the top square piece of packing foam from the ship kit on your work
surface, smooth side up.
3. Take the HBA out of the antistatic bag and set it on the packing foam with the
heat sink facing up.
4. Slightly lift the HBA, and from underneath it, insert three plastic screws from
the BBU kit through the following three mounting holes in the HBA:
■
The bottom left hole. This is about 3 inches from the right edge of the HBA.
■
The bottom right hole. This is about 1 inch from the right edge of the HBA.
■
The top right hole. This is about 1 inch from the right edge of the HBA.
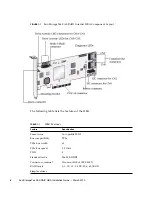
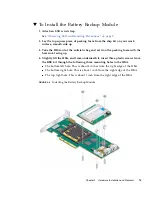
FIGURE 2-4
Installing the Battery Backup Module
Summary of Contents for SG-XPCIESAS-R-INT-Z
Page 14: ...xiv Sun StorageTek SAS RAID HBA Installation Guide March 2010 ...
Page 22: ...8 Sun StorageTek SAS RAID HBA Installation Guide March 2010 ...
Page 58: ...44 Sun StorageTek SAS RAID HBA Installation Guide March 2010 ...
Page 62: ...48 Sun StorageTek SAS RAID HBA Installation Guide March 2010 ...
Page 70: ...56 Sun StorageTek SAS RAID HBA Installation Guide March 2010 ...
Page 78: ...64 Sun StorageTek SAS RAID HBA Installation Guide March 2010 ...
Page 104: ...90 Sun StorageTek SAS RAID HBA Installation Guide March 2010 ...
Page 126: ...112 Sun StorageTek SAS RAID HBA Installation Guide March 2010 ...
Page 128: ...114 Sun StorageTek SAS RAID HBA Installation Guide March 2010 ...
Page 130: ...116 Sun StorageTek SAS RAID HBA Installation Guide March 2010 ...
Page 142: ...128 Sun StorageTek SAS RAID HBA Installation Guide March 2010 ...
Page 144: ...130 Sun StorageTek SAS RAID HBA Installation Guide March 2010 GOST R Certification Mark ...


