background image

Appendix B - 5 - Proximity Reader Installation

F M S P a r t N u m b e r 2 0 - 4 4 4 3 - P R O X - X X X

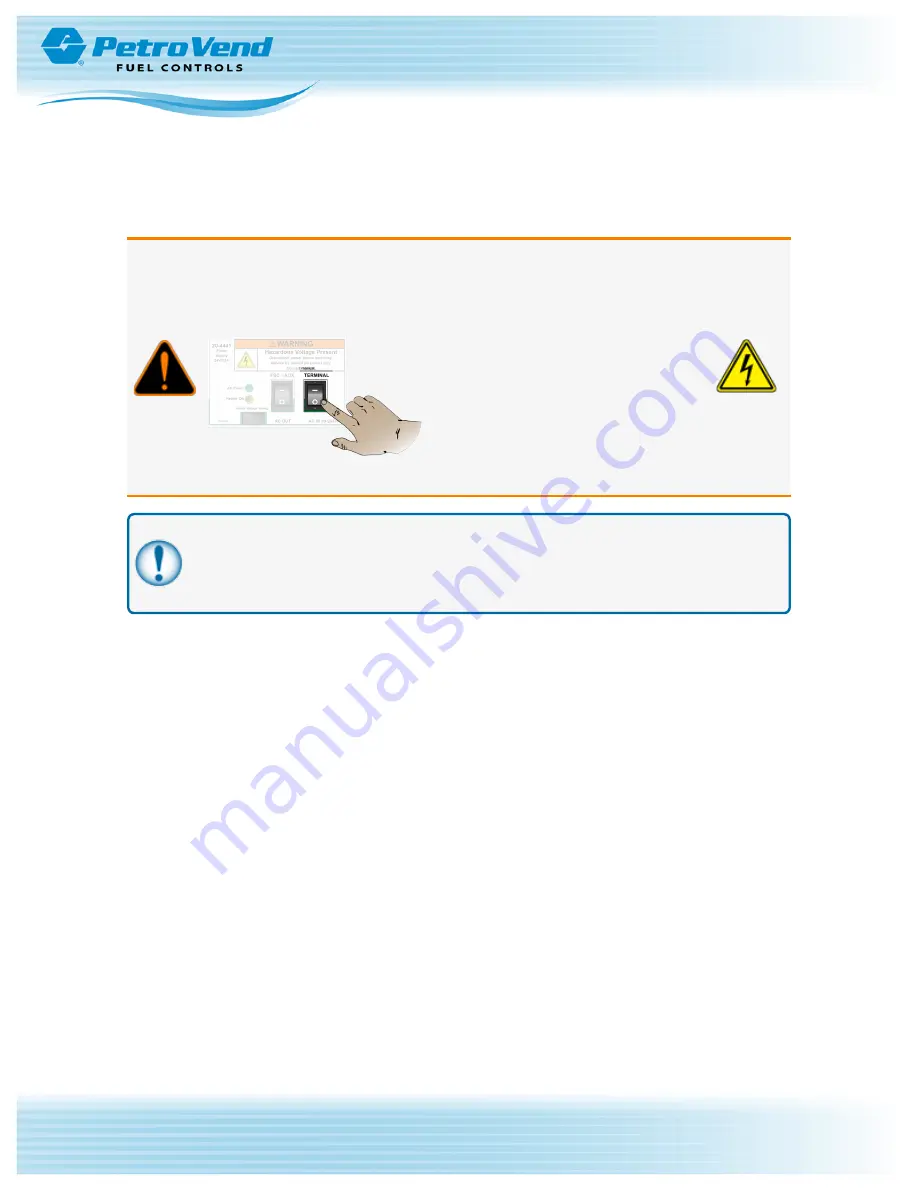
WARNING:

To prevent an electrical shock hazard, de-energize the Terminal

before you do this procedure! Push the Terminal rocker switch on the Power
Supply to the

O

(Off) position.

IMPORTANT:

When you order a Proximity Reader, the correct Format code must be attached

to the Part Number. For example, 20-4443-PROX-XXX, where the three Xs show the three-
digit Format code. Call Customer Support at 1-888-OPW-FUEL (1-888-679-3835) for more
information.

Doc. No.: M1010 Rev.: 10

Page 67 of 98

Summary of Contents for Petro Vend 200 M1010

Page 1: ...Part Number M1010 Rev 10 Issue Date 7 22 2021 Supersedes 4 27 2021 M1010 Petro Vend 200 Fuel Control System Installation Operation and Maintenance Guide...

Page 2: ...IONS and other trademarks referenced herein are trademarks of Delaware Capital Formation Inc Dover Corporation Dover Fueling Solutions UK Ltd and their affi liated entities Contact OPW Fuel Management...

Page 3: ...losure Installation 18 3 2 Aluminum Enclosure Conduit Knockouts 20 3 3 Flex Conduit Installation 20 3 4 Power and Communication Wiring 20 Section 4 Preparation of System Conduit Wiring Requirements 22...

Page 4: ...t 44 11 4 PV200 Door 45 11 5 Fastener Specifications 46 11 6 Cables 46 Appendix A Software Upgrade Procedure 47 Appendix B PV200 Options Installations 49 Appendix B 1 Alpha Keypad Installation 50 Appe...

Page 5: ...Appendix B 9 Drip Shield Kit Installation 87 Appendix B 10 PV200 Door Gasket Kit Installation 89 Appendix B 11 Blank Option 93 Warranty 97 Doc No M1010 Rev 10 Page 5 of 98...

Page 6: ...ontrol System About this manual This manual includes specified information about the PV200 Information related to the FSC3000 Fuel Site Controller can be found in the M1700 FSC3000 Installation Operat...

Page 7: ...s than 5000m temperature range rel ative humidity 80 for temperatures up to 31 C decreasing linearly to 50 relative humidity at 40 C Wet location Pol lution degree 2 Graphics display 7 inch 18 cm colo...

Page 8: ...ented could result in death or serious injury CAUTION Indicates a possibly hazardous situation that if not prevented could result in minor or moderate injury NOTICE Indicates important information not...

Page 9: ...ep or procedure that is recommended to make another step or procedure easier INFORMATION This panel shows references to more information in other sources READ CAREFULLY This panel points to informatio...

Page 10: ...peration or unsatisfactory procedures that could also cause a failure of electrical equipment l Class I Division 2 A Class I Division 2 location is a location where n An accidental failure or incorrec...

Page 11: ...e 1 4 2 Installation Requirement OPW Terminals are designed to be installed above the hazardous area when using the terminal s associated pedestal The pedestal can be mounted in the hazardous area but...

Page 12: ...ve equipment PPE This includes safety glasses hardhat safety shoes and reflective vest Barricade the work area before installation Be sure to obey all applicable Lockout Tagout LOTO procedures before...

Page 13: ...cations Commission FCC Rules Regulations Operation is applicable to these conditions l This device must not cause harmful interference l This device must accept interference received including interfe...

Page 14: ...net communication refer to M00 20 6020 Wireless Ethernet Radio User s Guide For installations that will use wireless Petro Net modem communication refer to M00 20 7074 Wireless Petro Net Modem Install...

Page 15: ...ical Pump Control For installations with remote PCMs see M1700 FSC3000 Installation Operation and Maintenance Guide You can download this guide at http www opwglobal com opw fms tech support manuals h...

Page 16: ...Typical System Diagram with an Integrated FSC Electronic Pump Control Doc No M1010 Rev 10 Page 16 of 98...

Page 17: ...ronic Pump Control For installations with remote DPC see M1700 FSC3000 Installation Operation and Maintenance Guide You can download this guide at http www opwglobal com opw fms tech support manuals h...

Page 18: ...Standard ADA Americans with Disabilities Act compliant for off island installations l 32 inch ADA compliant for on island installations 3 1 Pedestal and Enclosure Installation INFORMATION For your re...

Page 19: ...will anchor the pedestal e g concrete 5 Use the provided hardware to attach the enclosure to the pedestal Align the provided gasket with the mounting holes of the pedestal top plate Carefully positio...

Page 20: ...edestal conduit plate IMPORTANT All unused knockout holes must be sealed to meet NEC compliance codes 3 4 Power and Communication Wiring 1 Pull three 3 14 AWG wires green black and white from a dedica...

Page 21: ...together and all terminals marked 2 together NOTE Petro Net is connected internally on integrated units There is no need to connect to the Petro Net terminal block unless there are additional termina...

Page 22: ...d Repair Garages Code NFPA No 30A and all national state and local codes All wiring running to the system must be installed in threaded rigid metal conduit and have the required seal offs AC and DC po...

Page 23: ...d pulser wires for pedestal mounted PCMs only l To each electronic dispenser for communication wires for an internal FSC with a DPC board installed in the pedestal only INFORMATION For information abo...

Page 24: ...ro Net Wiring Requirements Terminal Feed Minimum 14 AWG Stranded Black Oil Gas resistant Wet Locations Terminal Neutral Minimum 14 AWG Stranded White Oil Gas resistant Wet Locations Terminal Ground Mi...

Page 25: ...minal This conduit may be looped from terminal to terminal Terminal Communication and Power Wiring Requirements Terminal Feed Minimum 14 AWG Stranded Black Oil Gas resistant Wet Locations Terminal Neu...

Page 26: ...SC controller This conduit will provide access for a phone line or Ethernet connection 300 91 4 m max or Serial Cable 50 15 2 m max to access the FSC Wires Wire Requirements Serial Cable 50 15 2 m Pho...

Page 27: ...nduit to provide ground connections 4 2 2 Circuit Breakers Power to the PV200 must be supplied from dedicated circuit breakers No other equipment should be powered from these breakers including the pu...

Page 28: ...he SIMM battery If the system must be cold started put a piece of paper or business card into the battery clip A cold start will clear all configuration settings except for transactions Install the pe...

Page 29: ...ery six months or as needed Use graphite or molybdenum disulfide Moly B dry lubricant Do not apply too much lubricant Card Readers l Magnetic Card Readers Magnetic card readers contain magnetic heads...

Page 30: ...Number Description Qty 20 6208 PRINTER 24V Hengstler Modified 1 20 1721 PRINTER HENGSTLER POWER CABLE 1 20 1679 COPT PRINTER DATA CABLE ASSY 1 54 1107 Thermal Paper roll for C 56 Hengstler Printer 1...

Page 31: ...tor end of the cable is connected to the power cable port on the top of the printer unit Make sure the locking tab of the connector points toward the rear of the unit the side where the paper is loade...

Page 32: ...the paper release lever and feed the receipt paper until the paper advances 5 Pull out the extra paper in the chute to cut it off 7 3 Clear a Paper Jam To clear a paper jam cut off the document that...

Page 33: ...ter mechanism housing open c Manually turn the motor pinion gear the brass gear in the illustration clockwise until the jammed paper is released from the platen roller d Remove the jammed paper e Clos...

Page 34: ...Section 8 Antenna Installation Doc No M1010 Rev 10 Page 34 of 98...

Page 35: ...hole does not get bent 4 Put the bulkhead connector and cable of the antenna assembly through the hole NOTE If the connector does not go through the hole easily use a file to increase the dimension o...

Page 36: ...Section 9 Main Board 9 1 Main Board Connections Doc No M1010 Rev 10 Page 36 of 98...

Page 37: ...sembly Installed J10 Printer Comm RJ 45 20 1679 75 3053 Printer Option J11 Door Sensor 1x2 Pin J12 ChipKey 2x5 Pin 20 1625 20 4117 ChipKey Reader Option J13 Magnetic Card Reader 1x10 20 1642 75 3022 M...

Page 38: ...SP SW3 Reset 9 2 Main Board LEDs PV200 Main Board LEDs Location Color Function TX RX Other D1 Multi Green Red D2 Multi Green Yel low D3 Green D4 Green D5 Yellow D6 Red D7 Yellow Ethernet Currently Not...

Page 39: ...Currently Not Supported D36 Green Output 2 Relay Currently Not Supported D46 Green Power 24V D47 Red Communications RS 232 Prox Reader TX D48 Green RX 9 3 Main Board Jumpers PV200 Main Board Jumpers P...

Page 40: ...screen l Move switch 1 to the ON position to gain access to the Terminal Setup Main Menu l Push Reset IMPORTANT The unit will not operate if Switch 1 and Switch 8 are both in the ON position Switch 8...

Page 41: ...ric function keypad to enter numbers and Cancel Save settings where applicable 10 2 Readers Menu NOTE The PV200 will automatically detect the type of reader s that are installed Doc No M1010 Rev 10 Pa...

Page 42: ...are for illustration purposes to identify part numbers and show component locations only These drawings are not intended to illustrate assembly procedures and are not drawn to scale 11 1 PV200 Enclos...

Page 43: ...11 2 PV200 Display Doc No M1010 Rev 10 Page 43 of 98...

Page 44: ...11 3 PV200 Pocket Doc No M1010 Rev 10 Page 44 of 98...

Page 45: ...11 4 PV200 Door OPW FMS Part Number 20 4440 D REMINDER The Display and Pocket drawings shown above are sub assemblies of the 20 4440 D Doc No M1010 Rev 10 Page 45 of 98...

Page 46: ...50 0497 M4 316 Stainless Steel Pan Head 10mm Machine Screw 3 Display Clamps 01 19090 2 Sensor Board Pocket Nut KEPS 6 32 4 Numeric Keypad 50 0005 6 Under LED PCB Door Nut KEPS 6 32 28 All 50 0005 Scre...

Page 47: ...Select option 2 Firmware Upgrade from the Utilities screen 5 Put the flash drive into the left USB socket J7 on the main board Push Enter on the front panel keyboard l The green LED D21 under the fla...

Page 48: ...l The remaining files are in a folder named firmware The files in the firmware folder are n load xml n PV200_flasher hex n loader hex Doc No M1010 Rev 10 Page 48 of 98...

Page 49: ...allation on page 71 DX Fleet Option on page 73 Modem and Gateway Installations on page 79 Drip Shield Kit Installation on page 87 PV200 Door Gasket Kit Installation on page 89 Blank Option on page 93...

Page 50: ...ber 20 4444 YES WARNING To prevent an electrical shock hazard de energize the Terminal before you do this procedure Push the Terminal rocker switch on the Power Supply to the O Off position Remove the...

Page 51: ...YES Components Part Number Description Qty 50 2253 A Keypad Gasket 1 09 4037 27 Position Alpha Keypad 1 50 0005 NUT KEPS 6 32 6 20 1687 PV200 Alpha Keypad Cable 1 3 Put the Gasket 50 2253 A over the s...

Page 52: ...e two 11 Pin connectors of the Alpha Keypad Cable 20 1687 into the J 22 connector labeled ALPHA on the Main Board as shown The clip side of the connector should point down 7 Connect the other 11 pin c...

Page 53: ...de energize the Terminal before you do this procedure Push the Terminal rocker switch on the Power Supply to the O Off position Remove the Blank out Plate 1 Remove the nuts from the blank out plate s...

Page 54: ...50 0005 NUT KEPS 6 32 4 20 1625 ChipKey Reader Cable 1 54 1052 TC ChipKeyReader Test Card not shown 1 NOTE Part Numbers in Green Bold text in the component list above are availabe as replacement item...

Page 55: ...ssembly Installation 7 Put the Gasket 50 2254 around the ChipKey Plate studs Put the Sub assembly with the Gasket through the open pocket slot until they are flush with the front panel of the pocket 8...

Page 56: ...1625 pointed to the right connect the top cable connector into the J12 connector labeled CHIPKEY on the Main Board as shown 11 Connect the bottom connector of the ribbon cable to the connector on the...

Page 57: ...rd de energize the Terminal before you do this procedure Push the Terminal rocker switch on the Power Supply to the O Off position Remove the Blank out Plate 1 Remove the nuts from the blank out plate...

Page 58: ...s Part Number Description Qty 75 3022 Magnetic Card Reader 1 51 0448 Mounting Bracket 1 50 3199 A LED Ring 1 50 3199 B LED Clip 1 50 0005 NUT KEPS 6 32 4 20 1642 Card Reader Cable Assembly 1 54 1051 T...

Page 59: ...5 if it is necessary to assemble the parts in the field again 4 Hold the LED Ring 50 3199 A against the bracket 51 0448 hole as shown 5 Squeeze the large end of the LED Clip 50 3199 B and push it thr...

Page 60: ...connector of the wire harness 20 1642 into the connector on the top of the Mag Reader unit 75 3022 1 B B 10 Push the LED light of the wire harness 20 1642 into the LED Clip assembly IMPORTANT If this...

Page 61: ...a factory installed card reader or as a secondary back up card reader with a primary 20 4443 MAG upgrade installation Remove the Blank out Plate s If a secondary card reader is installed with a factor...

Page 62: ...plate if applicable Install the Card Reader s NOTE If there is a factory installed Mag Card Reader in one of the pocket slots disconnect the 10 Pin cable connector from the J13 connector of the PV200...

Page 63: ...et 2 50 3199 A LED Ring 2 50 3199 B LED Clip 2 50 0005 NUT KEPS 6 32 8 20 1642 Card Reader Cable Assembly 2 20 1698 PV0385 I F Board Connection Cable 1 20 0417 PV200 Dual Mag Reader PCB 1 54 1051 TC M...

Page 64: ...5 if it is necessary to assemble the parts in the field again 4 Hold the LED Ring 50 3199 A against the bracket 51 0448 hole as shown 5 Squeeze the large end of the LED Clip 50 3199 B and push it thr...

Page 65: ...Put the four 4 nuts 50 0005 on the screws and turn them clockwise with a 5 16 socket or nut driver until they are tight 9 Plug the 7 Pin connector of the wire harness 20 1642 into the connector on the...

Page 66: ...20 1642 cable was connected to the reader in step 9 above Connect the 10 Pin connector end of the 20 1642 Cable Assembly to the J3 connector of the Dual Mag Reader PCB as shown above l Left Reader Th...

Page 67: ...ure Push the Terminal rocker switch on the Power Supply to the O Off position IMPORTANT When you order a Proximity Reader the correct Format code must be attached to the Part Number For example 20 444...

Page 68: ...talled 2 Remove the bracket 3 Pull out the blank out plate and gasket Install the Proximity Reader 20 4443 PROX XXX Components Part Number Description Qty 20 4450 Prox Reader Assembly 1 20 1701 Cable...

Page 69: ...the Gasket through the open pocket slot until they are flush with the front panel of the pocket 5 Hold the Assembly and Gasket in place and put the two 2 Mounting Brackets 51 0449 over the top and bot...

Page 70: ...Proximity Reader Cable Connection 7 Connect the 9 pin connector of the Prox Reader Cable 20 1701 into the J18 connector labeled PROX READER on the Main Board as shown Doc No M1010 Rev 10 Page 70 of 98...

Page 71: ...ation FMS Part Number 20 4465 WARNING To prevent an electrical shock hazard de energize the Terminal before you do this procedure Push the Terminal rocker switch on the Power Supply to the O Off posit...

Page 72: ...e VIS assembly and attach them to the standoffs 5 Connect the 20 1732 AVI Petro Net Cable to one of the three Molex connectors J6 J7 J8 of the Petro Net Power Hub Board 20 0414 6 Connect the Yellow Vi...

Page 73: ...tery with Panasonic or Matsushita Electric Part Number CR 2450 or equivalent ONLY There can be a risk of fire or explosion if an incorrect battery is used To avoid possible explosion or fire do not re...

Page 74: ...Field Service Kit with wrist strap dissipative mat and grounding cord when possible Do not touch the circuitry if you are not grounded correctly To remove the battery pull the locking clip to the left...

Page 75: ...must have a 20 1722 Revision 5 or above cable installed before you can install the DX Fleet option The Revision 5 cable can be identified by the Red and Black wires attached to the 4 pin connector tha...

Page 76: ...ss from the FSC board connections 3 Connector on the FSC Power Supply with the Black White wires 4 Connector attached to the spade terminal with the Green wire 5 2 pin Molex connector from the Interna...

Page 77: ...alled go to step 7 below 20 1722 Connections 1 3 Pos Terminal Block Black White Green AC Out of the Power Supply 2 FSC3000 Power 3 Pin connector Black White and 18 24 GA Terminal as shown on the FSC30...

Page 78: ...et Connections 10 External Ethernet connection from an office router Ethernet port to the 5 Port Router Ethernet In port marked From Server 11 6 RJ45 Patch Cable FMS P N 12 3031 from an open port of t...

Page 79: ...Cellular Option AT T FMS Part Number 20 7500 PV200 V PV200 Cellular Option Verizon WARNING De energize the terminal before you do the procedures below to prevent the possibility of electrical shock f...

Page 80: ...1618 Wireless Cellular Modem 20 1617 for AT T or 20 1618 for Verizon 1 75 2064 Cellular 4G Dome Mount Antenna 1 51 0479 Universal Mounting Plate PCM 1 50 0234 SCRW 8 32 x 1 2 PHIL PANHD 2 50 0008 8 32...

Page 81: ...Phoenix or PuTTY to configure your system you must use the IP Address of your Cellular Modem to connect You must also use Port 8001 The Modem IP address can be found on the sticker that is attached to...

Page 82: ...bent d Put the bulkhead connector and cable of the antenna assembly through the hole NOTE If the connector does not go through the hole easily use a file to increase the dimension of the hole suffici...

Page 83: ...FSC3000 Internal Connections Inbound Outbound with Cellular Modem and IP Gateway Doc No M1010 Rev 10 Page 83 of 98...

Page 84: ...PetroNet Power Hub Board J6 J7 J8 Outbound Connection FSC3000 and IP Gateway Optional NOTE One 1 20 6000 IP Gateway can be installed internally to the PV200 In this scenario the IP Gateway Ethernet co...

Page 85: ...FSC3000 Internal Connections Inbound Outbound with IP Gateway Only Doc No M1010 Rev 10 Page 85 of 98...

Page 86: ...he IP Gateway l Connect the RJ45 end of the cable to the FSC3000 RS232 Port 5 INFORMATION The illustration above shows the ports as they are seen from the top of the FSC3000 Port 5 is the one on the r...

Page 87: ...u do this procedure Push the Terminal rocker switch on the Power Supply to the O Off position This Field Installation Kit includes Part Number Description Qty 50 3293 PV200 Drip Shield 1 50 0518 Stand...

Page 88: ...ffs in the holes where the screws were removed in Step 1 Tighten the Standoffs so they are finger tight 3 Hold the Drip Shield in place so that the holes align with the Standoffs 4 Install the two 2 T...

Page 89: ...d the latest revision if necessary The 20 4468 kit contains four 4 pieces of rubber weatherstripping replacements To install the new weatherstripping WARNING To prevent an electrical shock hazard de e...

Page 90: ...e rubber gasket material that is currently on the door assembly Make sure to remove all remaining adhesive 6 The Gasket Upgrade Kit contains 4 lengths of new rubber gasket to be installed l one 1 piec...

Page 91: ...as shown Carefully push down all the way along the gasket against the edge of the door frame to install the 17 inch piece Make sure you do not stretch the gasket IMPORTANT This 17 inch piece will have...

Page 92: ...gap between the bottom of the gasket and the bottom of the frame DO NOT TRY TO STRETCH THIS GASKET TO THE BOTTOM Completed Gasket Assembly 11 Install the Door Assembly back on the enclosure 12 Attach...

Page 93: ...ow cold etc can have an unwanted affect on the operation of the unit s components Install a Blank out Plate as a cover for the open pocket slot Remove the Reader Before you install the Blank out Plate...

Page 94: ...gasket 50 2254 and the pocket slot from the outside as shown Hold the Plate and Bracket in position 2 Put the two 2 Inside Mounting Brackets 51 0449 over the posts 3 Put the four 4 Nuts 50 0005 on th...

Page 95: ...ure knockout procedure 6 1792 9 21 2020 Add pedestal install details hyper link to PCM manual add Complete Install section 7 1855 2 2 2021 Add DX Fleet option AVI option update update Reader Menu imag...

Page 96: ...Web links updated 2 13 2019 to new www opwglobal opw fms site Doc No M1010 Rev 10 Page 96 of 98...

Page 97: ...ny particular purpose and of all other obligations or liabilities on OPW Fuel Management Systems part Further OPW Fuel Management Systems neither assumes nor authorizes any other person to assume for...

Page 98: ......

Reviews: